EasyManua.ls Logo

Center 390 - User Manual

Center 390
20 pages
Print Icon
To Next Page IconTo Next Page
Loading...
390
Data Logger
SOUND LEVEL METER
SE-390
Question and Answer IconNeed help?

Do you have a question about the Center 390 and is the answer not in the manual?

Summary

Safety Information

Environment Conditions

Details ambient conditions like altitude, humidity, and operating temperature for safe use.

Maintenance and Cleaning

Provides guidelines for repairs, servicing by qualified personnel, and case cleaning.

Safety Symbols

Explains safety symbols, including the CE mark for EMC compliance.

General Description

Features

Specifications

Name and Functions

Power Button

Controls unit power on/off and manages auto power-off features.

Recall Button

Recalls data stored in the manual memory of the device.

Record Button

Initiates and stops data recording sessions, indicated by a REC symbol.

Memory Button

Stores measurement data manually into the device's memory.

Navigation Buttons (Up;Down)

Details the use of ▲/▼ buttons for increasing or decreasing numerical values.

Clock Button

Covers toggling Date/Time display and setting the internal clock.

Interval Button

Explains how the INTV button adjusts the auto-store interval time.

Max;Min Button

Describes entering MAX/MIN mode to store highest and lowest values.

Backlight Button

Explains turning the LCD backlight on/off for visibility.

A;C Button

Details selecting between A or C frequency weighting.

Fast;Slow Button

Explains setting the time weighting response to Fast or Slow.

Microphone

Specifies the type of microphone used in the sound level meter.

Calibration Potentiometer

Details the CAL potentiometer for level calibration adjustment.

Computer Connection

Describes the PC jack output and serial interface for computer connection.

AC;DC Signal Output Jack

Explains connecting to level recorders for AC or DC signal output.

External Power Input

Details the DC 9V power supply jack for external AC adapter connection.

Tripod Mounting Thread

Provides a thread for mounting the unit on a tripod for stability.

Battery Compartment

Location for inserting and securing the unit's batteries.

Power Button Operation

Data Logger & Interval Setup

Auto Store Interval Setup

Guides on setting the recording interval for auto-store functionality.

Clearing Stored Data (Auto Store)

Procedure to clear data stored via the auto-store function.

Manual Store

Process for storing measurement data manually, up to 99 sets.

Reading Stored Data (Manual Store)

Steps to recall data previously stored using manual store.

Clearing Stored Data (Manual Store)

Procedure to clear data stored via the manual store function.

Setting the Data and Time

Calibration Procedures

Measurement Preparation

Battery Loading

Instructions for inserting AA batteries, including polarity and cover replacement.

Battery Capacity Indicator

Explains how to check the battery level using the on-screen indicator.

AC Adapter Connection

Details on connecting the AC adapter for powering the unit.

Operating Precautions

Measurement

Setup TestLink SE-390 Software

Software Package Contents

Lists the items included in the SE-390 software package.

System Requirements

Specifies the minimum hardware and operating system requirements.

Installation Procedure

Step-by-step guide for installing the SE-390 software on a PC.

Main Menu Functions

Overview of functions available in the SE-390 software's main menu.

Using the Software Interface

Tool Bar Options

Explains the functions of buttons in the software's toolbar for graph manipulation.

Cursor Functionality

Details how to use cursors (A and B) for analyzing graph data.

Zooming Graph Data

Instructions on how to zoom in on specific areas of the graph.

DataLogger Functionality

Loading Recorded Data

Procedure to load recorded data from the meter to the PC via software.

Viewing Data Sets

Description of how loaded data sets are displayed with details.

Software Quick Start Guide

Recording Real-Time Data

Steps for recording real-time data in waveform using the software.

Saving Real-Time Data to File

Guide on saving recorded real-time data in various file formats.

Loading and Saving Meter Data

Loading Meter Data to PC

Procedure to load recorded data from the meter memory and save it to a file.

Frequently Asked Questions

Troubleshooting No Connection

Solutions for resolving the 'NO CONNECTION' error when connecting to PC.

Saving Graph to Excel File

Instructions on saving graph data in a format compatible with EXCEL.

Uninstalling SE390 Software

Steps to remove the SE-390 software from the computer.

Data Loading Failures

Possible reasons and solutions for data loading failures.

Zooming Graph Function

Explanation of how to zoom in on the graph using mouse controls.

Data Loss with Fast Sampling

Reasons for potential data loss when using fast sampling rates.

Overview

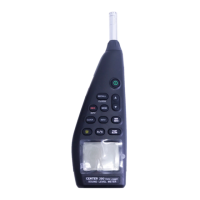
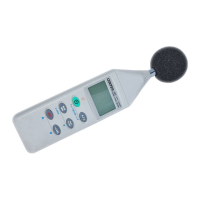
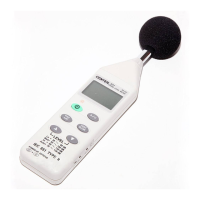
The CENTER 390 is a Data Logger Sound Level Meter designed for accurate sound level measurements and data logging. It complies with IEC 61672-1 Class 2 and ANSI S1.4 Type2 standards, making it suitable for a variety of professional applications.

Function Description:

The device measures sound pressure levels and can log data for later analysis. It features both digital and analog displays, including a 50-segment bargraph for quick visual reference. The meter can store up to 31,000 records in its data logger and 99 manual readings. It offers both auto and manual data storage options. The unit can be connected to a PC via an RS-232/USB interface for real-time data display, logging, and further processing using dedicated Windows software (TestLink SE-390). It also provides AC/DC signal outputs for connection to a level recorder.

Important Technical Specifications:

  • Frequency Range: 20Hz ~ 8KHz
  • Measuring Level Range: 30 ~ 130dB
  • Frequency Weighting: A / C
  • Microphone: 1/2 inch electret condenser microphone
  • Digital Display: 4 digits, 0.1dB resolution, 0.5 sec update
  • Analog Display: 50 segment bargraph, 2dB resolution, 50 mS update
  • Time Weighting: FAST (125mS), SLOW (1 sec.)
  • Accuracy: ±1.4dB (under reference conditions @ 94dB, 1KHz)
  • Dynamic Range: 100 dB
  • Alarm Function: "OVER" (input > upper limit) and "UNDER" (input < lower limit) indicators
  • Data Logging Capacity: 31,000 records
  • Manual Reading Memory: 99 points
  • MAX/MIN Hold: Holds maximum and minimum values
  • AC Output: 1 Vrms at FS (full scale)
  • DC Output: 10mV / dB
  • Power Supply: Four IEC LR6P (AA-size) batteries (approx. 30hrs life with alkaline batteries) or 9 VDC AC adapter (8-10VDC Max)
  • Power Consumption: Approx. 0.3W
  • Operating Temperature: 0 to 40°C (32 to 104°F)
  • Operating Humidity: 10 to 90%RH
  • Storage Temperature: -10 to 60°C (14 to 140°F)
  • Storage Humidity: 10 to 75%RH
  • Dimensions: 272(L)×83(W)×42(H)mm; 10.7(L)×3.3(W)×1.6(H)inch
  • Weight: 390g (including battery)
  • PC Interface: 9600 bps N 8 1 serial interface (RS-232/USB cable included)

Usage Features:

  • Display Screen: The LCD shows battery capacity, auto power off indicator, MAX/MIN indicator, time weighting, level range, bar graph, manual store indicator, time, memory address, recall indicator, frequency weighting, level reading, date, over-range, memory full, recording datalogger, and under-range indicators.
  • Power Button: Turns the unit on/off. Holding it down until "P-OFF" is shown turns it off.
  • Auto Power Off: Enabled by default, the unit powers off after 30 minutes of inactivity to save battery life. It is disabled when connected to a PC or during recording.
  • Disabled Auto Power Off: Can be activated by holding the MEM button while powering on, indicated by the auto power off symbol disappearing.
  • RECALL Button: Recalls data from manual store.
  • REC Button: Starts/stops data recording. The "REC" symbol appears during recording.
  • MEM Button: Stores measurement data manually (up to 99 points).
  • ▲/▼ Buttons: Used to increase or decrease numbers during settings.
  • CLOCK Button: Toggles Date and Time display ON/OFF. Holding it for 2 seconds enters Date and Time setting mode (Year→Month→Day→Hour→Minute→Second).
  • INTV Button: Adjusts the auto store interval time (from 1 second to 1 minute).
  • MAX/MIN Button: Enters maximum and minimum recording mode. Pressing it cycles through MAX, MIN, and blinking MAX/MIN (current value displayed). Holding it down exits this mode.
  • Backlight Button: Turns LCD backlight ON/OFF. Backlight automatically turns off after 30 seconds.
  • A/C Button: Sets frequency weighting to A or C.
  • FAST/SLOW Button: Sets time weighting to Fast or Slow.
  • Tripod Mounting Thread: Allows mounting on a camera tripod for long-term measurements.
  • Data Logger & Interval Setup: Supports auto store with adjustable intervals and manual store.
  • Clearing Stored Data: Procedures for clearing data from both auto and manual stores are provided, involving specific button presses during power-off.
  • Reading Stored Data: Data from manual store can be recalled and viewed using the RECALL and ▲/▼ buttons.
  • Battery Capacity Indicator: Shows remaining battery power, with "Lo bat" warning when power is low.
  • AC Adapter Connection: The unit can be powered by an AC adapter, which takes priority over batteries when connected.
  • PC Software (TestLink SE-390): Allows real-time data graphing, data logging, and saving data in binary (.ghf), text (.txt), or EXCEL (*.csv) formats. Features include a tool bar for various functions, cursor-based analysis on graphs, and zoom capabilities.

Maintenance Features:

  • Repairs: Servicing should only be performed by qualified personnel.
  • Cleaning: Periodically wipe the case with a dry cloth. Do not use abrasives or solvents.
  • Battery Care: Remove batteries if the unit is not used for an extended period to prevent damage from fluid leakage.
  • Calibration: An internal CAL potentiometer allows for level calibration adjustment. Recommended recalibration cycle is 1 year.
  • Environment: Avoid high temperature and high humidity. Keep the microphone dry and avoid severe vibration.
  • Windscreen: Use a windscreen in windy conditions to prevent extraneous noise.

Center 390 Specifications

General IconGeneral
BrandCenter
Model390
CategoryMeasuring Instruments
LanguageEnglish

Related product manuals