SKU 65902/66742 For technical questions, please call 1-800-444-3353. Page 9
OPERATING INSTRUCTIONS
Read the ENTIRE IMPORTANT
SAFETY INFORMATION
section at the beginning of this
manual including all text under
subheadings therein before set
up or use of this product.
Inspect Soda Blaster before
use, looking for damaged,
loose, and missing parts. If any
problems are found, do not use
Soda Blaster until repaired.
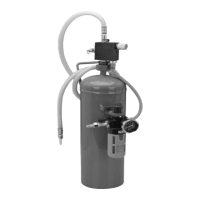
Soda Blaster Set Up
Note: When setting up this
product always use thread
sealer tape at every tting to
assure leak free operation.
TO PREVENT
SERIOUS INJURY
FROM ACCIDENTAL
OPERATION:
Turn off the Soda Blaster,
detach the air supply, safely
discharge any residual air
pressure in the Soda Blaster,
and release the throttle and/or
turn the switch to its off
position before performing
any inspection, maintenance,
or cleaning procedures.
TO PREVENT SERIOUS
INJURY:
Do not adjust or tamper with
any control or component in a
way not specically explained
within this manual. Improper
adjustment can result in
Soda Blaster failure or other
serious hazards.
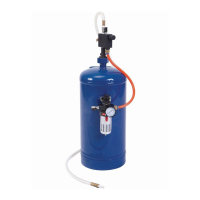
Loading Media Into The Tank:
WARNING! 1. Never service or disas-
semble the Soda Blaster with the air
hose attached. Always release any
built-up air even after disconnecting
the hose.
This portable Soda Blaster is de-2.
signed to be used with Bicarbon-
ate of Soda (Baking Soda) as the
only media. Use of other media
may damage this tool.
Make sure the media used is dry to 3.
avoid clogging the Media Outlet Hose
(19) or Media Regulator Assembly
(15).
For SKU # 65902 pour up to 10 4.
pounds of media into the Storage
Tank (1). For SKU # 66742 pour up
to 15 pounds of media into the Stor-
age Tank (1). You may need to use a
funnel (not included). Be sure to pour
enough into the Tank to do the job at
hand. NOTE: If this is a large job, ll
the Tank only 3/4 full and reload as
needed to nish the job.
IMPORTANT TIP: 5. If the humidity
is 90 to 100%, it is recommended
to reduce the amount of media and
load more frequently. This will reduce
the possibility of clogging the bottom
of the Storage Tank (1), the Media
Outlet Hose (19), or Ceramic Nozzle
(21).
Insert the Pickup Tube (11) into the 6.
Storage Tank (1).
Place the O-Ring (12) onto the top of 7.
the Pickup Tube (11) and position the
Media Regulator Assembly (15) on
top of it.
REV 09d