Page 10 For technical questions, please call 1-800-444-3353. SKU 97586
GENERAL OPERATING
INSTRUCTIONS
This tool DOES NOT
use a SAFETY
MECHANISM.
Extreme caution must be used
whenever this tool is connected to
an air supply. If the tool is
dropped, or if the Head Cap (10)
is accidentally struck, then the tool
will re a nail or staple, potentially
causing SEVERE PERSONAL
INJURY.
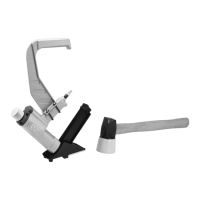
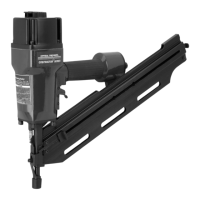
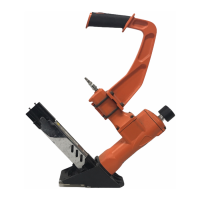
1. Attach the Floor Nailer to the air supply
at the Quick Connector. Start your
compressor and check the pressure,
making sure it is set at the recommended
70-90 PSI. Do not exceed the
maximum 90 PSI.
2. WARNING! Keep your feet clear of the
Floor Nailer.
3. NOTE: Before using on a oor, test the
tool on a scrap piece of wood. Adjust
the driving depth by providing more or
less air pressure. Do not exceed the
maximum air pressure (PSI).
4. Hold the Arm (56) securely and press the
Spacer (32) to the work surface, making
sure the Spacer is over the nail/staple
target position.
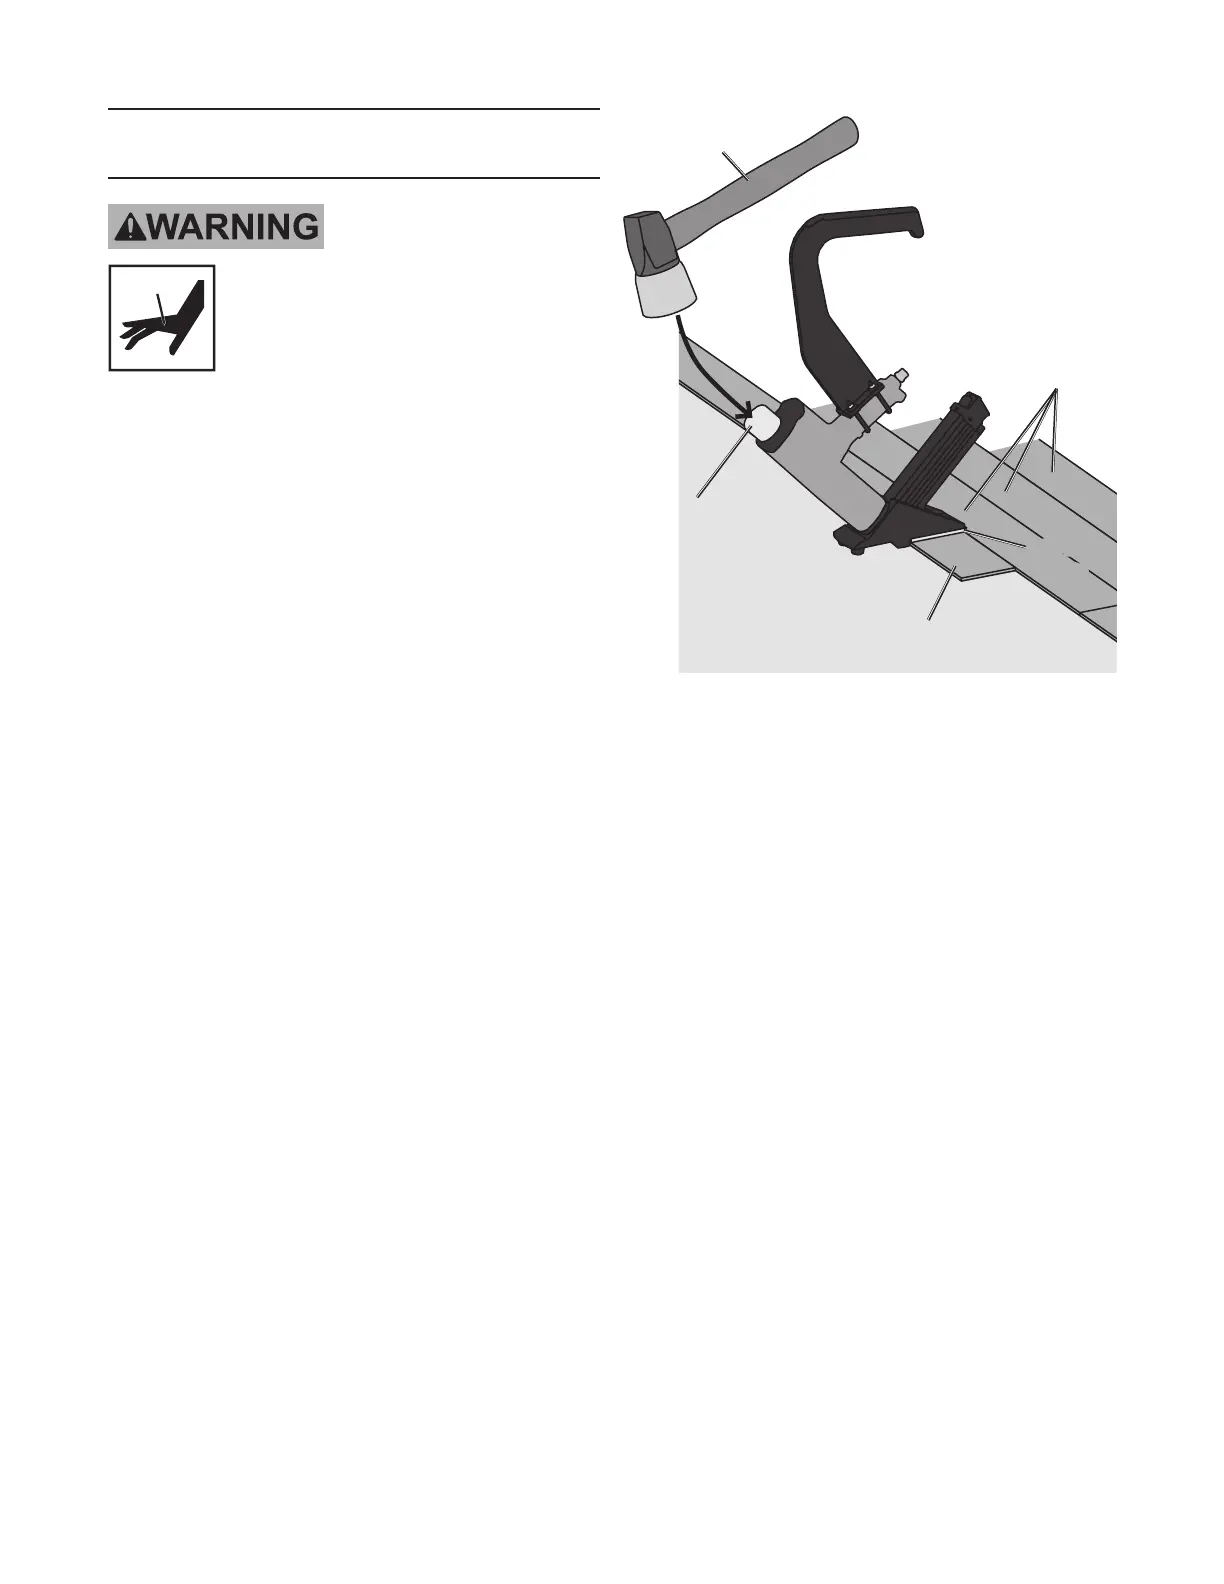
5.
HAMMER
(57)
SPACER
(32)
HEAD
CAP (10)
WOOD
SUBFLOOR
BOARD BEING
INSTALLED
PREVIOUSLY
INSTALLED
BOARDS
Press down hard so that the Spacer (32)
is rmly contacting the work surface.
Then, using the Hammer (57), strike
the Head Cap (10) rmly to drive the
fastener into the work surface. Lift the
Floor Nailer off the work surface. Repeat
this process until the job is completed.
6. When nished, disconnect the Floor
Nailer from the air supply source.
7. WARNING! After disconnecting the
Floor Nailer from the air compressor,
there could still be enough air pressure
to re the Floor Nailer. After the air hose
is disconnected, always re the Floor
Nailer into scrap wood repeatedly to
make sure all of the compressed air is
expended.
8. When nished, make sure to store the
Floor Nailer in a clean, dry, safe location
out of reach of children and other
unauthorized people.