Page 12 For technical questions, please call 1-800-444-3353. SKU 97586
6. Replace the Blade Guide (26), and four
Screws (24).
7. Reload the tool with cleat nails/staples.
Then, reconnect the air supply hose to
the tool.
8. Press the Blade Guide (26) against
a piece of scrap wood, and test re
the Floor Nailer several times while
checking for proper operation. If the
tool is properly ring, you may continue
using the tool. If the tool fails to perform
properly, immediately discontinue use
and have the tool repaired by a qualied
service technician.
9. If you are unable to clear the fastener
jam using the method prescribed above,
the tool should be taken to a qualied
service technician for proper servicing.
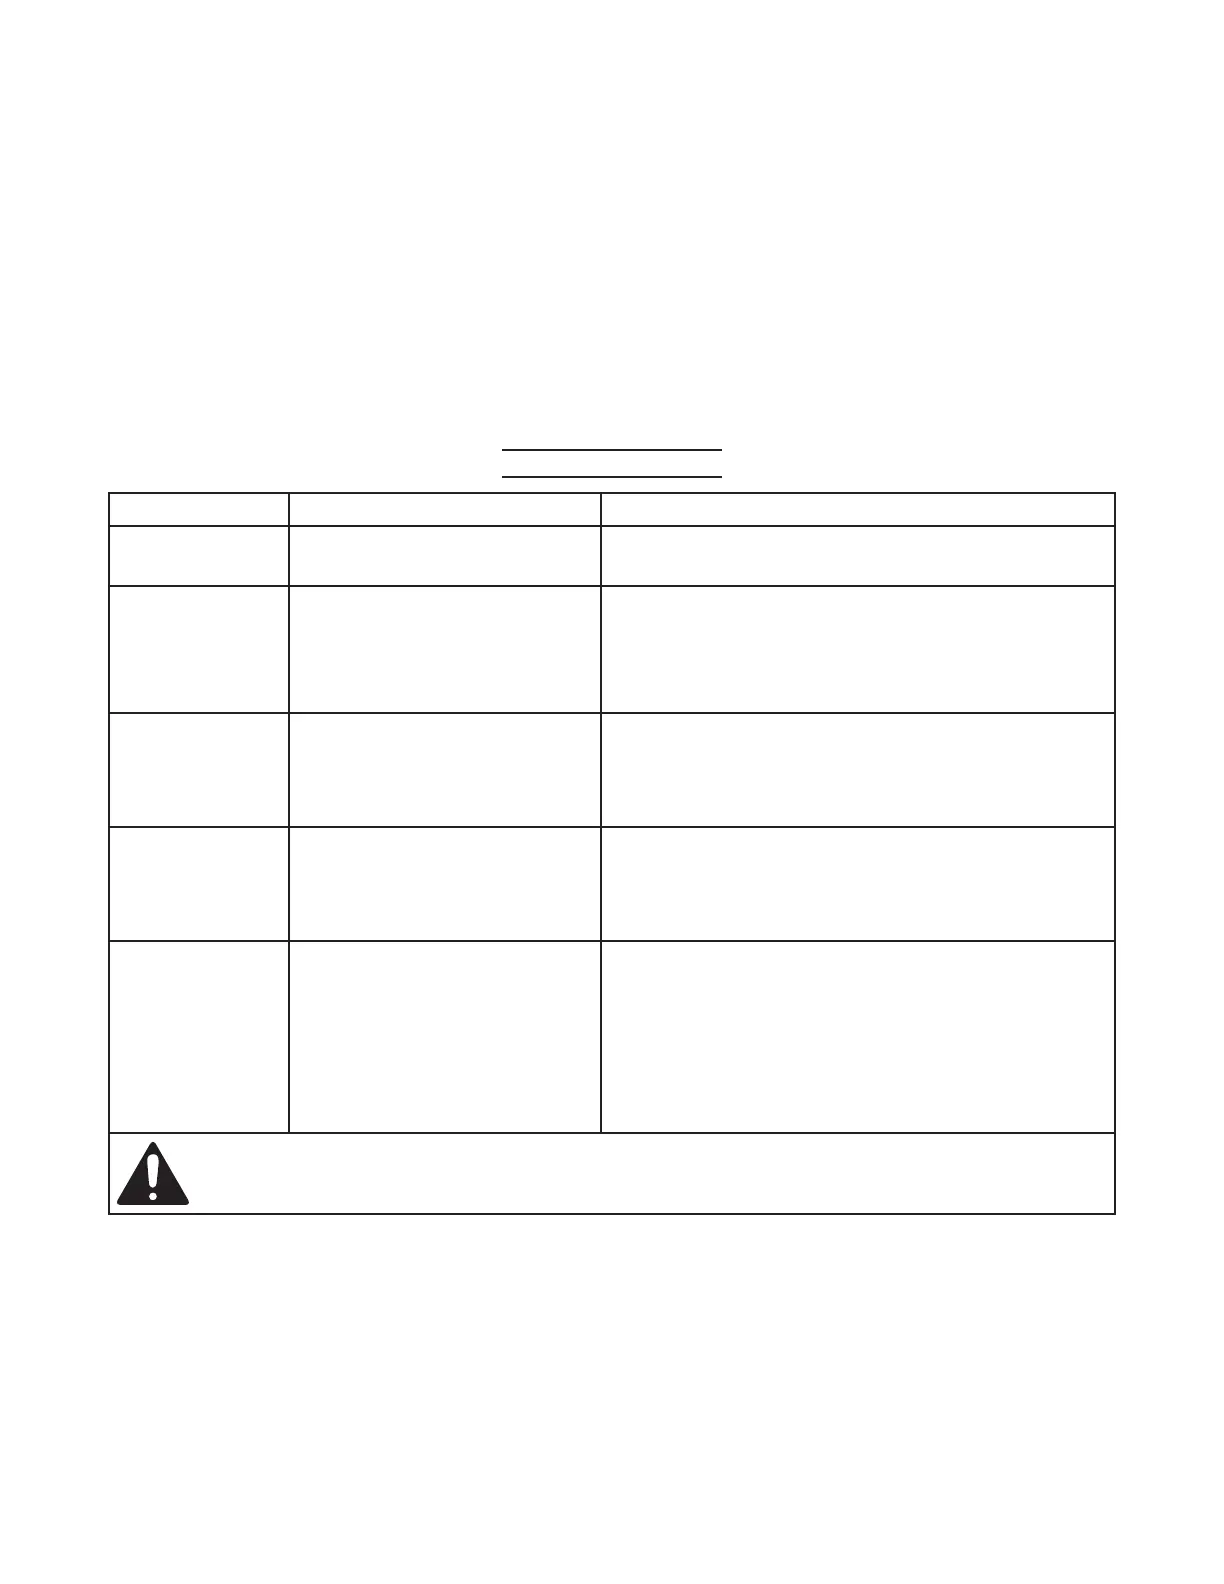
Troubleshooting
Problem Possible Causes Likely Solutions
Air leaking in
Cylinder Cap.
1. Loose nose Screw (13).
2. Seal (17) is cracked or worn.
1. Tighten and recheck.
2. Replace Seal.
Lack of power.
Slow to cycle.
Low power when
shooting and
returning.
1. Tool is too dry.
2. Air pressure too low.
3. Exhaust blocked.
1. Add about 3 drops of pneumatic tool oil into the Air
Plug (55).
2. Set air supply between 70 PSI and 90 PSI.
3. Clean exhaust channel.
Shooting no
fasteners, or
intermittent
feeding.
1. Damaged Pusher Spring (39).
2. Wrong size of fasteners.
3. Fixed Magazine (35) or Bafe
Plate (23) is dirty.
1. Replace Spring.
2. Use proper fasteners.
3. Clean Fixed Magazine and Babble Plate.
Fastener is
jammed in tool.
1. Driver channel is worn.
2. Piston Assy. (9) broken/worn.
3. Bent fasteners.
1. Replace Bafe Plate (23).
2. Replace Piston Assy.
3. Remove Bent fasteners. Replace with Cleat Nails
1-1/2 to 2” long or Staples 1” to 2” long.
Severe air
leakage.
(Slight air leakage
is normal,
especially on
older tools.)
1. Cross-threaded housing
components.
2. Loose housing.
3. Damaged valve or housing.
4. Dirty, worn or damaged valve.
1. Check for incorrect alignment and uneven gaps. If
cross-threaded, disassemble and replace damaged
parts before use.
2. Tighten housing assembly. If housing cannot tighten
properly, internal parts may be misaligned.
3. Replace damaged components.
4. Clean or replace valve assembly.
Follow all safety precautions whenever diagnosing or servicing the tool.
Disconnect air supply before service.