Page 9For technical questions, please call 1-800-444-3353.SKU 97586
Loading
TO PREVENT
SERIOUS INJURY
FROM ACCIDENTAL OPERATION,
BEFORE LOADING:
• Wear ANSI-approved safety
goggles with side shields. Other
people in the work area must also
wear ANSI-approved impact safety
goggles with side shields.
• Release the trigger.
• Detach the air supply.
• Attempt to re the Tool into a
piece of scrap wood to ensure
that it is disconnected and is
incapable of ring any fasteners.
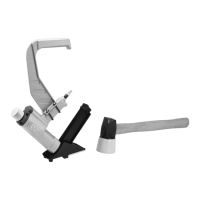
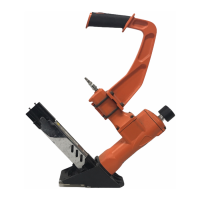
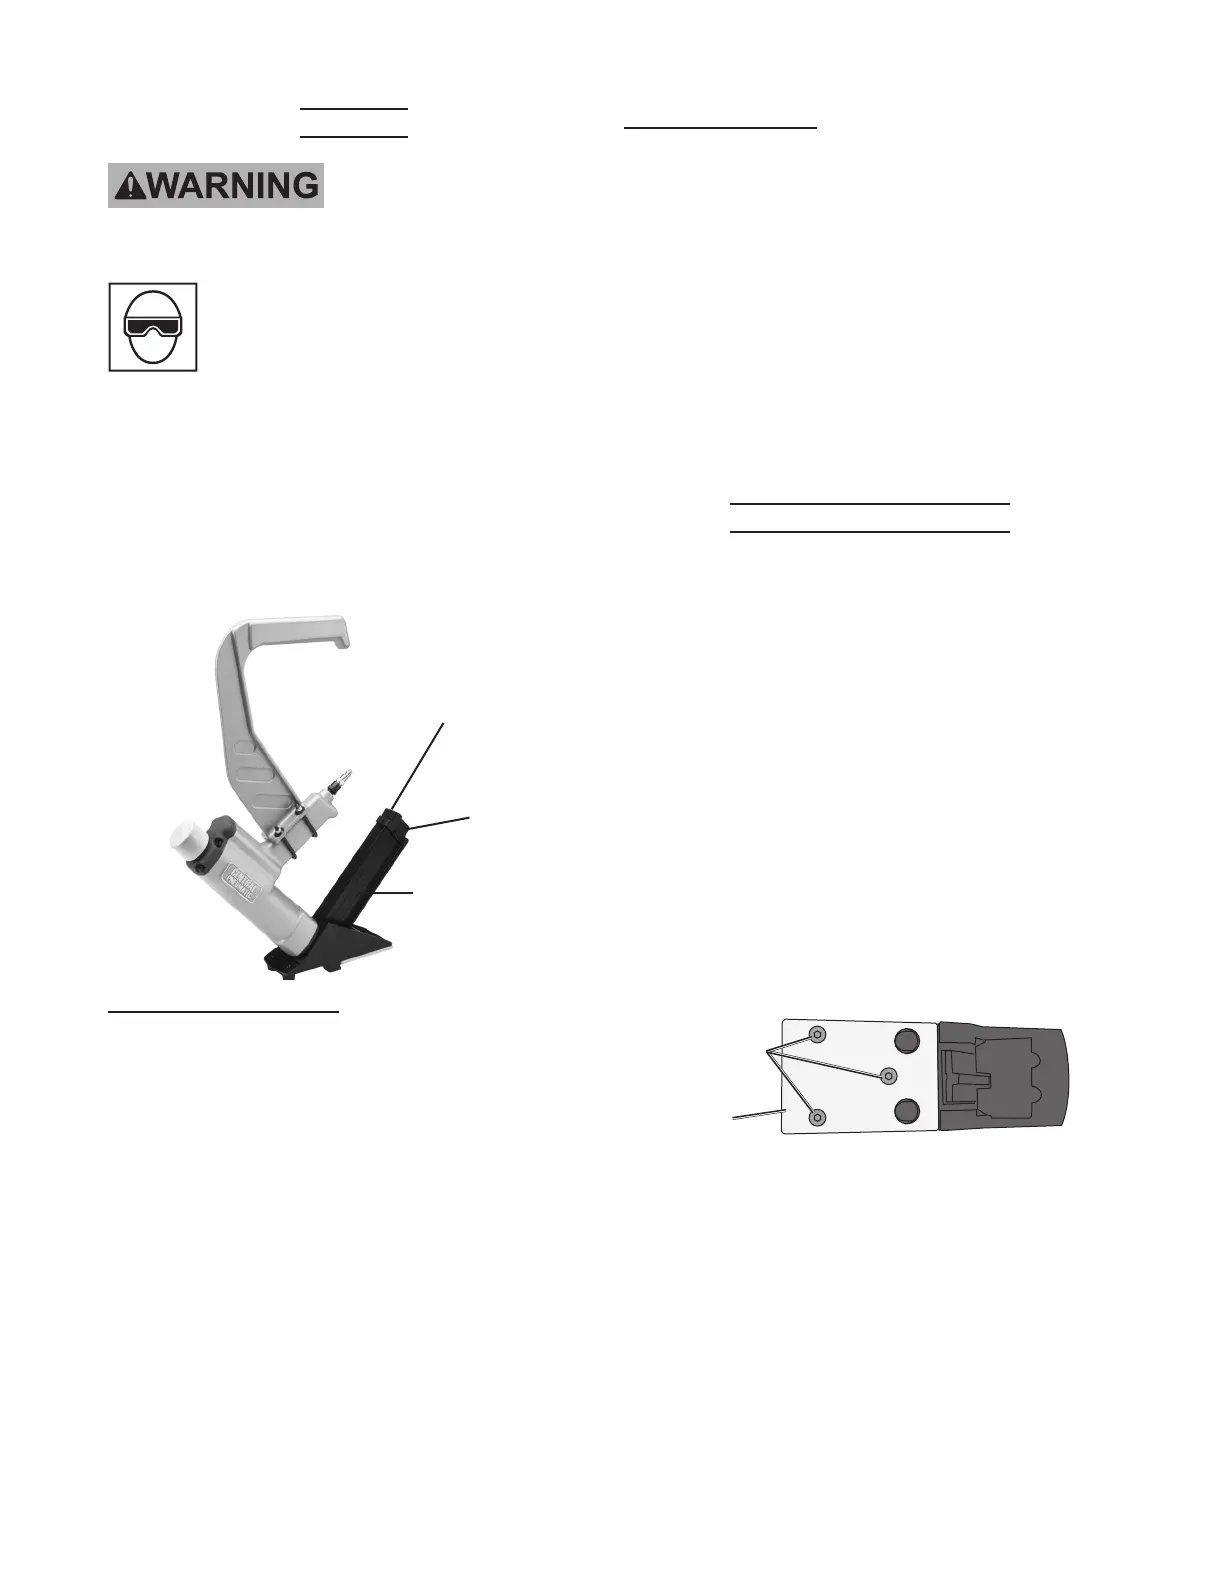
MOVABLE
MAGAZINE (50)
FIXED
MAGAZINE (35)
LATCH (44)
Loading Cleat Nails:
1. Press the Latch (44) and pull the
Movable Magazine (50) back.
2. Place a full clip of the desired size cleat
nails (1-1/2” to 2” long) in the Fixed
Magazine (35) from the side. The head
of the cleat nails should be inserted into
the notch on the Fixed Magazine (35).
Up to 100 cleat nails may be loaded in
the Fixed Magazine.
3. Push the Movable Magazine (50) forward
and secure the Movable Magazine in
place with the Latch (44).
Loading Staples:
1. Press the Latch (44) and pull the
Movable Magazine (50) back.
2. Place a full clip of the desired size
staples (1” to 2” long) in the Fixed
Magazine (35) from the top. Up to
80 staples may be loaded in the Fixed
Magazine.
3. Push the Movable Magazine (50) forward
and secure the Movable Magazine in
place with the Latch (44).
Changing the Spacer
The Nailer is equipped with a factory pre-
installed Spacer for 3/4” Boards (32) and an
additional uninstalled Spacer for 1/2” Boards
(58). To change the Spacer:
1. Disconnect the Nailer from its air supply.
2. Empty the Moveable Magazine (50)
completely.
3. Attempt to re the Nailer into a piece
of scrap wood to ensure that it is
disconnected and is incapable of ring
any fasteners.
4. Set the tool on its side to expose the
three Screws (33).
5.
SCREW (33)
SPACER
(32/58)
Remove the three Screws (33). Then,
remove the current Spacer (32/58).
6. Align the three mounting holes in the
desired Spacer (32/58) with the three
threaded mounting holes.
7. Secure the Spacer (32/58) to the tool,
using the three Screws (33).