OPERATOR INSTALLATION SECTION 6
6.5. The wireless wall switch
The wireless wall switch provided with the SDO4 kit (T12 Model only) provides ease of
installation, obviating the need for running hard wires to the switch. It can be mounted
inaconvenientlocationsuchasadjacenttoasideentrydoorintothegarage.The
four buttons provided on the wall switch are for independently operating from one wall
switch, the two openers of a double garage door installation. The buttons can be used for
activating the various functions provided by the system.
Each individual button of the wall switch has been marked with a number, from one to
four, to help the user identify which function each button operates. The buttons can be
learnedinanyconguration.
The wireless wall switch must be mounted within sight of the garage door and
a reasonable distance away from moving parts. It should be mounted at least
1500mm above the ground and the entrapment warning label provided, must be
attachedadjacenttotheswitch.
The grub screws will slightly dent the rail when tightened correctly.
If grub screws are not securely tightened, the end-stops will fail during
setup.
6.4.2. Positioning the opening end-stop
• Ensure that the motor is disengaged
• Open the garage door fully
• Locate the opening end-stop within the drive rail - nearest to the back wall of the
garage
• Position the end-stop 10mm away from the carriage, then tighten the two lock screws
• Re-engage the motor
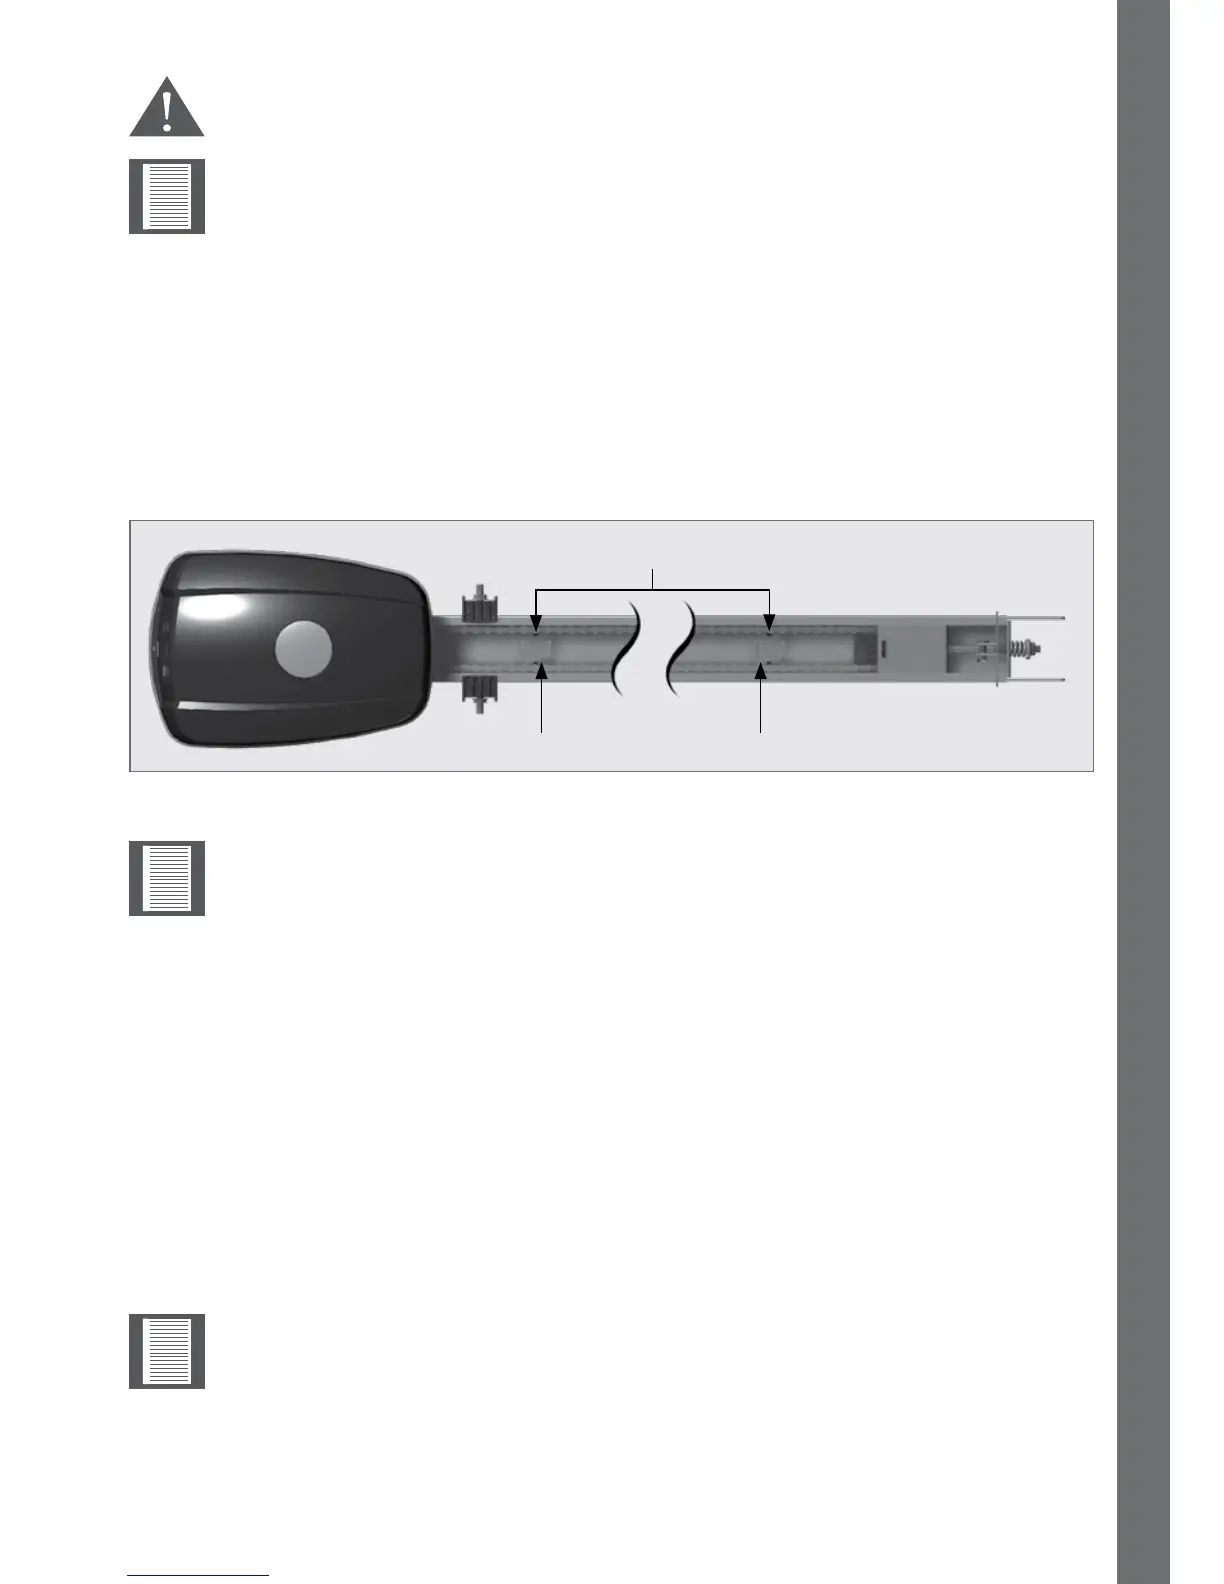
FIGURE 77
End stop grub screws
Opening End Stop Closing End Stop
The closing and opening end-stops work on a one-to-one ratio with the garage
door, meaning that, if the limit prong is moved by 10mm, then the garage door
will also move by 10mm.