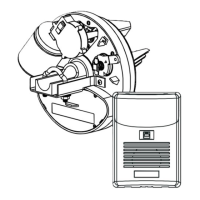
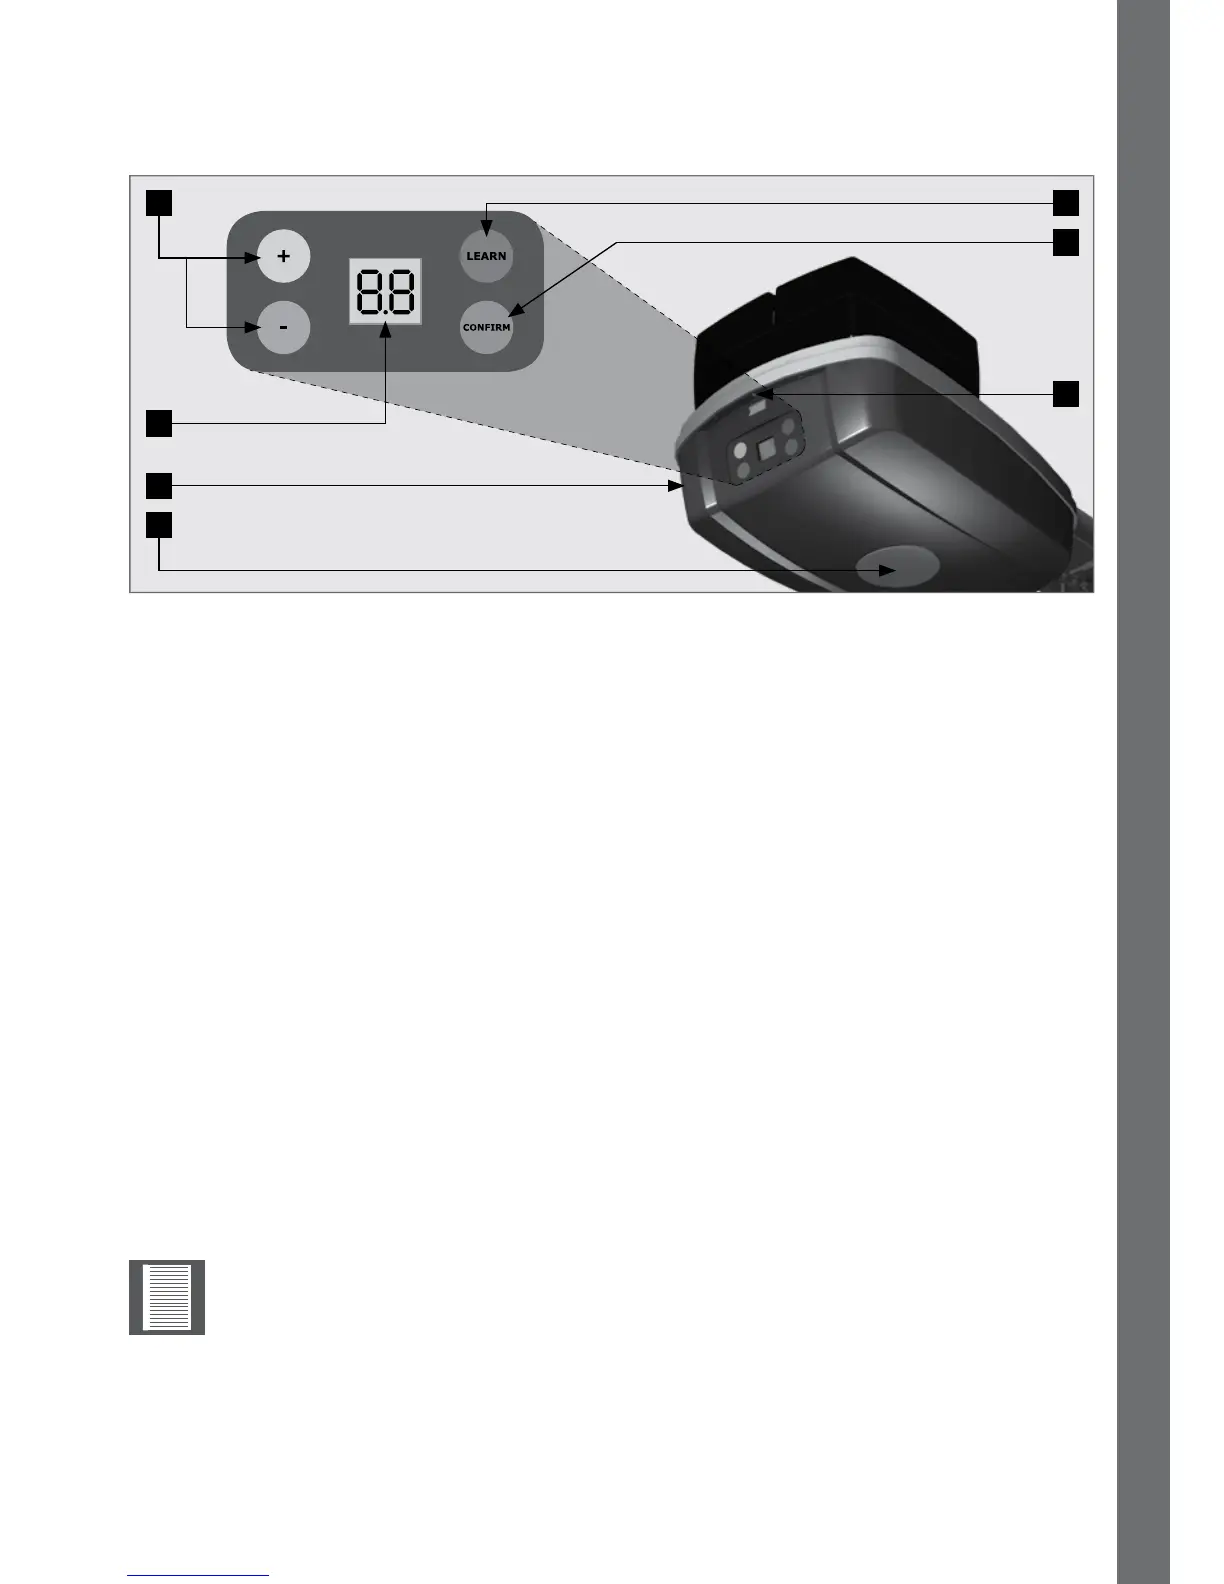
8.1. Control box
8.2. Selecting the door type
FIGURE 85
1. Yellow‘+’button,andBlue‘-’button.
• In Standby:Decreaseorincreaseforceosetvalues
• Pressing ‘+’ and ‘-’ together: Enters Function Setup menu
• In Function Setup menu: Scroll functions and values
• In Transmitter Setup menu: Scroll functions
2. Learn Button.
• Short Press: Enters Transmitter Setup menu
• Long Press (5 sec):
Forced relearn - Door can be in any position other than closed
Fine Tune - Door must be in the closed position
3. ConrmButton.
• In Standby:Actsasa‘Run’button(Openandclosethegaragedoor)
• In Setup menus:Conrmchosenfunctionorvalue
4. Screw that keeps the power head cover in position. Remove the screw to hinge /
remove the power head cover to gain access to terminals.
5. Courtesy LED light.
• Actsasa‘Run’button(Openandclosethegaragedoor)
6. Control box of the SDO4
7. Display Screen
1. Connect the mains and power up the unit.
2. “LL”&“SE”willashalternatelyonthescreen.
3. Usethe“+”&“-“buttonstonavigatebetweenthefollowingoptions:
1
7
6
2
3
4
5
8. Commissioning the system
Bydefault,theoperatorissetto“SE”;ifthismatchesthedoortypebeing
automated,theusermayskipto“Settingthelimits”bypressingthe“Light
Button”.
COMMISSIONING THE SYSTEM SECTION 8
 Loading...