45
[x][x][x][x] for 4-digit codes (or [x][x][x][x][x][x] for 6-digit codes),
where [x][x][x][x] and [x][x][x][x][x][x] are the new 4 or 6 digits for “master code”.
2.1. After entering the first digit of a new sequence for “master code” the zone 2 LED will be blinking. That means the control panel is waiting for second digit for new
value of the “master code”.
2.2. After entering second digit of the “master code” the zone 3 LED will be blinking. That means the control panel is waiting for third digit for new value of the “master
code” and so on, until entering the last digit of the “master code” (the forth for 4-digit codes and the sixth for 6-digit codes).
2.3. After any digit was pressed, “master code” programming may be canceled by [#] key pressing. After cancellation by [#] key pressing, the keypad buzzer will sound 6
confirmation beeps, the system will keep the old value for “master code” and the control panel will go back within “main programming menu”.
Note: Do not enter [*] key while entering the digits of the “master code”! The keypad buzzer will sound a long error beep and will reject [*] key.
3. After entering the last digit of the “master user code” the keypad buzzer will sound 3 confirmation beeps and the panel will pass to the next step:
By [#] key pressing, RIGHTS
1
set of the “master user code” can be maintained as it was previously established.
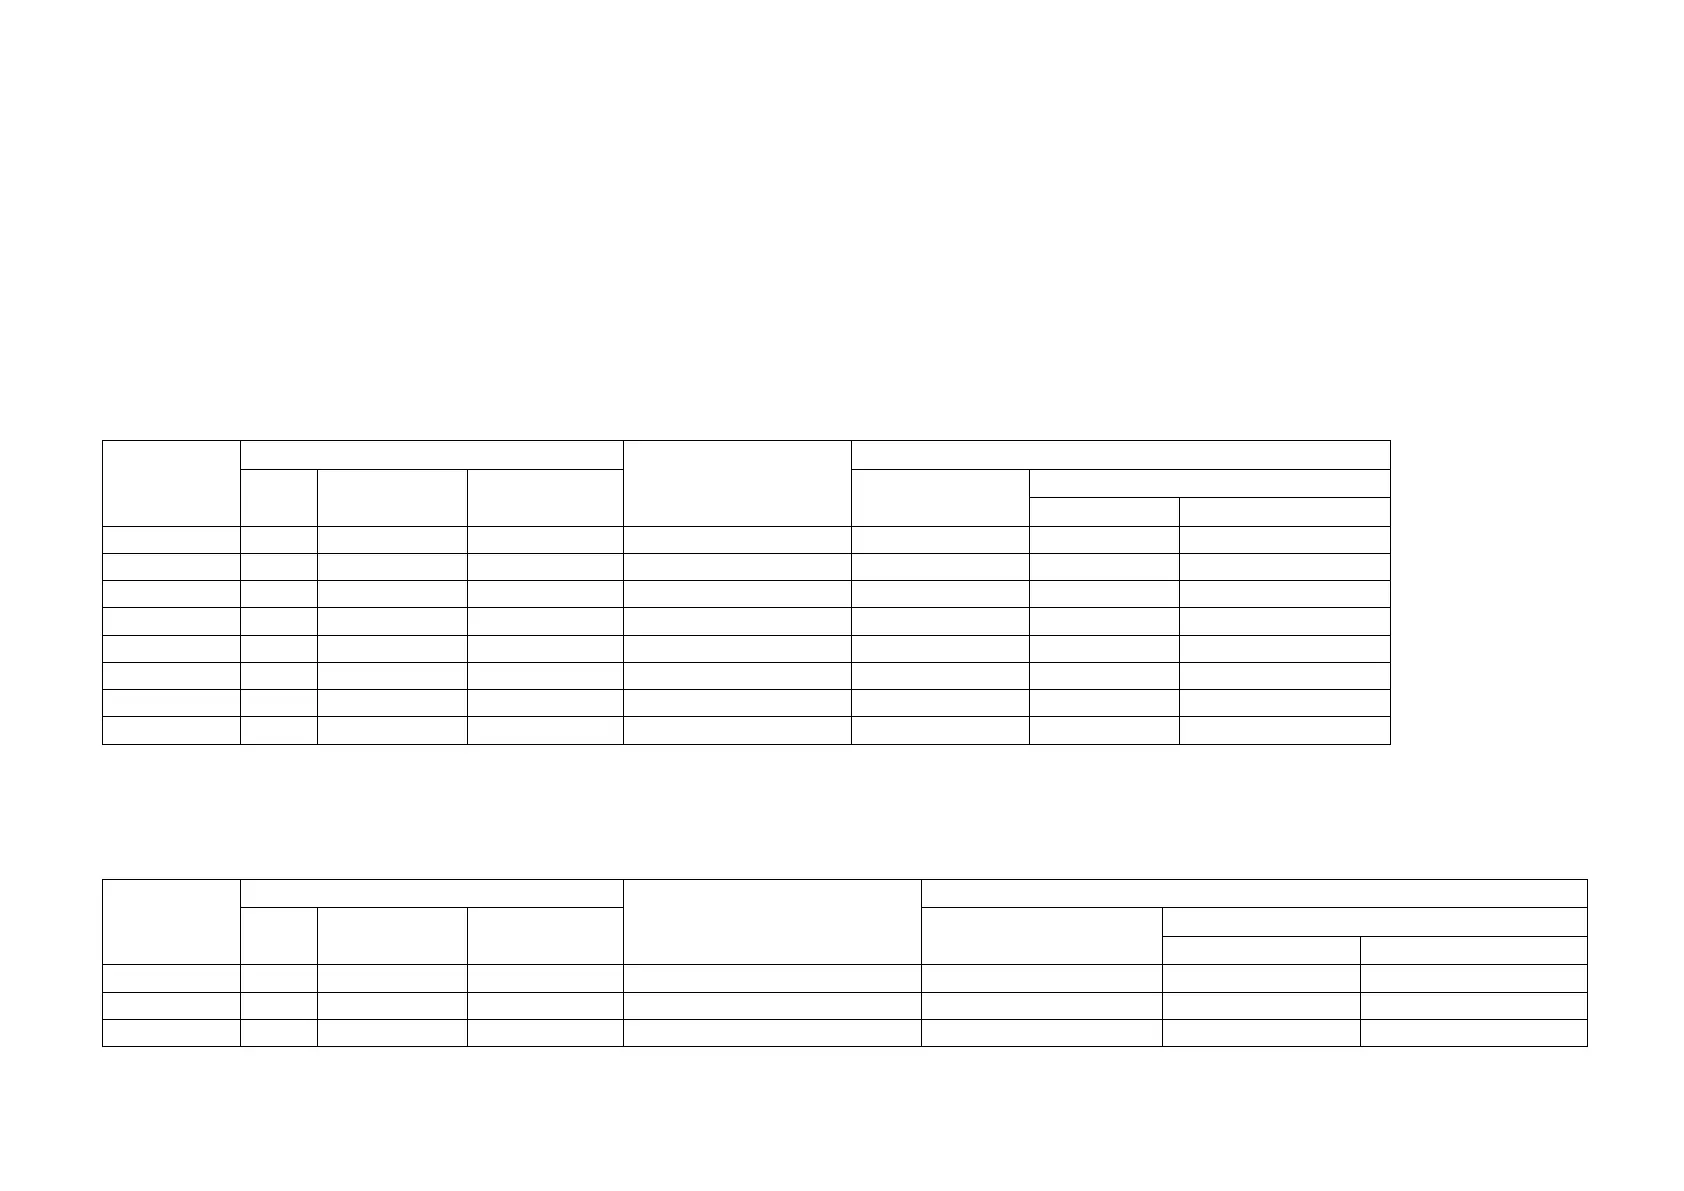
3.1 The rights of the “master code” are displayable on 1 to 8 options; in order to turn the rights activate/deactivate, the installer should press the 1 to 8 keys
and the appropriate right will turn ON/OFF. For LED keypads, if a zone LED is ON, while the user code rights are displayed, means the appropriate right is enabled and if the zone
LED is OFF means the right is disabled.
1
st
set of rights
Key pressed
to toggle
option
KP-126Pz / KP-164Pz (LED keypads)
Description
KP16LCD / KP16LCDL (LCD keypads)
Zone
LED
ON OFF 1
st
line message
2
nd
line message
Enabled Disabled
[1] 1
*enabled disabled Zone bypassing
Bypassing Z Allowed k1 Not allowed k1
[2] 2
*enabled disabled Regular arming
Arming Allowed k2 Not allowed k2
[3] 3
*enabled disabled Stay arming
Stay arming Allowed k3 Not allowed k3
[4] 4
*enabled disabled
Force arming
Force arming Allowed k4 Not allowed k4
[5] 5
*enabled disabled Disarming/siren stopping;
Disarm/SirenStop Allowed k5 Not allowed k5
*enabled disabled Access to partition A
[7] 7
*enabled disabled Access to partition B
Access Part B Allowed k7 Not allowed k7
[8] 8
*enabled disabled Access from phone line
AccessFromPhLine Allowed k8 Not allowed k8
3.2 Finally installer should press [#] key to confirm the RIGHTS
1
set of the “master user code”.
After [#] key pressing the keypad buzzer will sound 3 confirmation beeps and the panel will pass to the next step.
By [#] key pressing, RIGHTS
2
set of the “master user code” can be maintained as it was previously established.
On KP-126Pz / KP-164Pz the user code rights are displayable on 1 to 8 LEDs; in order to turn the rights activate/deactivate, the installer should press the 1 to 8
keys and the appropriate LED will turn ON/OFF. If the a zone LED is ON that means the appropriate right is enabled and if the zone LED is OFF that means the right is disabled.
2
nd
set of rights
Key pressed
to toggle
option
KP-126Pz / KP-164Pz (LED keypads)
Description
KP16LCD / KP16LCDL (LCD keypads)
Zone
LED
ON OFF 1
st
line message
2
nd
line message
Enabled Disabled
[1] 1
*enabled disabled
PGM1 activating/deactivating
En/Dis PGM1 Allowed k1 Not allowed k1
*enabled disabled
PGM2 activating/deactivating
[3] 3
*enabled disabled
PGM3 activating/deactivating
En/Dis PGM3 Allowed k3 Not allowed k3