15. Engine Removal, Inspection & Installation
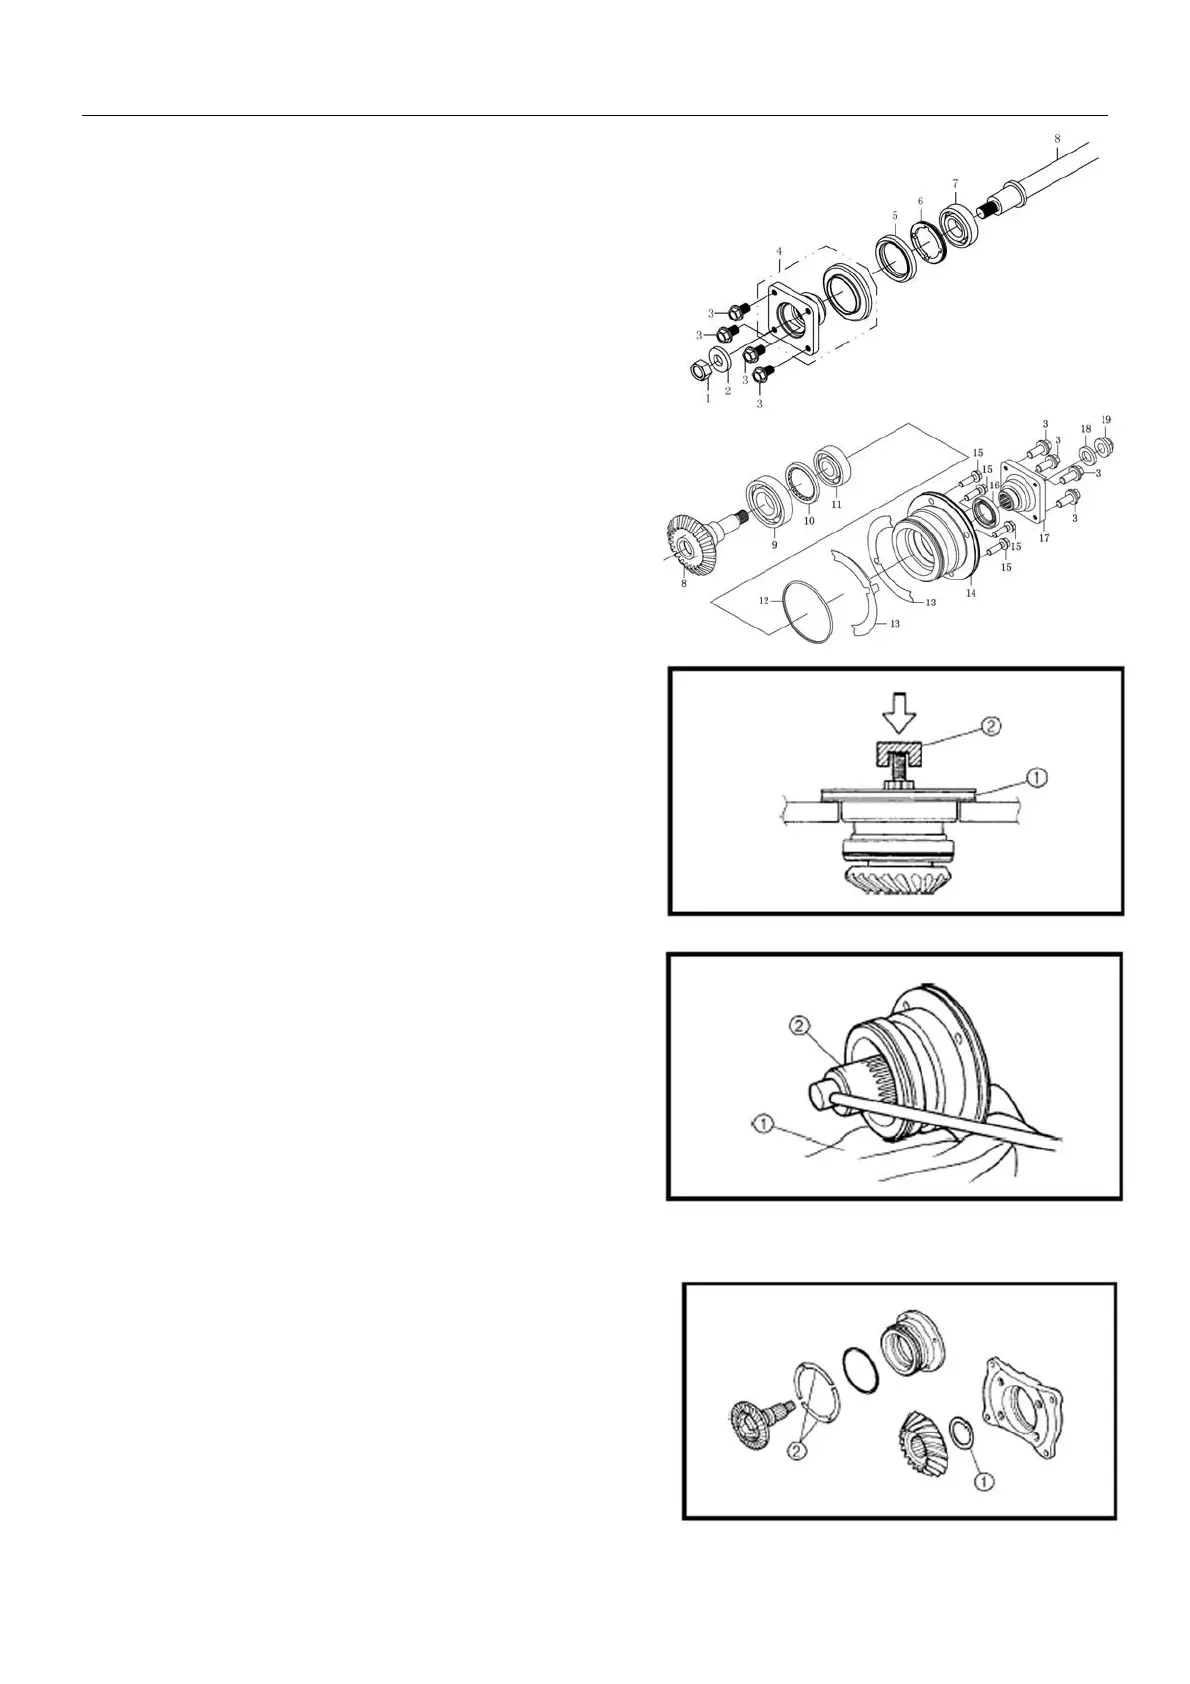
Front Output Shaft
z Check bearing 7 for smooth turning and abnormal
wear. Check oil seal 5 for damage.
Wear or damage: → Replace
z Apply lubrication oil to bearing 7 and oil seal 5 lip
before assembly.
z Apply thread locker to bearing limit nut 6 (left thread)
and tighten to the specified torque.
Bearing limit nut Tightening torque: 80N.m
Tighten Nut 1 to the specified torque
Front output shaft nut tightening torque: 97N.m
Driven Bevel Gear
Remove nut 19, washer 18, coupler 17 and oil seal 16.
z Protect end thread of driven bevel gear with proper
device ②. Fix bevel gear cover 14 and press out
driven bevel gear.
z Place a clean rag ① under bevel gear cover.
Remove bearing limit nut 10 with special tool ② and
remove bearing.
z Check driven bevel gear 8 surface for scratches,
wear. Scratch or wear: → Replace
z Check free turning of bearing 9 and 11. Replace
with a new one if any abnormal is found.
z Use new oil seal 16 and O-ring 12 when
assembling.
z Adjust washer 13 if any of right crankcase, driven
bevel gear 8 or driven bevel gear cover 14 is
replaced. Refer to bevel gear adjustment for
details.
z Apply lubrication oil to bearing 9 and 11 and oil seal
16, O-ring. Apply thread locker to nut 10 and tighten
to the specified torque.
Tightening torque :110N.m
Tool: driven bevel gear nut wrench
Driven bevel gear nut tightening torque:150N.m
Bevel Gear Washer Adjustment
z Adjust washer ① and ② when replacing crankcase
and/or bevel gear and/or bevel gear cover,
15-43
 Loading...