Do you have a question about the Chamberlain 7200 and is the answer not in the manual?
Understand the meaning of warning and caution symbols for safe operation.
Perform a balance test on the garage door before installation.
Survey garage area and identify conditions applying to sectional door installation.
Survey garage area and identify conditions applying to one-piece door installation.
Check carton contents against the illustrated parts list for assembly.
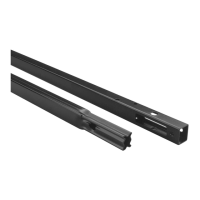
Assemble T-rail sections and attach the cable pulley bracket to the front end.
Attach the threaded shaft to the trolley and slide it onto the T-rail.
Securely attach the assembled T-rail to the opener using provided screws.
Install chain/cable onto trolley/sprocket and attach the sprocket cover.
Follow all instructions carefully to ensure safe operation and prevent injury or death.
Key safety rules including door balance, locks, ropes, and opener placement.
Identify and mark the correct location for the header bracket based on door type and clearance.
Specific steps for determining header bracket location for one-piece doors without tracks.
Fasten the header bracket securely to either the wall or ceiling.
Connect the T-rail assembly to the header bracket using the provided hardware.
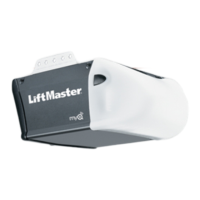
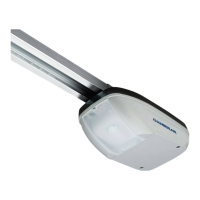
Place the opener in the correct position relative to the door and rail.
Securely attach the opener to the structural supports of the garage.
Wire and mount the Door Control panel or button for operating the opener.
Install the light bulb and lens cover onto the opener unit.
Connect the manual release rope and handle to the trolley for emergency operation.
Ensure proper electrical connection and grounding for safe opener operation.
Connect and align the safety reversing sensors for safe door operation.
Assemble and mount the safety reversing sensor brackets and wraps.
Securely attach the door bracket to the garage door panel.
Specific steps for attaching the door bracket to one-piece garage doors.
Attach the door arm sections to the trolley and secure connections.
Fasten the straight and curved door arm sections together for one-piece doors.
Set the travel limits for the opener to ensure proper door travel.
Regulate the opener's force settings for safe and effective door operation.
Verify the safety reversing sensor is functioning correctly when the door closes.
Perform tests to ensure the door reverses properly upon encountering an obstruction.
Overview of opener operation, remote controls, and transmitter battery.
Recommended routine checks and lubrication for the garage door opener.
Methods to activate the opener: remote, door control, or keylock/entry.
Details on using lighted buttons, push bars, and lock features.
Instructions for programming new remote controls or erasing existing codes.
Guide to diagnosing and resolving common garage door opener problems.
List and diagrams of parts for the rail assembly.
List and diagrams of parts used during opener installation.
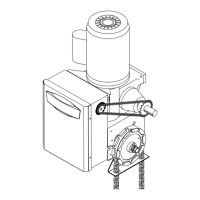
Diagrams and part numbers for components within the opener unit.
Accessories for outside access: Quick Release, Keylock, Keyless Entry.
Kits to extend the rail for 8-foot or 10-foot door openings.
Various remote control options: Mini, Standard, Single-Function, Security.
Accessories to control interior or exterior lights: Wire-In and Plug-In.
Details the motor warranty periods for different model series.
| Brand | Chamberlain |
|---|---|
| Model | 7200 |
| Category | Garage Door Opener |
| Language | English |