Do you have a question about the Chamberlain C2405C and is the answer not in the manual?
Provides an overview of the installation manual and instructions for registering the product.
Explains safety symbols and signal words used throughout the manual for hazard identification.
Details safety precautions for features allowing unattended door operation.
Instructions on how to check the garage door's balance and condition before installation.
Guides users on checking Wi-Fi signal strength for smartphone connectivity.
Lists the tools necessary for installing the garage door opener system.
Outlines extra items that may be required based on garage construction.
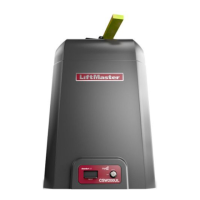
Details all components included in the garage door opener package.
Lists and illustrates hardware used during the assembly phase.
Lists and illustrates hardware used during the installation phase.
Step-by-step guide to assembling the rail sections and installing the trolley.
Instructions on securely attaching the rail assembly to the motor unit.
Details the process of installing the idler pulley onto the rail.
Step-by-step guide for connecting and installing the drive chain.
Instructions on adjusting and tightening the drive chain for proper operation.
Critical safety advice and warnings to follow during the entire installation process.
Guidance on selecting the correct location for the header bracket based on door type.
Step-by-step instructions for mounting the header bracket to the wall or ceiling.
Connects the rail assembly to the previously mounted header bracket.
Guides on correctly positioning the main opener unit for installation.
Instructions for securely hanging the opener unit to structural supports.
Covers the installation of light bulbs and securing the light lens cover.
Details how to attach the emergency release rope and handle to the trolley.
Instructions for attaching the door bracket to the garage door panel.
Guides on connecting the door arm to the trolley for sectional doors.
Guides on connecting the door arm to the trolley for one-piece doors.
Instructions for mounting and wiring the push button door control.
Instructions for mounting and wiring the multi-function control panel.
Connects the installed door control unit to the garage door opener.
Placement instructions for entrapment and safety reverse test labels.
Mounts the safety reversing sensors onto the garage door track.
Mounts the safety reversing sensors to the wall or floor if track mounting is not possible.
Connects safety reversing sensors when no pre-installed wiring exists.
Connects safety reversing sensors using existing pre-installed wiring.
Guides on connecting the garage door opener to a power source.
Adjusts the safety reversing sensors for proper beam alignment.
Checks the wiring of the door control for correct functionality.
Specific considerations for one-piece doors during travel adjustment.
Explains the function of the programming buttons on the opener.
Sets the open and close travel limits for the garage door.
Configures the opener's force sensitivity for safe operation.
Verifies the garage door opener's safety reversal feature.
Confirms the functionality of the safety reversing sensors.
Guides on connecting the opener to a smartphone using the myQ application.
Explains the meaning of different LED indicators for Wi-Fi status.
How to operate the garage door opener using various controls.
Crucial safety rules for operating the garage door opener.
Explains how to use the features of the multi-function control panel.
Details the operation of the basic push button door control.
Instructions for programming remote controls and keyless entry keypads.
Information on integrating the opener with vehicle HomeLink systems.
Procedures for clearing stored remote codes and Wi-Fi network connections.
Steps for manually disengaging and moving the garage door.
Recommended monthly and yearly maintenance tasks for the opener.
Guide on replacing the battery in the remote control transmitter.
Explains how to read flash codes to diagnose opener issues.
Addresses common issues like unexpected beeps, flashes, or reversals.
Troubleshoots problems with Wi-Fi, HomeLink, and remote control functionality.
Provides contact details for customer service and warranty inquiries.
Outlines the warranty coverage period for different opener components.
Emphasizes the importance of safe operation and child safety.
Reinforces the message that garage door openers are not toys for children.
Checking components for wear and testing manual door movement.
Performing functional tests on safety reversal and photoelectric sensors.
Identifies and lists part numbers for rail assembly components.
Identifies and lists part numbers for various installation components.
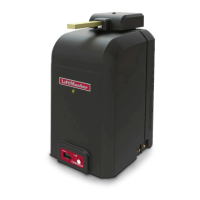
Lists and illustrates the parts specific to the C2102C model.
Lists and illustrates parts for the C2405C and D2405C models.
Lists and illustrates the parts specific to the C2202C model.
Lists and illustrates the parts specific to the D2101C model.
| Brand | Chamberlain |
|---|---|
| Model | C2405C |
| Category | Gate Opener |
| Language | English |