ChamSys QuickQ Series Service Document
Page 9 of 17 www.chamsys.co.uk
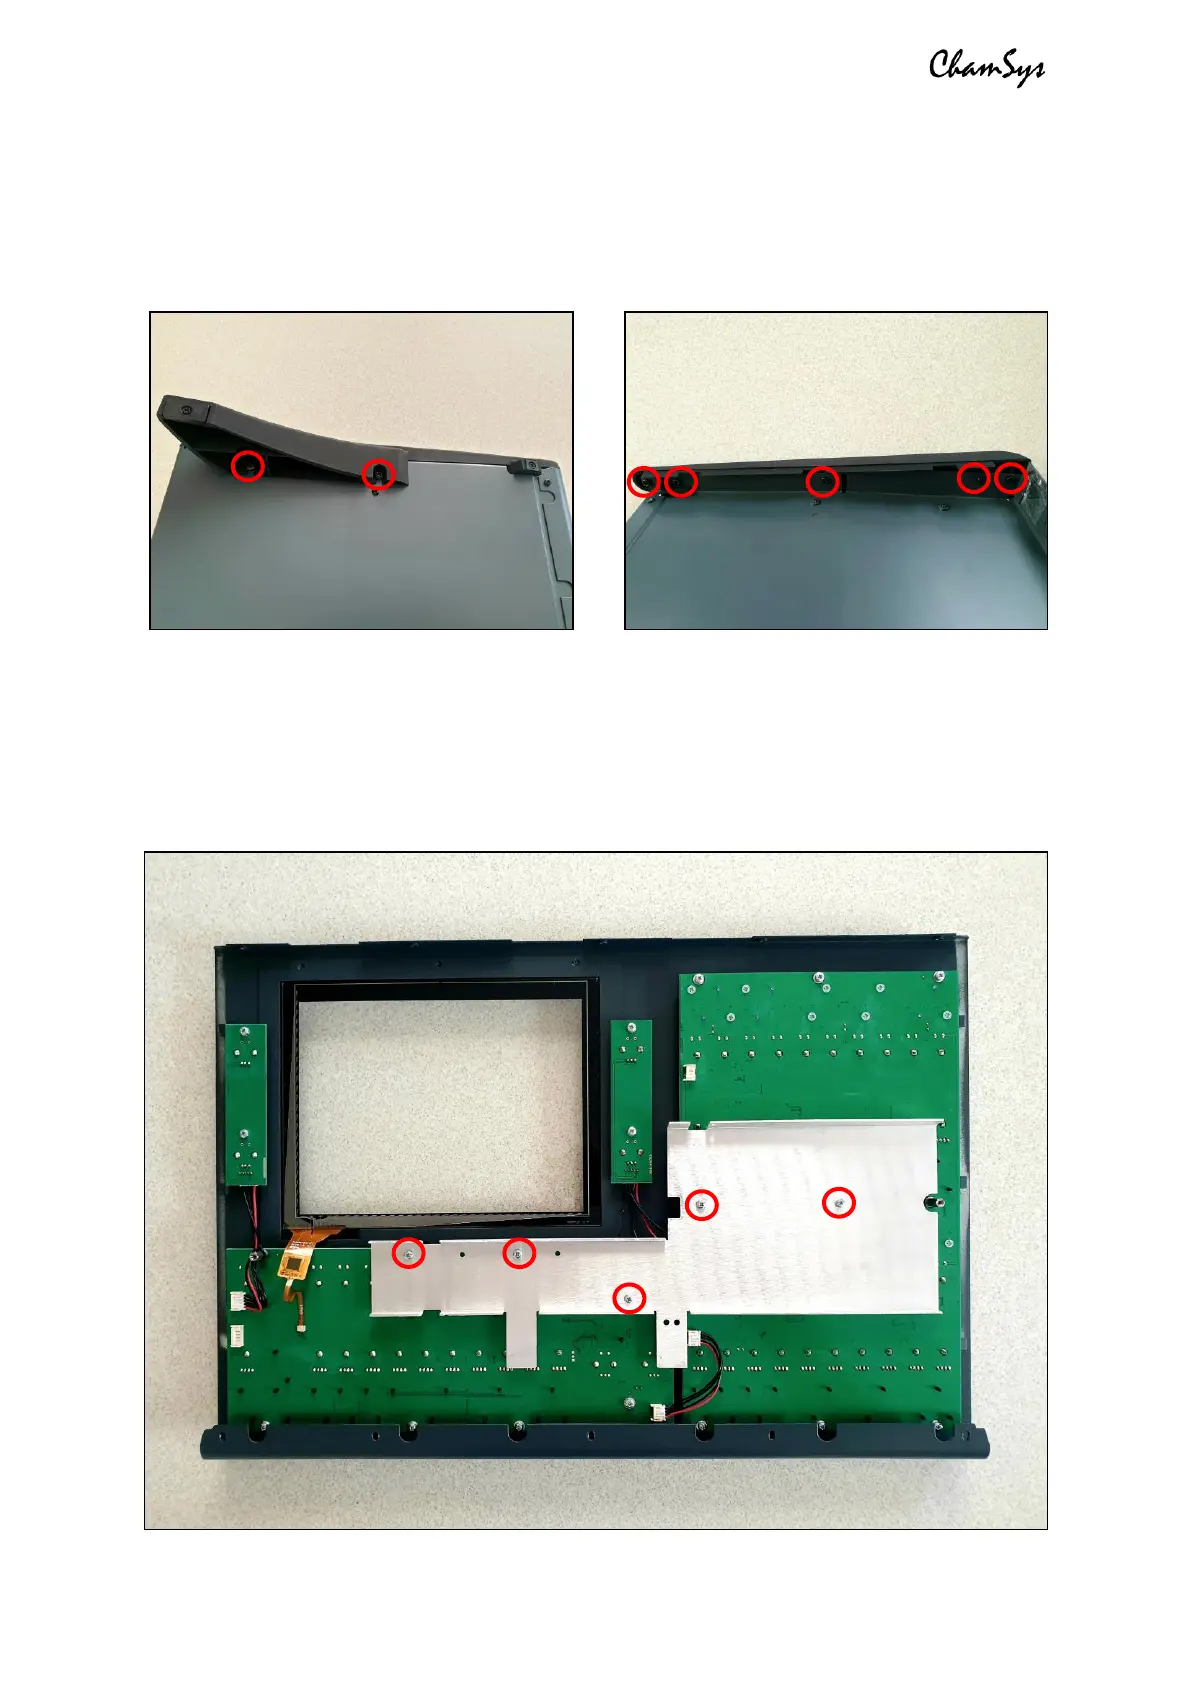
To remove the plastic moulded endcheeks/feet from the console: The final part for
complete disassembly for the base of the console is to remove the endcheeks/feet from
the console. There is one of these on each side, each secured with a total of 7x M4x6
black screws – 2x on the base, and 5x on the inside of the chassis. To remove these,
you’ll need to use a PZ2 screwdriver. See the images below for locations of the screws.
Disassembly of the front panel section of the console:
Start by removing the PCB support bracket by removing all M3x6 screws and shake-
proof washers highlighted in the image below, using a PZ1 screwdriver. The QuickQ 10/20
consoles have 5x screws, while the QuickQ 30 has a larger plate with more screws.
 Loading...