EasyManua.ls Logo

ChargePoint CT4000 SERIES - User Manual

Default Icon
74 pages
Print Icon
To Next Page IconTo Next Page
Loading...
Installation
Guide
ChargePoint, Inc.
1692 Dell Ave.
Campbell, CA 95008-6901 USA
US toll free: +1-877-370-3802
www.chargepoint.com
Document P/N: 75-001084-01 Rev. 3
CT4000 Family
ChargePoint® Networked Charging Station

Table of Contents

Questions and Answers

  • A
    aguilarmarySep 4, 2025
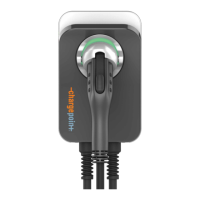
    What does hardware error mean on ChargePoint Battery Charger?
    • B
      Brandon HumphreySep 4, 2025
      The ChargePoint Battery Charger is out of service. Disconnect and reconnect power. If the error persists, contact ChargePoint Customer Support to arrange to have the station replaced or repaired.
  • K
    Kimberly NorrisSep 18, 2025
    How to fix ChargePoint Battery Charger charging cable that doesn’t move freely?
    • A
      abigail97Sep 18, 2025
      Re-position the ChargePoint Battery Charger cable by following the steps to inspect and align the rope onto the pulley.
  • B
    Brian FranklinSep 16, 2025
    Why does ChargePoint Battery Charger show ventilation requested error?
    • D
      dylan15Sep 16, 2025
      The vehicle requires ventilated charging, which is not supported by the ChargePoint Battery Charger station. The driver will be unable to use the station to charge their type of vehicle. Contact the vehicle manufacturer.
  • A
    Alan PriceSep 14, 2025
    What does relay stuck closed mean on ChargePoint Battery Charger?
    • M
      Mrs. Nicole Carr MDSep 14, 2025
      When attempting to end a charging session, the ChargePoint Battery Charger relay stays closed. Contact ChargePoint Customer Support to arrange to have the station replaced or repaired.
  • K
    Kevin SteinSep 13, 2025
    What does breakaway fault mean on ChargePoint Battery Charger?
    • J
      jason88Sep 13, 2025
      The ChargePoint Battery Charger cable has been removed from the station or is damaged. Contact ChargePoint Customer Support to arrange to have the station replaced.
  • J
    Jeffrey JacksonSep 12, 2025
    What does SNP error mean on ChargePoint Battery Charger?
    • T
      Todd BryanSep 12, 2025
      The ChargePoint Battery Charger can be used to charge for the specified number of remaining grace sessions. When all grace sessions have been used, the station is not operational. Arrange for the station to be activated on ChargePoint by completing the steps in Chapter 5.
  • M
    Michael YoderSep 9, 2025
    What does pilot unreachable mean on ChargePoint Battery Charger?
    • N
      nicholskyleSep 9, 2025
      The ChargePoint Battery Charger is out of service. Disconnect and reconnect power. If the error persists, contact ChargePoint Customer Support to arrange to have the station replaced or repaired.
  • W
    Wendy LongSep 7, 2025
    What does boot fault mean on ChargePoint Battery Charger?
    • M
      Mr. Joe DelgadoSep 7, 2025
      The ChargePoint Battery Charger is out of service. Disconnect and reconnect power. If the error persists, contact ChargePoint Customer Support to arrange to have the station replaced or repaired.
  • K
    Kathleen BoydSep 6, 2025
    What does FLC error mean on ChargePoint Battery Charger?
    • T
      terrimyersSep 6, 2025
      The voltage of an AC input line has fallen below 80 volts AC relative to ground. Correct any faulty connections. Verify that the station is connected to a system with its neutral properly grounded and connected to one of the system types. If the error persists, contact ChargePoint Customer Support.
  • R
    Robert MatthewsAug 21, 2025
    What to do if ChargePoint Battery Charger shows over current detection error?
    • J
      Jeffrey BeanAug 21, 2025
      The ChargePoint Battery Charger stopped delivering power because the vehicle attempted to draw more power than allowed during charging. This can indicate faulty wiring in the vehicle. You can try to end the session by inserting the station’s plug back into its holster, and then restart the session. If the error persists, contact ChargePoint Customer Support.

Summary

Introduction

Dual Circuit Wiring Diagram

Illustrates the wiring for installing a CT4000 on a dual circuit, requiring two dedicated circuits and 40A breakers.

Shared Power Wiring Diagram

Details wiring for a dual port CT4000 on a shared single circuit using a power sharing kit and a two-pole 40A breaker.

Grounding Requirements

Explains voltage requirements relative to ground and specifies systems to connect to or avoid for proper grounding.

Specifications

Installing a Bollard Mount

Bollard Mount: Mount Pole;Base Plate

Details how to position the pole/base plate assembly, adjust nuts for leveling, and tighten securely.

Bollard Mount: Install Main Body

Guides on aligning the main body with the bumper, sliding it onto the pole, and re-tightening screws.

Bollard Mount: Install Retractor

Details inserting the black cap, positioning the retractor, and securing it with screws.

Bollard Mount: Connect Wiring

Provides instructions for connecting wires to the terminal block, including warnings about GFCI and conductor types.

Bollard Mount: Check Voltages

Guides on verifying line-to-line and line-to-ground voltages using a voltmeter after connecting wiring.

Installing a Wall Mount

Wall Mount: Drill Holes in Wall

Details using the packing box as a template, marking, and drilling mounting holes in the wall.

Wall Mount: Mount Retractor

Guides on placing front brackets, tilting the retractor, and securing it with screws.

Wall Mount: Install Main Body

Guides on exposing the pre-drilled hole, aligning the main body, and securing it with flange bolts.

Wall Mount: Connect Wiring

Provides instructions for connecting wires to the terminal block, including warnings about GFCI and conductor types.

Wall Mount: Check Voltages

Guides on verifying line-to-line and line-to-ground voltages using a voltmeter after connecting wiring.

Installing the Head and Top Cap

Head and Top Cap: Slide Head Assembly Into Body

Guides on sliding the head assembly into the main body until stopped by the security tag.

Head and Top Cap: Connect Head Assembly

Instructions for connecting the blue connector of the head assembly to the terminal block and closing the cover.

Head and Top Cap: Verify the Station Operates Correctly

Steps to verify the station displays correctly, status icons are green, and to check station codes.

Head and Top Cap: Authorize Charging Session

Instructs to use the ChargePoint card to authorize a charging session and ensure proper holster function.

Head and Top Cap: Secure Head Assembly

Details removing the L-wrench, seating the head assembly, tightening security screws, and inserting plugs.

Preparing the Station for Activation

Activation: Complete the Post-Installation Checklist

Checklist to confirm all installation tasks are completed, including hardware security, voltages, and network signals.

Troubleshooting

Appendix A: Preparing the Installation Site for a Bollard Mount

Appendix C: CT4000 Power Sharing Instructions

Appendix C: Install Power Sharing Jumpers

Detailed instructions on how to install the jumpers on the terminal block, ensuring they are fully seated.

Appendix C: Connect Wiring for Power Sharing

Guides on connecting the wiring for power sharing, noting which ports are used and warnings.

Appendix C: Configure Station for Power Sharing

Steps to access the Service Menu and enable power sharing configuration in the station's software.

ChargePoint CT4000 SERIES Specifications

General IconGeneral
Connector TypeJ1772
Input Voltage208-240 VAC
Amperage30A
MountingWall or Pedestal
Connectors per station1 or 2
EnclosureNEMA 3R
Charging LevelsLevel 2
Enclosure RatingNEMA 3R
Network ConnectivityWi-Fi, Ethernet, Cellular
Operating Temperature-22°F to 122°F (-30°C to 50°C)
Product TypeElectric Vehicle Charger

Related product manuals