iGage X9x User Manual page 40 of 53
followed by the general area:
6. Click on “Save”.
7. OPTIONAL: You can test the new geoid file with
the Ashtech Geoids tool. Click on the
desktop icon and then browse for the file you just
made. Be sure to change the files of type to ‘.GSF’
as shown by the red arrow below:
If the extraction was successful, then you will get a
pretty picture:
8. Next transfer the GSF file to your data collector
using ActiveSync or by mounting the device as a
Flash Drive.
9. In SurvCE or FAST Survey, you load the GEOID
from: “Equip: 6 Localization: GPS (tab):
Click the ‘Geoid File:’ button, then browse to find
the new GSF file.
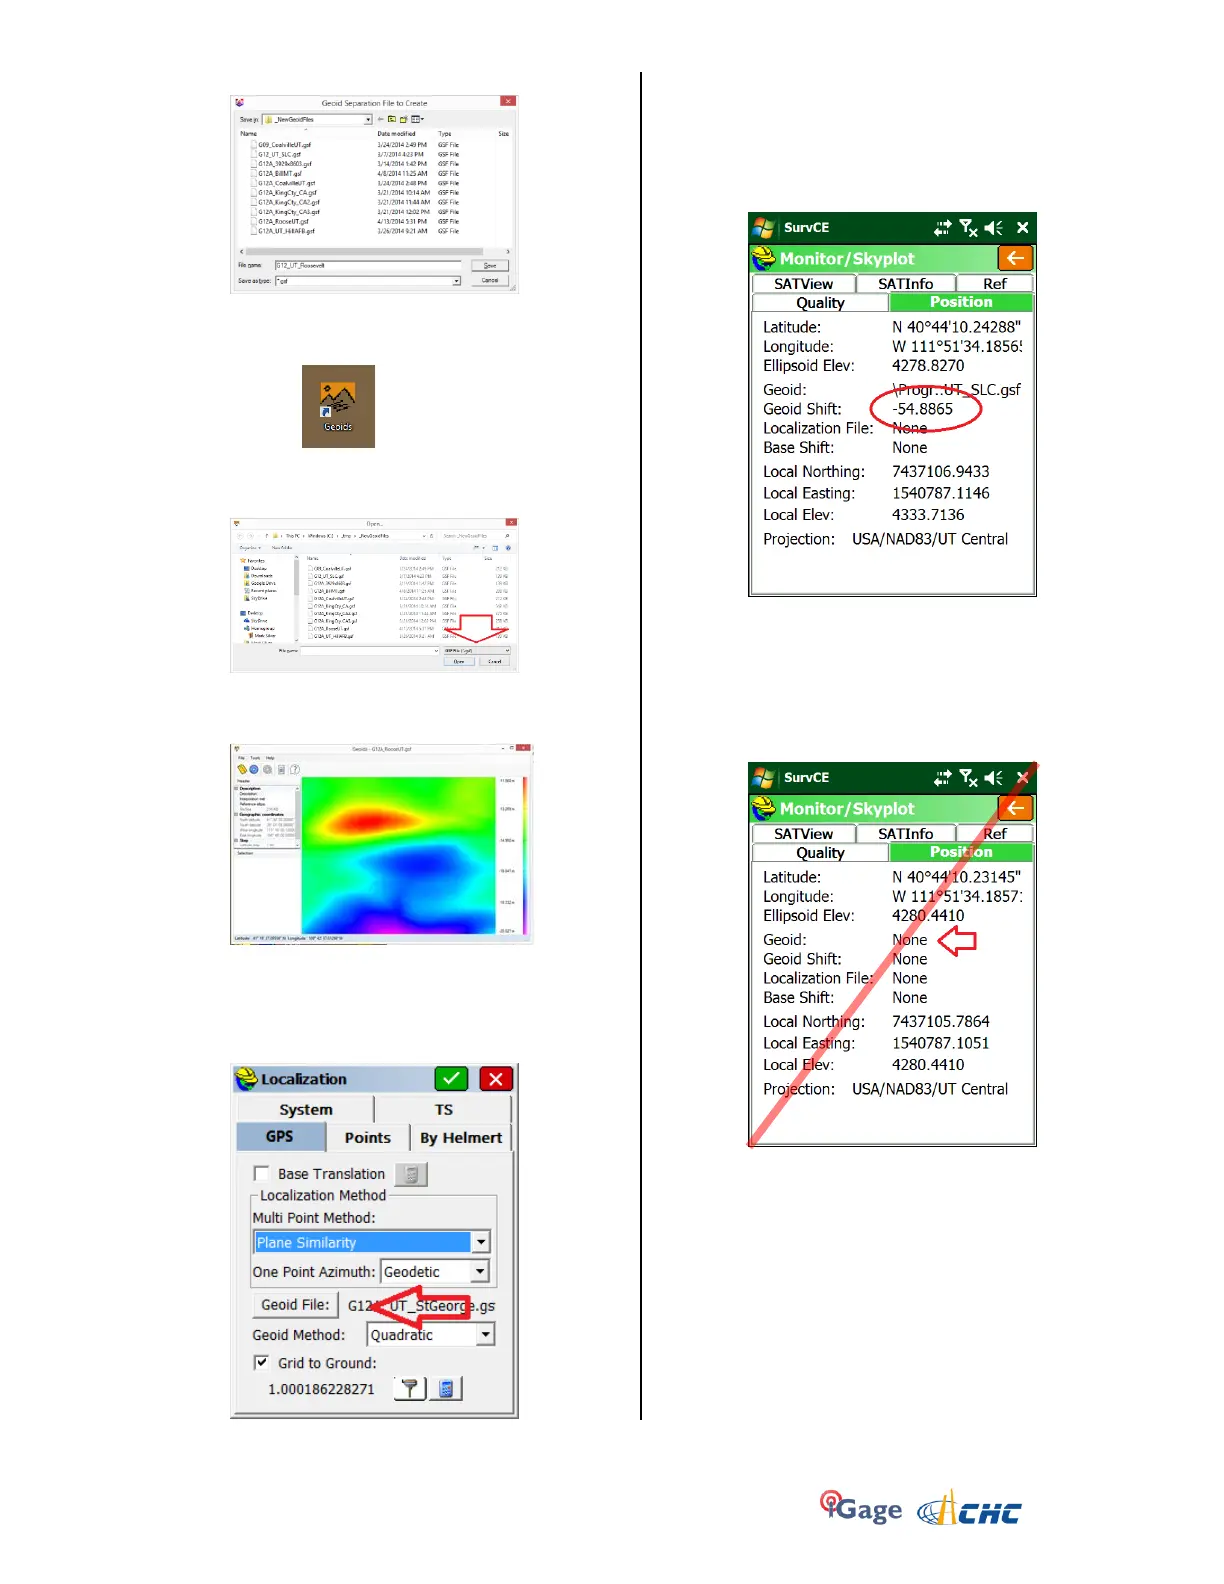
10. You can verify that a GEOID file is loaded and in-
use by going to “Equip: Monitor Skyplot: Position
(tab)” where you will see the ellipsoid height, and
the GEOID separation listed:
Notice that the GEOID Shift is negative. It is
subtracted from the Ellipsoid elevation and causes
the Local (orthometric) height to be higher than
the ellipsoid. (This is true for most of the planet.)
If the GEOID file does not cover your survey area,
or is not loaded you will see a screen like this:
Note the ‘Ellipsoid Elev’ is exactly the same as the
‘Local Elev’.