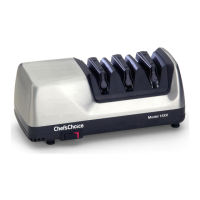
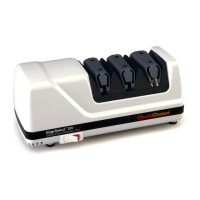
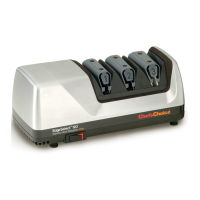
The Chef'sChoice EdgeSelect Diamond Hone Sharpener Model 120 is a professional-grade, heavy-duty sharpening device designed to create exceptionally sharp and durable edges on a wide variety of knives, including kitchen, pocket, and most sports knives. It is engineered to produce the advanced Trizor-Plus edge, which is known for its superior sharpness and extended edge retention.
Function Description:
The Model 120 is a three-stage electric sharpener that utilizes precision angle guides and conically shaped abrasive disks. The sharpening process is designed to create a triple-bevel edge on each side of the knife, contributing to its remarkable sharpness and durability.
- Stage 1: This stage uses fine 100% diamond-coated conical disks to create microgrooves along the facets on each side of the edge, establishing the first angled bevel of the Trizor edge. This stage is primarily used for very dull knives or when a more aggressive sharpening is needed to create an edge with "bite."
- Stage 2: In this stage, finer diamond abrasives create even finer microgrooves across the facets immediately adjacent to the edge. This establishes a well-defined second bevel at a slightly larger angle than Stage 1. Stage 2 refines the edge further and is suitable for knives that are reasonably sharp but require more than just stropping.
- Stage 3: This final stage employs ultra-fine flexible abrasive disks to polish and strop the facets immediately adjacent to the edge. It creates a third micro-bevel and establishes a microscopically thin, straight, and super-polished edge. The stropping action simultaneously polishes and sharpens the boundaries of the microgrooves created in Stages 1 and 2, transforming them into sharp micro-flutes. These micro-flutes are particularly beneficial for cutting fibrous materials. Stage 3 is also the only stage recommended for sharpening serrated blades.
The unique three-stage design allows for customization of the edge depending on the intended use of the knife, offering options for a smooth, polished edge ideal for gourmet food preparation or an edge with a selected amount of residual "bite" for cutting fibrous foods, meats, or for field dressing.
Usage Features:
The Chef'sChoice Model 120 is designed for ease of use and versatility.
- Straight Edge Sharpening:
- First-time Sharpening/Very Dull Knives: Begin in Stage 1 with one full-length pull through the left slot, followed by one pull through the right slot. Then proceed to Stage 2 (one pull left, one pull right) and finally Stage 3 (one to two pairs of alternating pulls).
- Reasonably Sharp Knives: Skip Stage 1 and start directly in Stage 2 (one pull left, one pull right), then move to Stage 3 (one to two pairs of alternating pulls).
- Gourmet Food Preparation (Smooth Edge): After using Stage 1 and/or 2, make three or more pairs of alternating pulls in Stage 3 to create a remarkably smooth and sharp edge.
- Meats, Field Dressing, Fibrous Materials (Edge with "Bite"): Sharpen in Stage 1 until a burr is developed, then move directly to Stage 3 for one or two pairs of alternating pulls. This leaves sharpened micro-flutes that assist in cutting tough materials.
- Game and Fish: For cooked poultry, use Stage 2 followed by Stage 3. For raw poultry, Stage 1 followed by Stage 3 is recommended. For filleting fish, use a thin but sturdy blade sharpened in Stages 2 and 3.
- Serrated Blade Sharpening: Serrated blades should only be sharpened in Stage 3. Generally, five to ten pairs of alternating pulls are sufficient. For severely damaged serrated edges, one fast pull (2-3 seconds for an 8" blade) in each of the right and left slots of Stage 2 can be made before proceeding to Stage 3, but excessive use of Stage 2 should be avoided to prevent unnecessary metal removal from the serrations.
- Pulling Technique: For all stages, the knife should be pulled alternately through the left and right slots. Insert the blade as close to the bolster or handle as possible and pull it towards you at a uniform rate (approximately 4 seconds for an 8-inch blade). Lift the handle slightly as you approach the tip for curved blades to maintain the edge parallel to the table. Consistent, light downward pressure is recommended to ensure contact with the abrasive disks. Never push the blade away from you or stop the pull mid-stroke.
- Burr Detection: Learning to detect a burr (a rough, bent extension of the edge) is a key technique to determine when sufficient sharpening has occurred in Stages 1 and 2 before proceeding to Stage 3. This helps prevent over-sharpening and ensures optimal results.
- On/Off Switch: The sharpener is activated by a power switch, which illuminates a red indicator when "ON."
- Safety: Always read and follow all safety instructions. Knives sharpened with the Model 120 will be extremely sharp and should be handled with extreme care. Do not run fingers along the edge.
Maintenance Features:
The Chef'sChoice Model 120 requires minimal maintenance to ensure long-lasting performance.
- Cleaning Knife Blades: It is crucial to clean all food, fat, and foreign materials from knife blades before sharpening to prevent accumulation on the abrasive disks.
- Exterior Cleaning: The exterior of the sharpener can be cleaned by wiping it with a damp cloth. Do not use detergents or abrasives.
- No Lubrication or Water: The device does not require any lubrication for its moving parts, motor, or bearings. Water or honing oils should not be used with the abrasives.
- Stage 3 Disk Cleaning/Dressing Tool: The Model 120 includes a built-in accessory to manually clean and reshape the honing disks in Stage 3. If the disks become glazed with grease, food, or sharpening debris, a small lever located in a recess on the rear of the sharpener can be pressed and held for 3 seconds in one direction to clean one disk, then in the opposite direction for 3 seconds to clean the other. This tool should be used infrequently, only when a noticeable decrease in polishing efficiency occurs, as excessive use will remove abrasive material and prematurely wear out the disks. Regular cleaning of knives before sharpening can significantly extend the time between needing to dress the Stage 3 disks, often for months or even a year.
- Metal Dust Removal: Periodically, accumulated metal dust inside the sharpener should be removed. This is done by removing a small rectangular clean-out cover on the underside of the sharpener. Metal particles adhere to a magnet attached to the inside of this cover and can be rubbed or brushed off with a paper towel or toothbrush. Any remaining dust can be shaken out through the bottom opening. After cleaning, the cover should be securely replaced. This maintenance is typically needed once a year or as required.
- Resharpening: For straight-edge knives, resharpening should primarily be done in Stage 3. If Stage 3 alone is insufficient, return to Stage 2 for one or two pairs of alternating pulls, then back to Stage 3. Stage 1 should only be used for resharpening if a more aggressive "bite" is desired or if the knife is excessively dull. Serrated blades are always resharpened in Stage 3. This approach minimizes metal removal and prolongs the life of the knives.
The Chef'sChoice Model 120 is a sophisticated yet user-friendly sharpening system designed to deliver professional-level sharpness and durability, making it a valuable tool for anyone who relies on high-performance cutlery.