(15) Remove regulator valve spring retainer (Fig.
133).
(16) Remove the vent reservoir check valve
retainer (Fig. 134).
(17) Remove vent reservoir check valve and spring
(Fig. 135).
(18) Remove remaining retainers as shown in (Fig.
136).
(19) Remove valves and springs as shown in (Fig.
137).
(20) Cleanliness through entire disassembly and
assembly of the valve body cannot be overempha-
sized. When disassembling, each part should be
washed in a suitable solvent, then dried by com-
pressed air. Do not wipe parts with shop towels.
All mating surfaces in the valve body are accurately
machined; therefore, careful handling of all parts
must be exercised to avoid nicks or burrs.
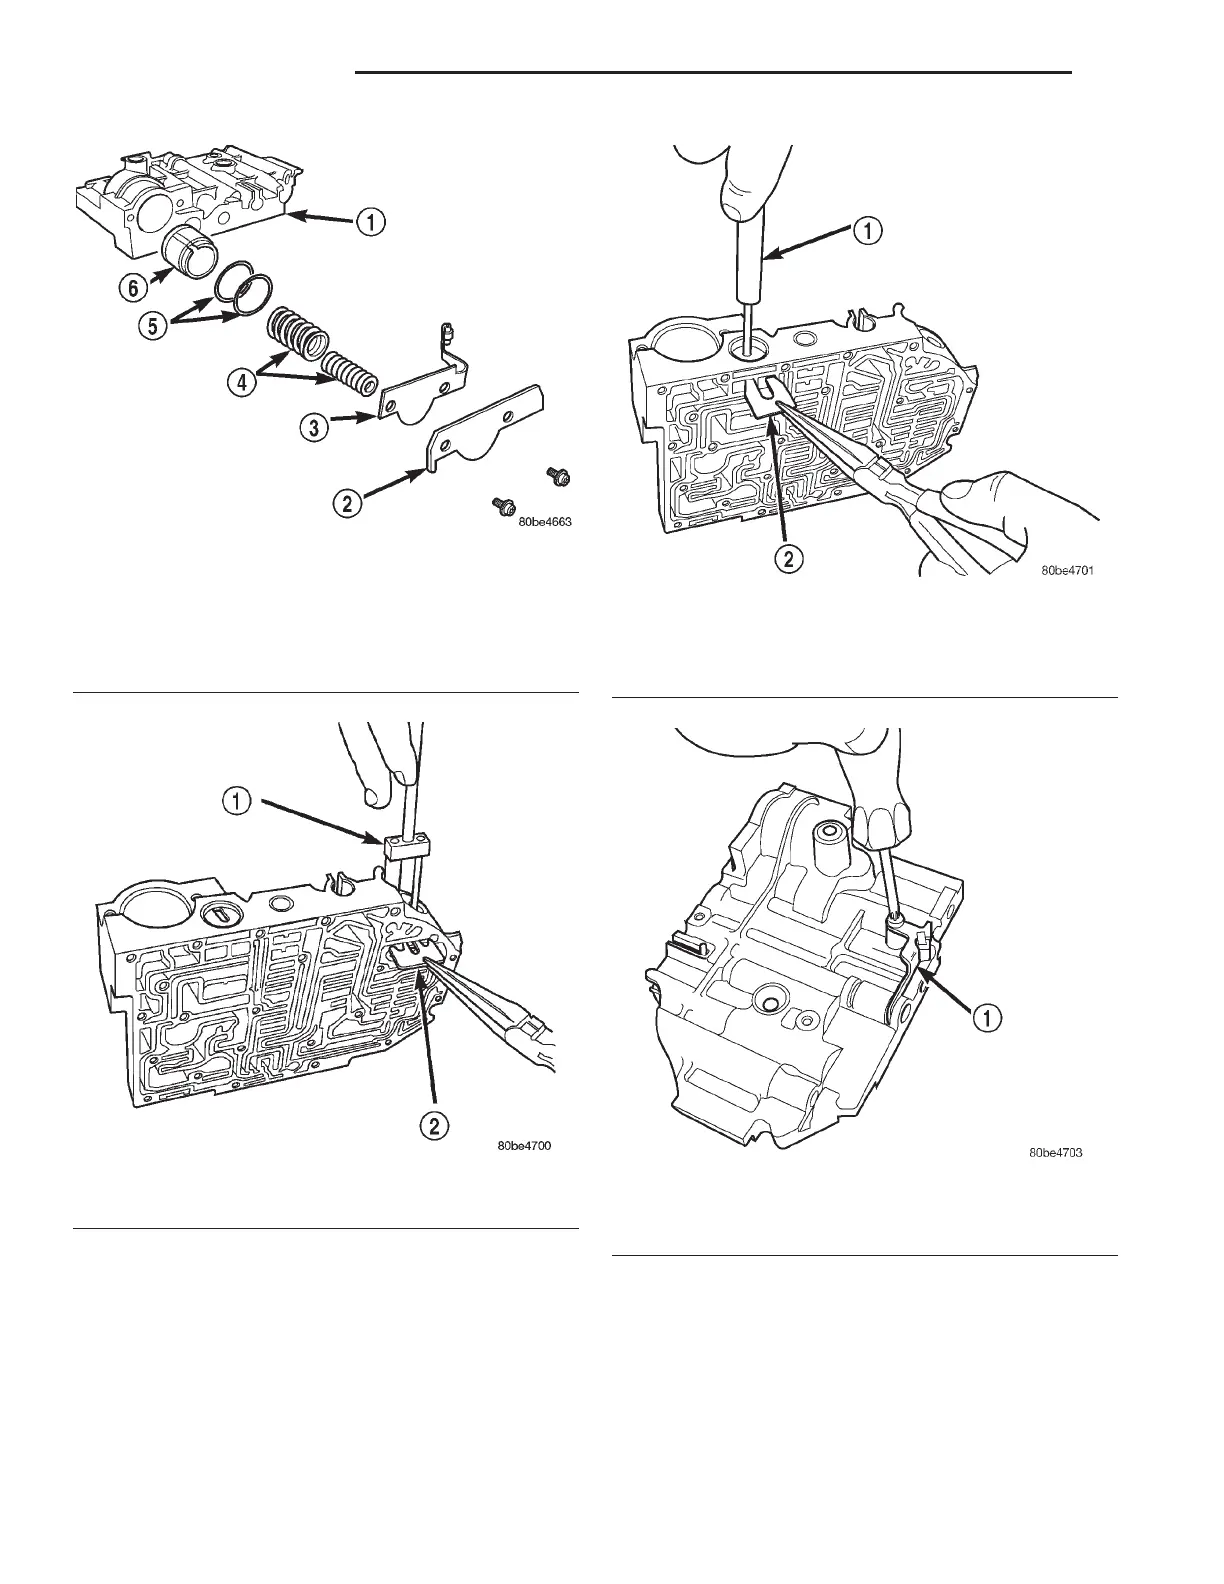
Fig. 131 2/4 Accumulator Assembly
1 – VALVE BODY
2 – RETAINER PLATE
3 – DETENT SPRING
4 – SPRINGS
5 – SEALS
6 – PISTON
Fig. 132 Remove or Install Dual Retainer Plate
1 – TOOL 6301
2 – RETAINER
Fig. 133 Remove Regulator Valve Spring Retainer
using Tool 6302
1 – TOOL 6302
2 – RETAINER
Fig. 134 Remove Vent Reservoir Check Valve
Retainer
1 – RETAINER
21 - 60 42LE TRANSAXLE LH
DISASSEMBLY AND ASSEMBLY (Continued)