OUTPUT SHAFT BEARING PRELOAD SHIM
SELECTION
When assembling, the output bearing preload must
be checked and/or adjusted if any of the following
items have been replaced:
• Output shaft (rear carrier assembly)
• Output shaft bearings
• Transaxle case
SHIM SELECTION
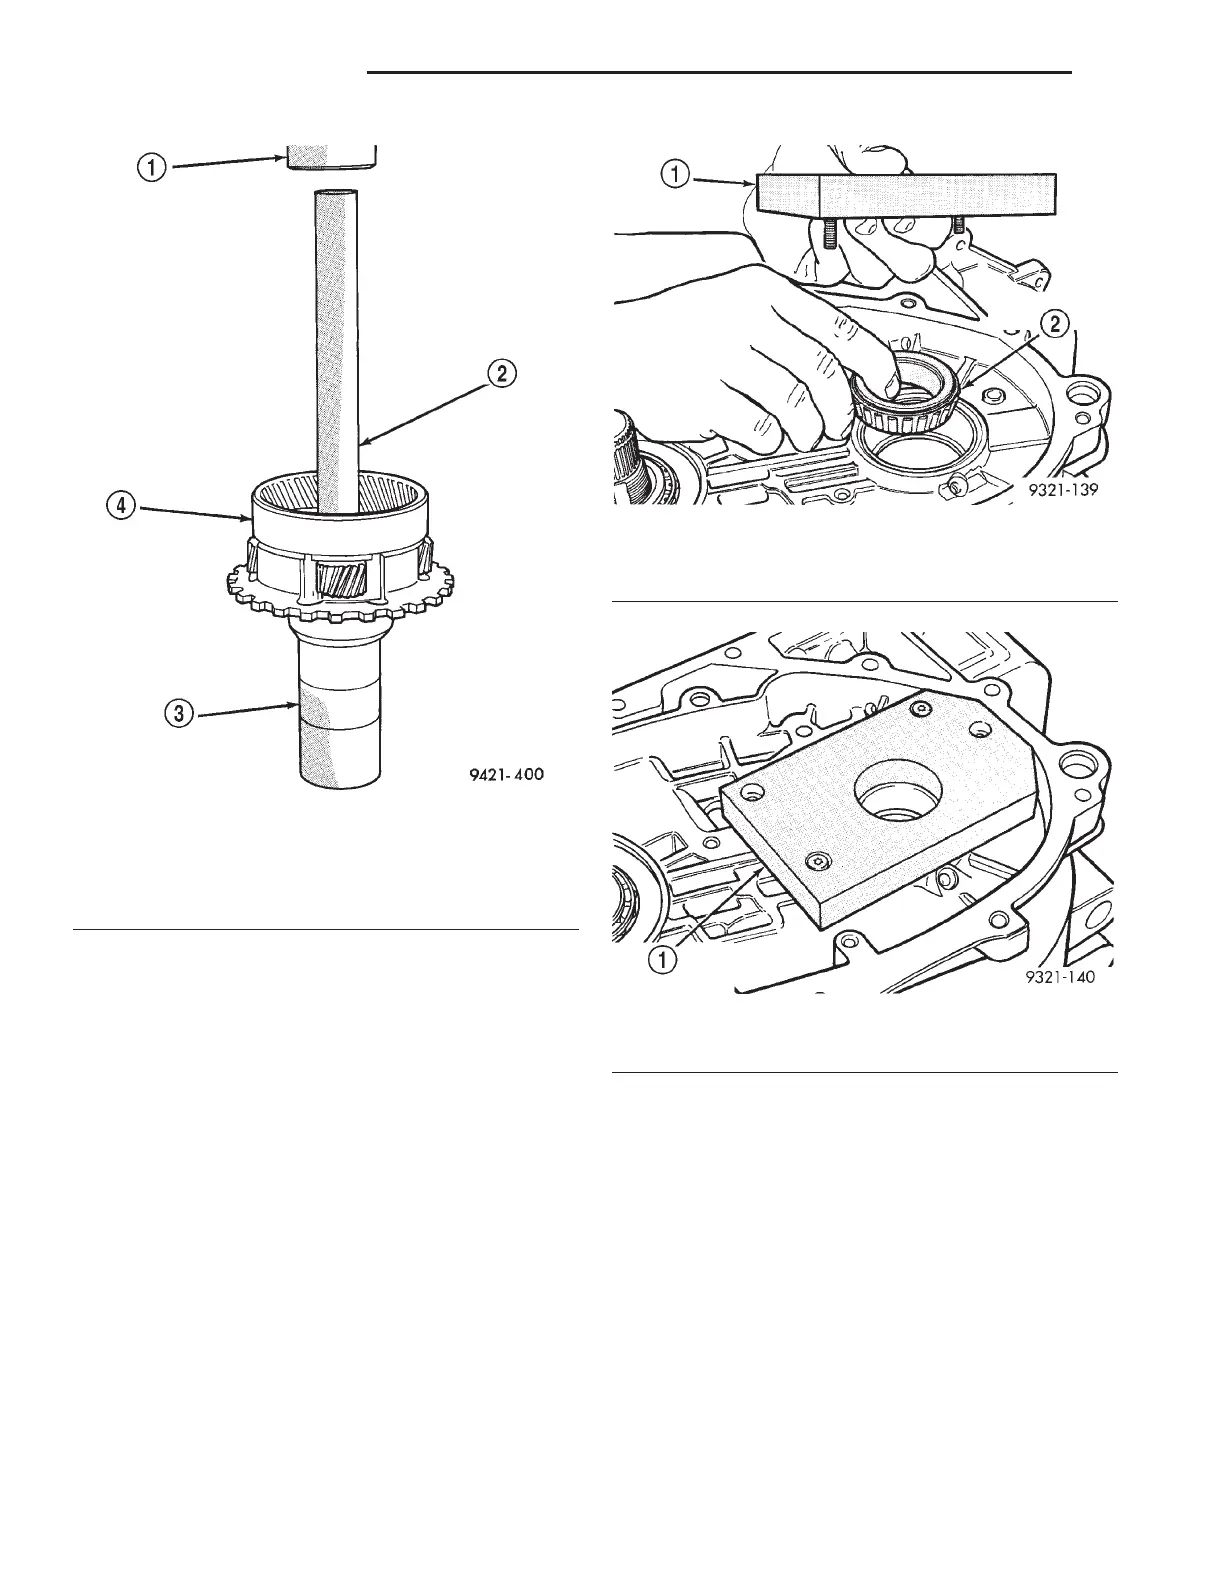
(1) Install rear output shaft bearing cone and spe-
cial tool 6618A (Fig. 305).
(2) Install special tool 6618A (Fig. 306). Lightly
tighten retaining screws. Screws should be below the
plate surface, but do not snug screws.
(3) Turn case over on arbor press so that the plate
is resting on the press base
CAUTION: The output shaft will extend through the
hole of tool 6618A. Ensure your press table has
clearance for the output shaft.
(4) Install shim on output shaft (Fig. 307). Apply
small amount of petrolatum onto the shim to hold it
in place. Use the original shim as a starting point. If
original shim is not available, use the thickest shim
available. Refer to Output Shaft Rear Shim Chart for
available sizes.
(5) Install output shaft/rear carrier into rear bear-
ing. The shaft must be pressed into position. Use spe-
cial tool MD-998911 (Disc) and C- 4171 and C4171-2
(Handle) to press shaft into rear bearing (Fig. 308).
CAUTION: Do not reuse old transfer shaft nut or
output shaft nut because the removed stake weak-
ens the nut flange.
(6) Using special tools 6497 and 6498, install new
output shaft nut. Do not reuse old output shaft nut.
Fig. 304 Install Rear Carrier Front Bearing Cone
1 – ARBOR PRESS
2 – SPECIAL TOOL C-4171
3 – SPECIAL TOOL 6052
4 – REAR CARRIER
Fig. 305 Bearing Installation
1 – SPECIAL TOOL 6618–A
2 – REAR OUTPUT SHAFT BEARING
Fig. 306 Special Tool Installed
1 – SPECIAL TOOL 6618–A
21 - 104 42LE TRANSAXLE LH
DISASSEMBLY AND ASSEMBLY (Continued)