(41) Install Transfer shaft preload shim (Fig. 419).
Use the original shim that was taken out of tran-
saxle if possible. If original shim is not available, use
the thickest shim as a starting point. Refer to Trans-
fer Shaft Rear Shim Chart for available sizes.
(42) Install rear transfer shaft cone. Press cone on
transfer shaft using Special Tool MD998805.
(43) Remove transfer shaft support fixture (special
tool 6595).
CAUTION: Always use a new transfer shaft nut. Do
not reuse old transfer shaft nut.
(44) Install a new transfer shaft nut (Fig. 420).
Tighten nut to 271 N·m (200 ft. lbs.). Use special
tools 6497 holder and 6498 shaft socket to tighten
nut.
CAUTION: Failure to set the transfer shaft turning
torque correctly may cause transfer shaft bearings
or seals to fail. Be sure transfer shaft does not have
end play. If end play exists, install a thinner preload
shim.
(45) Check the turning torque of the transfer shaft
using a torque wrench (Fig. 421). The turning torque
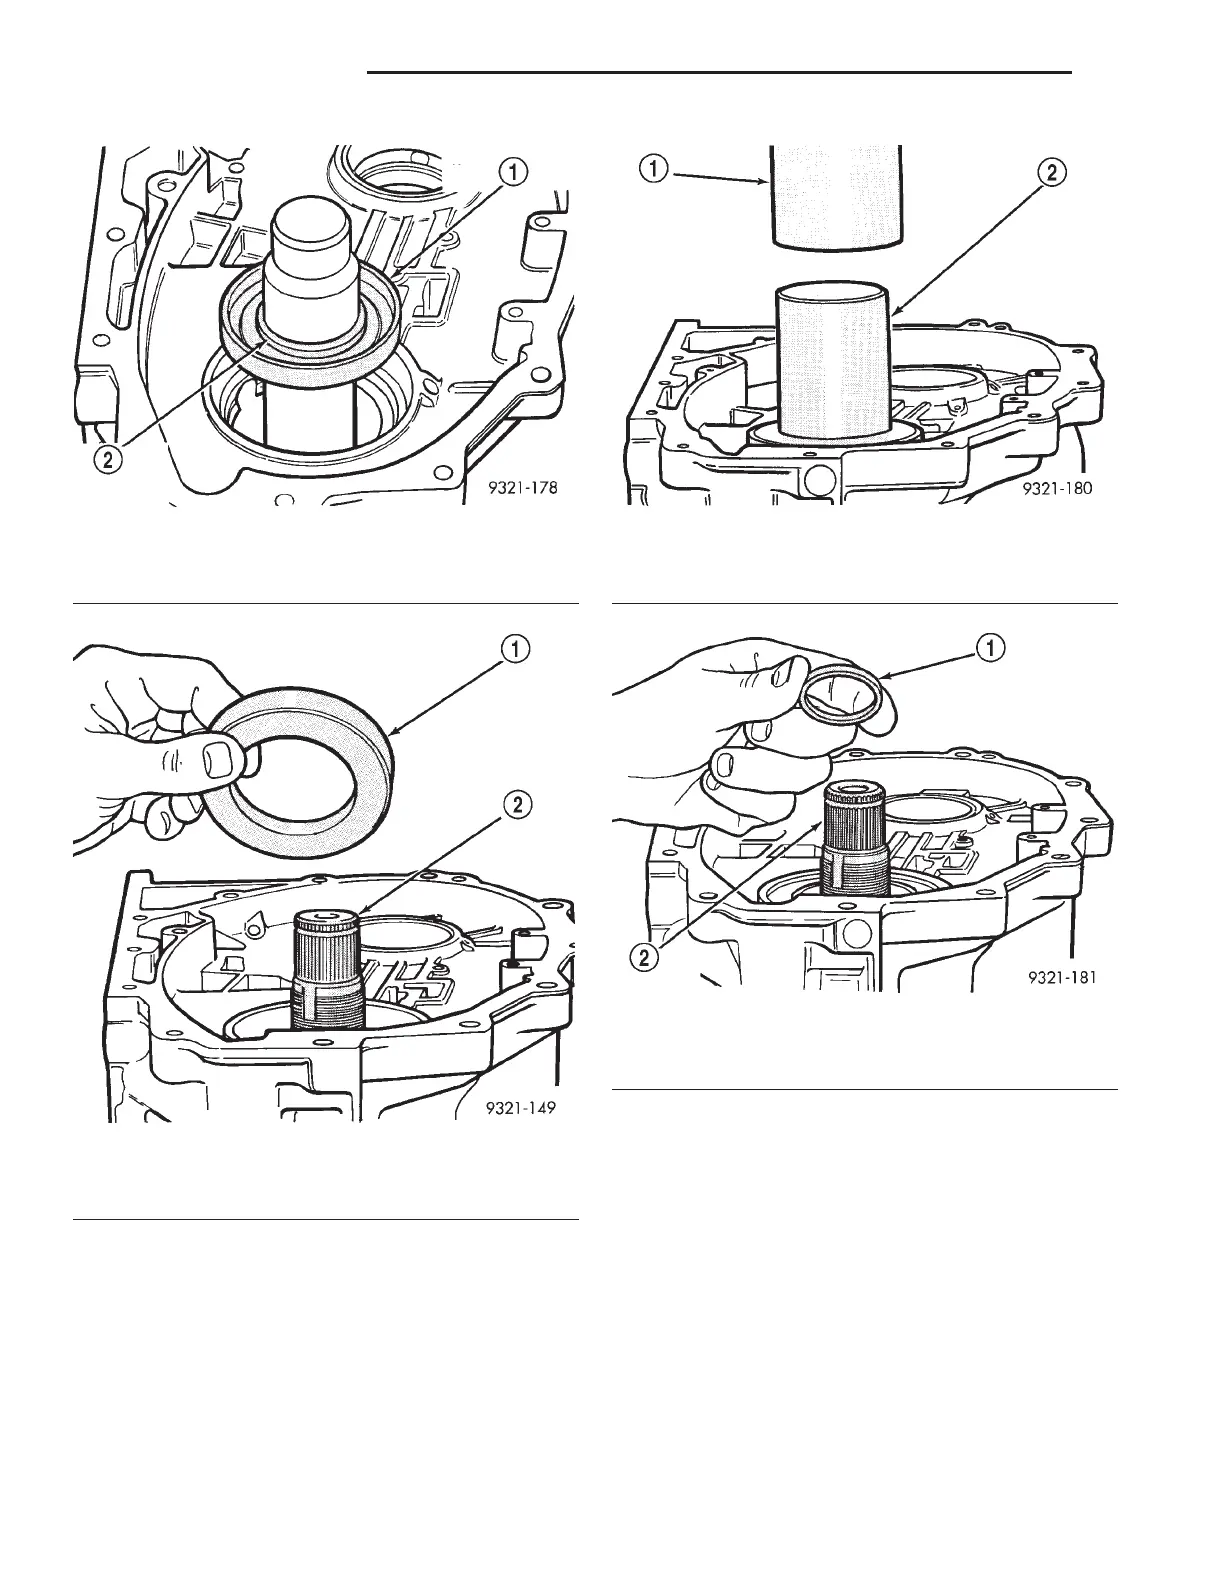
Fig. 416 Correct Seal Orientation
1 – REAR TRANSFER SHAFT SEAL
2 – SPRING SIDE OUTWARD
Fig. 417 Rear Transfer Bearing Cup
1 – REAR TRANSFER BEARING CUP
2 – TRANSFER SHAFT
Fig. 418 Rear Transfer Shaft Cup Installation
1 – ARBOR PRESS
2 – SPECIAL TOOL 6560
Fig. 419 Transfer Preload Shim Installation
1 – TRANSFER SHAFT PRELOAD SHIM
2 – TRANSFER SHAFT
21 - 134 42LE TRANSAXLE LH
DISASSEMBLY AND ASSEMBLY (Continued)