Manuale Istruzioni
Instruction Manual
8.5. Sostituzione nastro Tipper 8.5. Changing the Tipper Ribbon
ATTENZIONE Il tampone del Tipper ha
una temperatura di lavoro elevata (160°-
170°C). E' necessario prestare la
massima attenzione durante la
procedura di sostituzione del nastro.
160°
WARNING : The Silicon Blanket has
a high working temperature (160 -
170 C). Great care should be taken
during the process of changing the
ribbon.
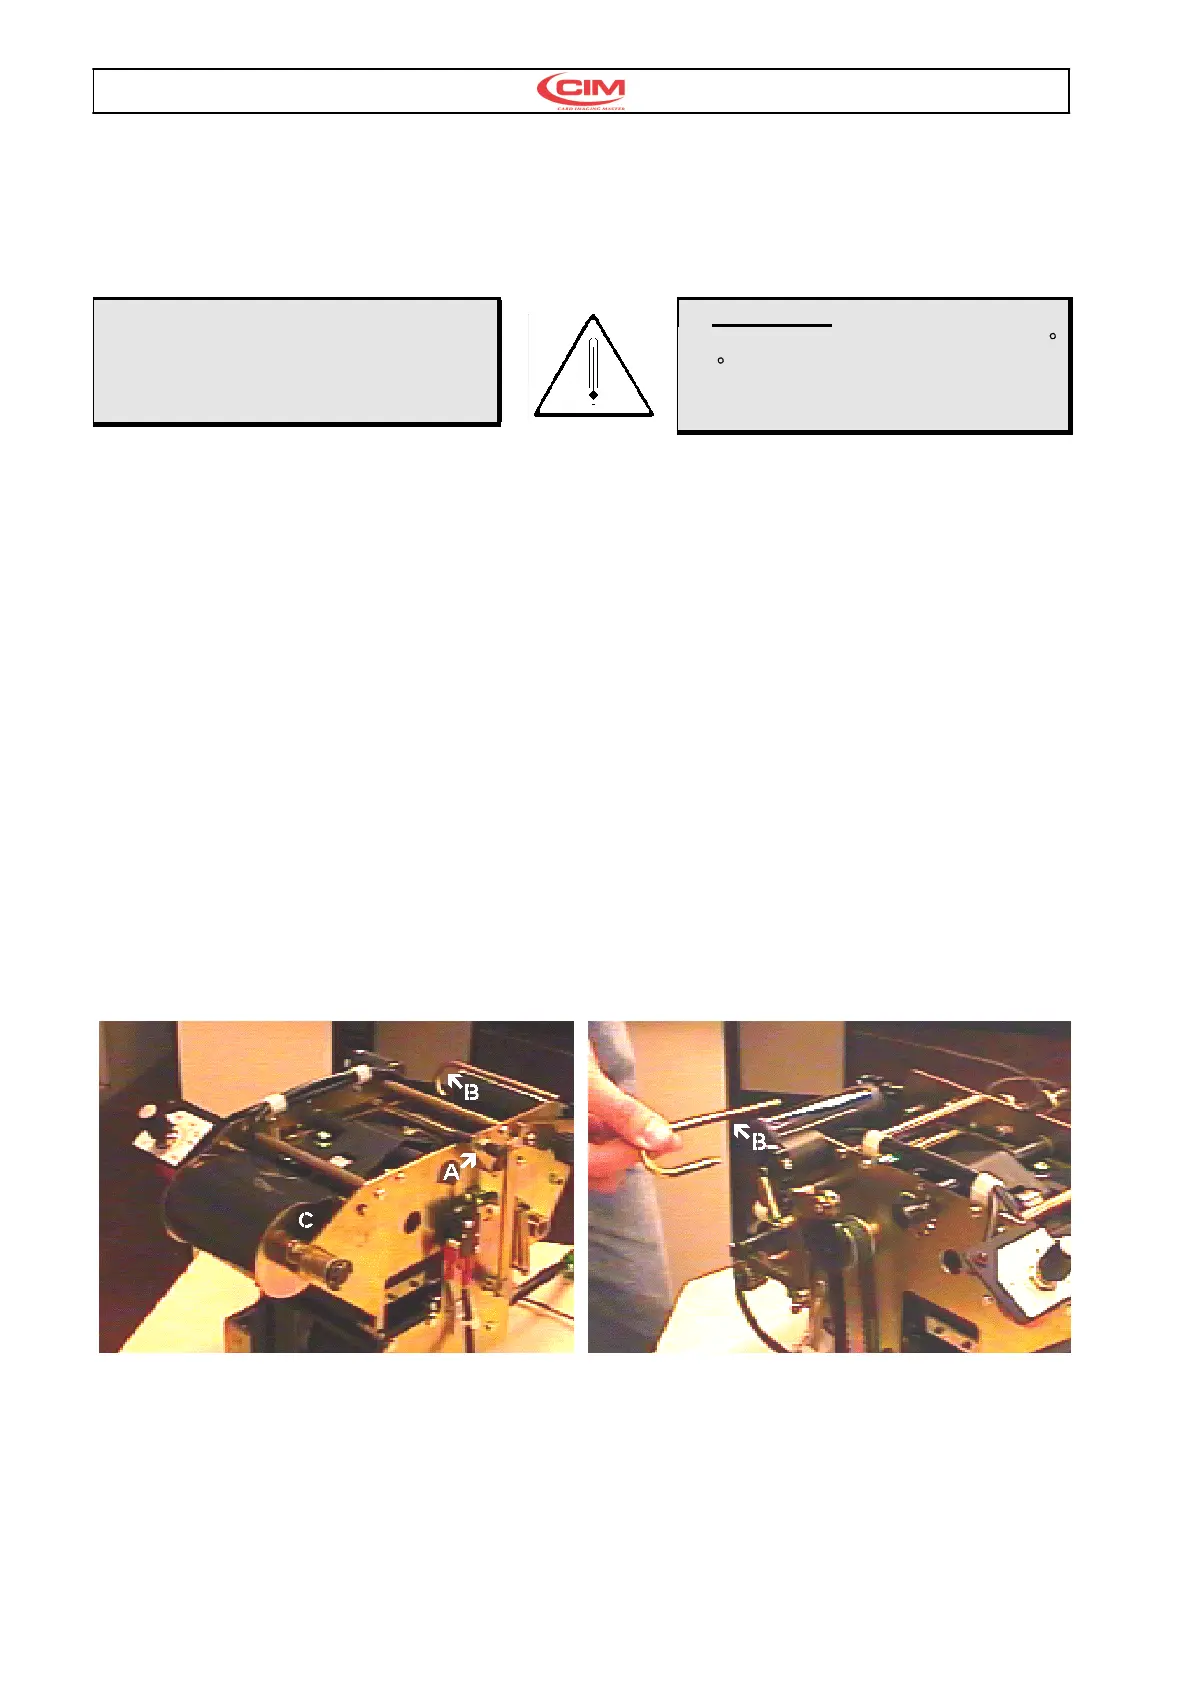
Procedura sostituzione nastro Tipper (vedi fig. 13,
14 e 15)
•
Sollevare il coperchio di MAXIMA (la macchina
si blocca ma il Tipper rimane caldo).
•
Sollevare la leva A per liberare il nastro.
•
Aprire il disco di tenuta C e togliere la bobina
vuota lasciando in posizione il nastro vecchio
•
Mettere la bobina nuova e incollare il nastro
nuovo al vecchio con nastro adesivo.
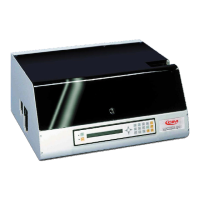
•
Ruotare il fermo B in senso antiorario fino a che
nella parte posteriore non fuoriesce il nastro
nuovo.
•
Rimuovere il fermo B (vedi fig.14) tirandolo verso
sinistra e togliere il nastro usato.
•
Avvolgere sul apposito perno il nastro nuovo,
rinserire il fermo B
•
Ruotare di un altro giro per mettere in tensione il
nastro e verificare che non ci siano pieghe.
•
Abbassare la leva A..
The procedure to change the Tipper Ribbon is
descibed below. Ref fig. 13 , 14 e 15.
•
Lift up the front cover of the MAXIMA. The
machine will stop all movements but the Tipper
will remain hot.
•
Lift the lever A to free the ribbon.
•
Remove the holding disk C and then remove the
the empty spooler leaving the old ribbon in place.
•
Now mount the new spooler and stick the new
ribbon to the old one with a adhesive tape.
•
Rotate the retainer B in an anticlockwise
direction until the new ribbon appears.
•
Remove the retainer B (Ref fig. 14) pulling it
towards the left and remove the used ribbon.
•
Wind the new ribbon into the relative pin, reinsert
the retainer B.
•
Rotate it half a turn to tighten the ribbon and
control that there are no folds.
•
Lower the lever A.
Fig. 13 Fig. 14