Step 1 Attach the inner rails to the sides of the chassis:
a) Align an inner rail with one side of the chassis so that the three keyed slots in the rail align with the three pegs on the
side of the chassis.
b) Set the keyed slots over the pegs, and then slide the rail toward the front to lock it in place on the pegs. The front slot
has a metal clip that locks over the front peg.
c) Install the second inner rail to the opposite side of the chassis.
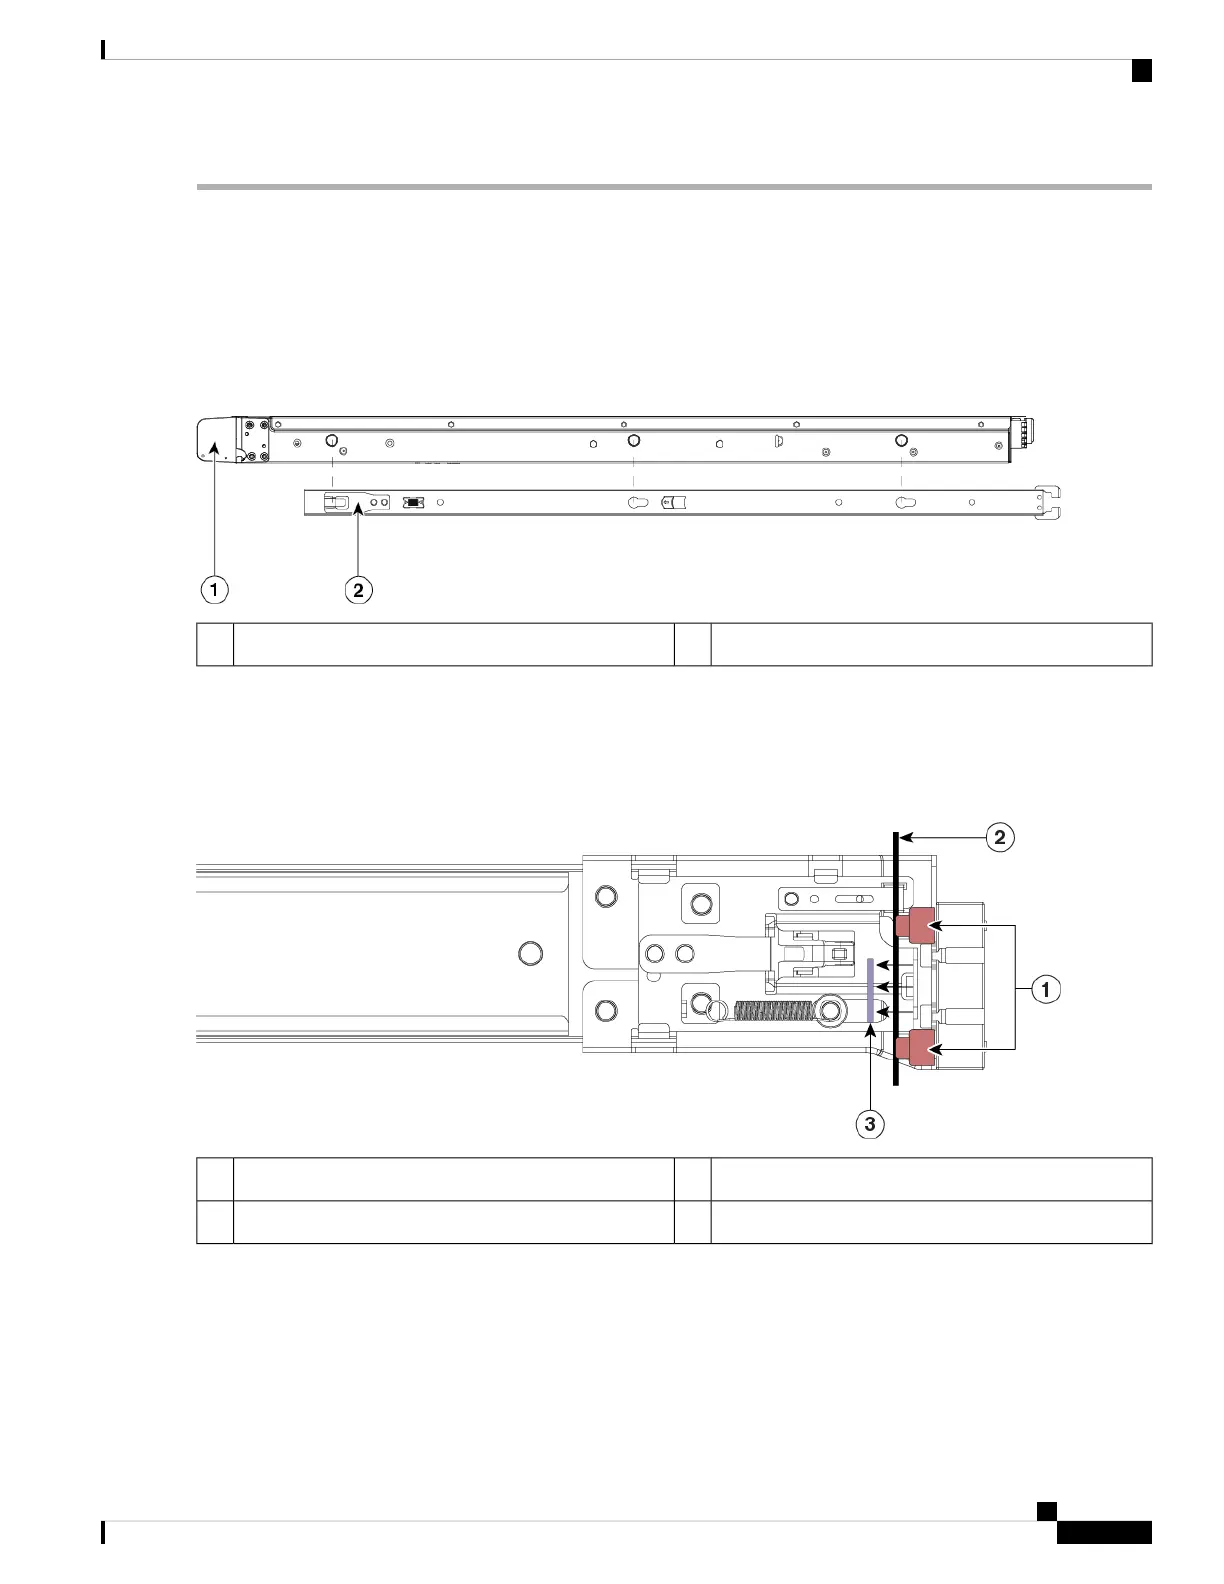
Figure 30: Attach the Inner Rail to Side of Chassis
Locking clip on inner rail2Front of chassis1
Step 2 Open the front securing plate on both slide-rail assemblies. The front end of the slide-rail assembly has a spring-loaded
securing plate that must be open before you can insert the mounting pegs into the rack-post holes.
On the outside of the assembly, push the green arrow button toward the rear to open the securing plate.
Figure 31: Front Securing Mechanism, Inside of Front End
Rack post2Front mounting pegs1
Securing plate shown pulled back to open position3
Step 3 Install the slide rails into the rack:
a) Align one slide-rail assembly front end with the front rack-post holes that you want to use.
The slide rail front end wraps around the outside of the rack post and the mounting pegs enter the rack-post holes
from the outside-front.
The rack post must be between the mounting pegs and the open securing plate.
Note
Cisco Firepower Management Center 1600, 2600, and 4600 Hardware Installation Guide
33
Rack-Mount the Chassis
Rack-Mount the Chassis

 Loading...


