Statement 1046—Installing or Replacing the Unit
To reduce risk of electric shock, when installing or replacing the unit, the ground connection must always
be made first and disconnected last.
Warning
Statement 1073—No User-Serviceable Parts
There are no serviceable parts inside. To avoid risk of electric shock, do not open.
Warning
Step 1 Unplug the power supply cable before removing the power supply module. You cannot disengage the power supply
module release tab without first removing the cable.
Step 2 To remove a power supply module, face the back of the chassis and grasp the handle.
Step 3 Press the release tab toward the left to disengage the power supply. The release tab is found on the right side of the power
supply.
Step 4 Place your other hand under the power supply module to support it while you slide it out of the chassis.
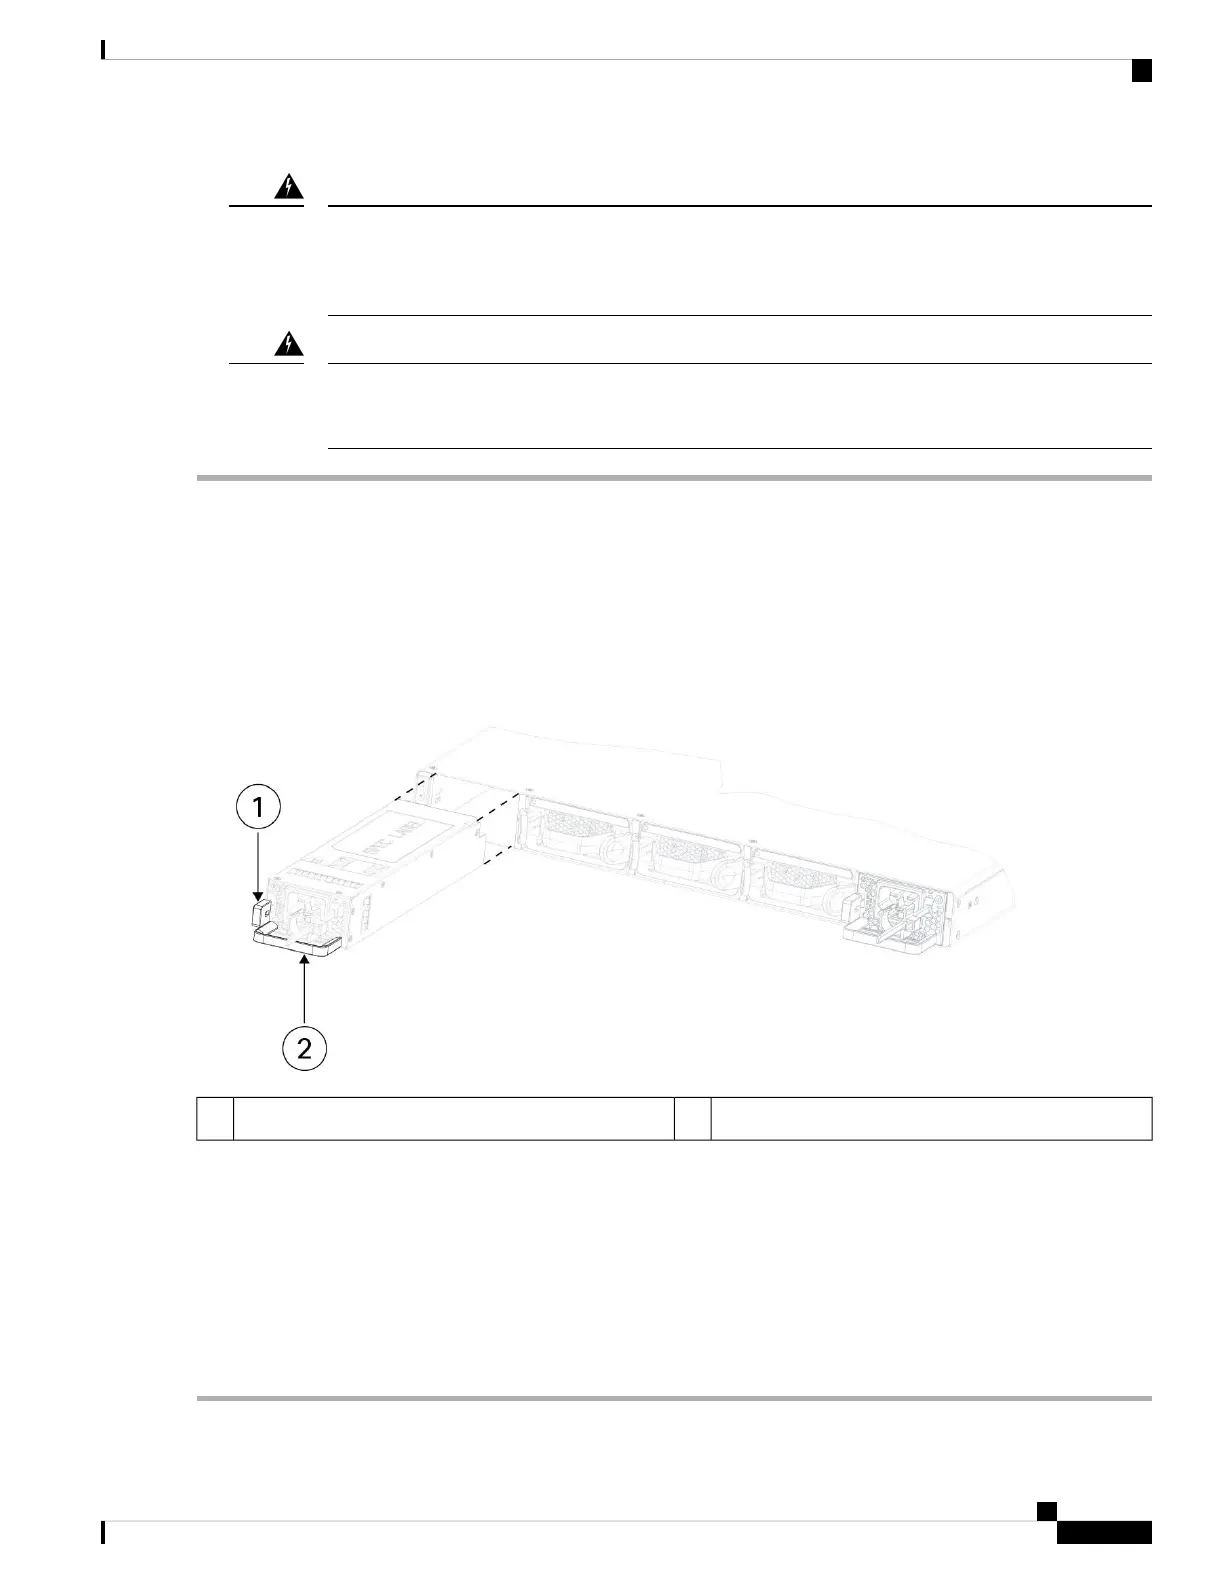
Figure 49: Remove the Power Supply Module
HandleRelease tab1
If the slot is to remain empty, install a blank faceplate to ensure proper airflow and to keep dust out of the chassis;
otherwise, install another power supply module.
Step 5 To replace a power supply module, hold the power supply module with both hands and slide it into the power supply
module bay.
Step 6 Push in the power supply module gently until you hear the release tab engage and the power supply is seated.
Step 7 Plug in the power supply cable.
Step 8 Check the LED on the power supply to make sure the power supply is operative. See Power Supply Module, on page 24
for a description of the LEDs.
Cisco Secure Firewall 3100 Series Hardware Installation Guide
73
Installation, Maintenance, and Upgrade
Remove and Replace the Power Supply Module
 Loading...