Statement 1030—Equipment Installation
Only trained and qualified personnel should be allowed to install, replace, or service this equipment.
Warning
Statement 1073—No User-Serviceable Parts
There are no serviceable parts inside. To avoid risk of electric shock, do not open.
Warning
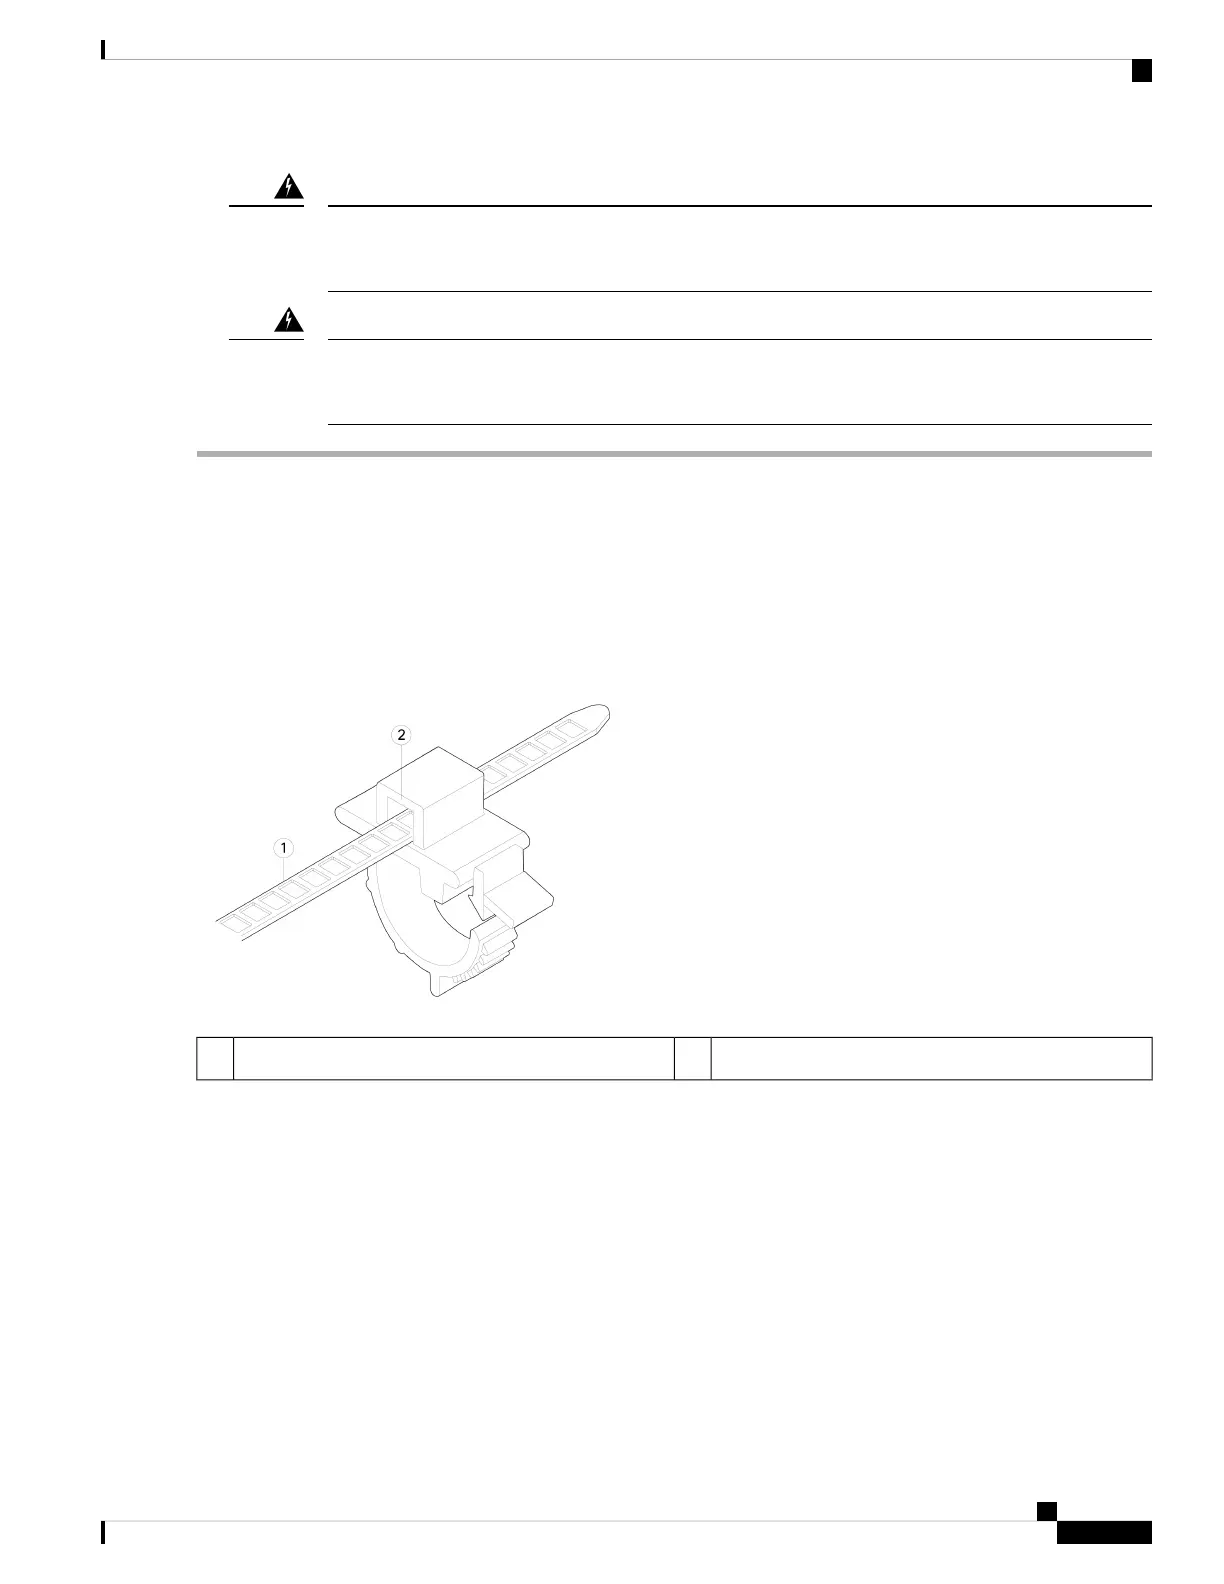
Step 1 Attach the clamp to the tie wrap by holding the clamp with the loop side on the bottom and sliding the tie wrap through
the box-shaped channel above the clamp (see the following figure).
One side of the tie wrap has evenly spaced ridges and the other is smooth. Be sure the ridged side is face up and that you
slide it through the open side of the channel. You hear a click as the tie slides through—it moves in one direction only.
To remove the tie wrap from the clamp, push the lever on the closed side of the box-shaped channel and slide out the tie
wrap.
Figure 53: Tie Wrap Through the Box Channel of the Clamp
Box channel2Tie wrap1
Step 2 Attach the clamp to the power supply module:
a) Locate the hexagonal ventilation hole on the power supply module at the center of the plug just below the power
connector body (see the following figures).
b) Plug the snapping portion of the tie wrap into the hexagonal hole.
c) With the clamp side facing up, push the tie wrap in until it is fully engaged.
Make sure you have the correct location because you cannot remove the tie wrap from the power supply
module once you have installed it without damaging the tie wrap.
Caution
Cisco Secure Firewall 3100 Series Hardware Installation Guide
77
Installation, Maintenance, and Upgrade
Secure the Power Cord on the Power Supply Module
 Loading...