Procedure
Step 1
Mark the location of the mounting screws on the wall. Use the mount hole locations on the back of the controller
for placement of the mounting screws.
Step 2
Use a 0.107-inch (2.7mm) or #32 drill bit to drill a 3/4 inch (19mm) hole for the two mounting screws.
Step 3
Insert two screws into the screw holes and tighten until the top of the screws are 1/8 inch from the wall (leaving
enough room for the back panel to slide onto the screws firmly).
Step 4
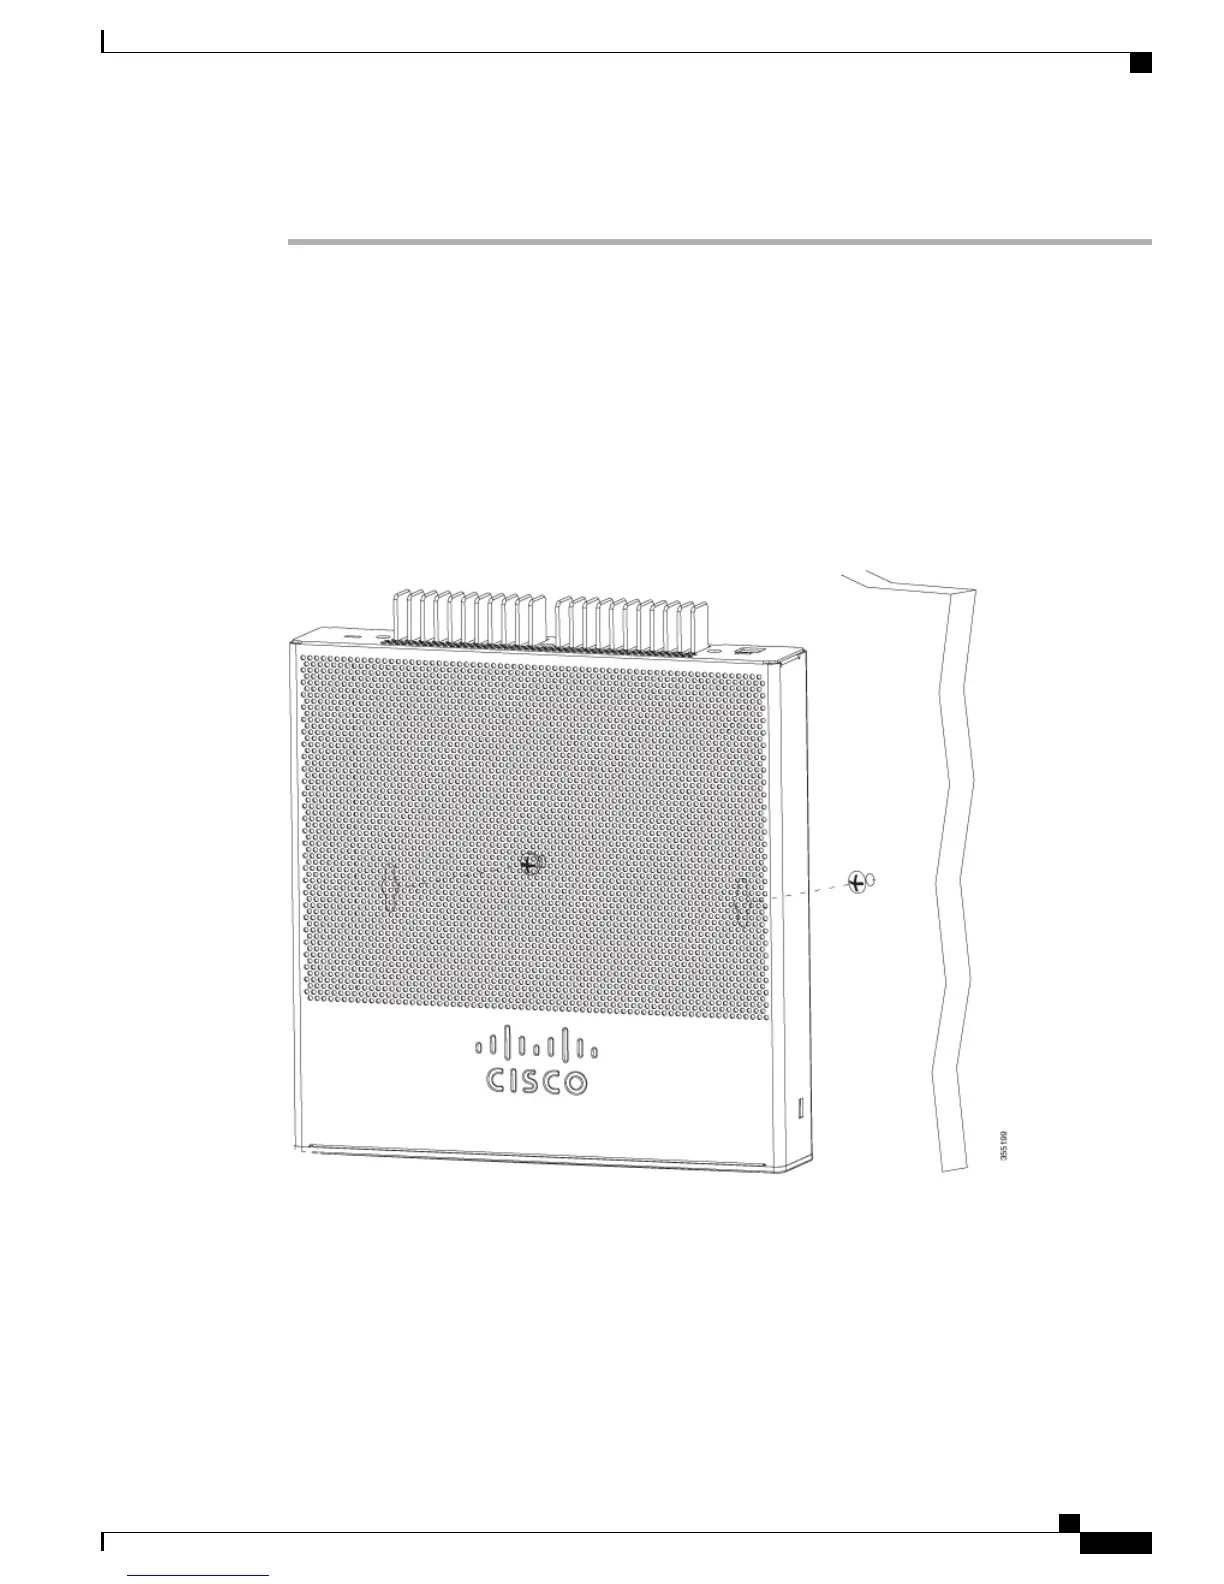
Place the controller onto the mounting screws and slide it down until it lock into place, as shown in figure
below:
The front panel of the controller should be facing
down.
Note
Figure 6: Place the Controller on the Mounting Screws
Step 5
After the controller is mounted on the wall, perform the following tasks to complete the installation
•
Connecting the Controller Console Port
•
Securing the Power Adapter Cable
•
Connecting to the Network
Cisco 3504 Wireless Controller Installation Guide
15
Installing the Cisco 3504 Wireless Controller
Mounting the Controller