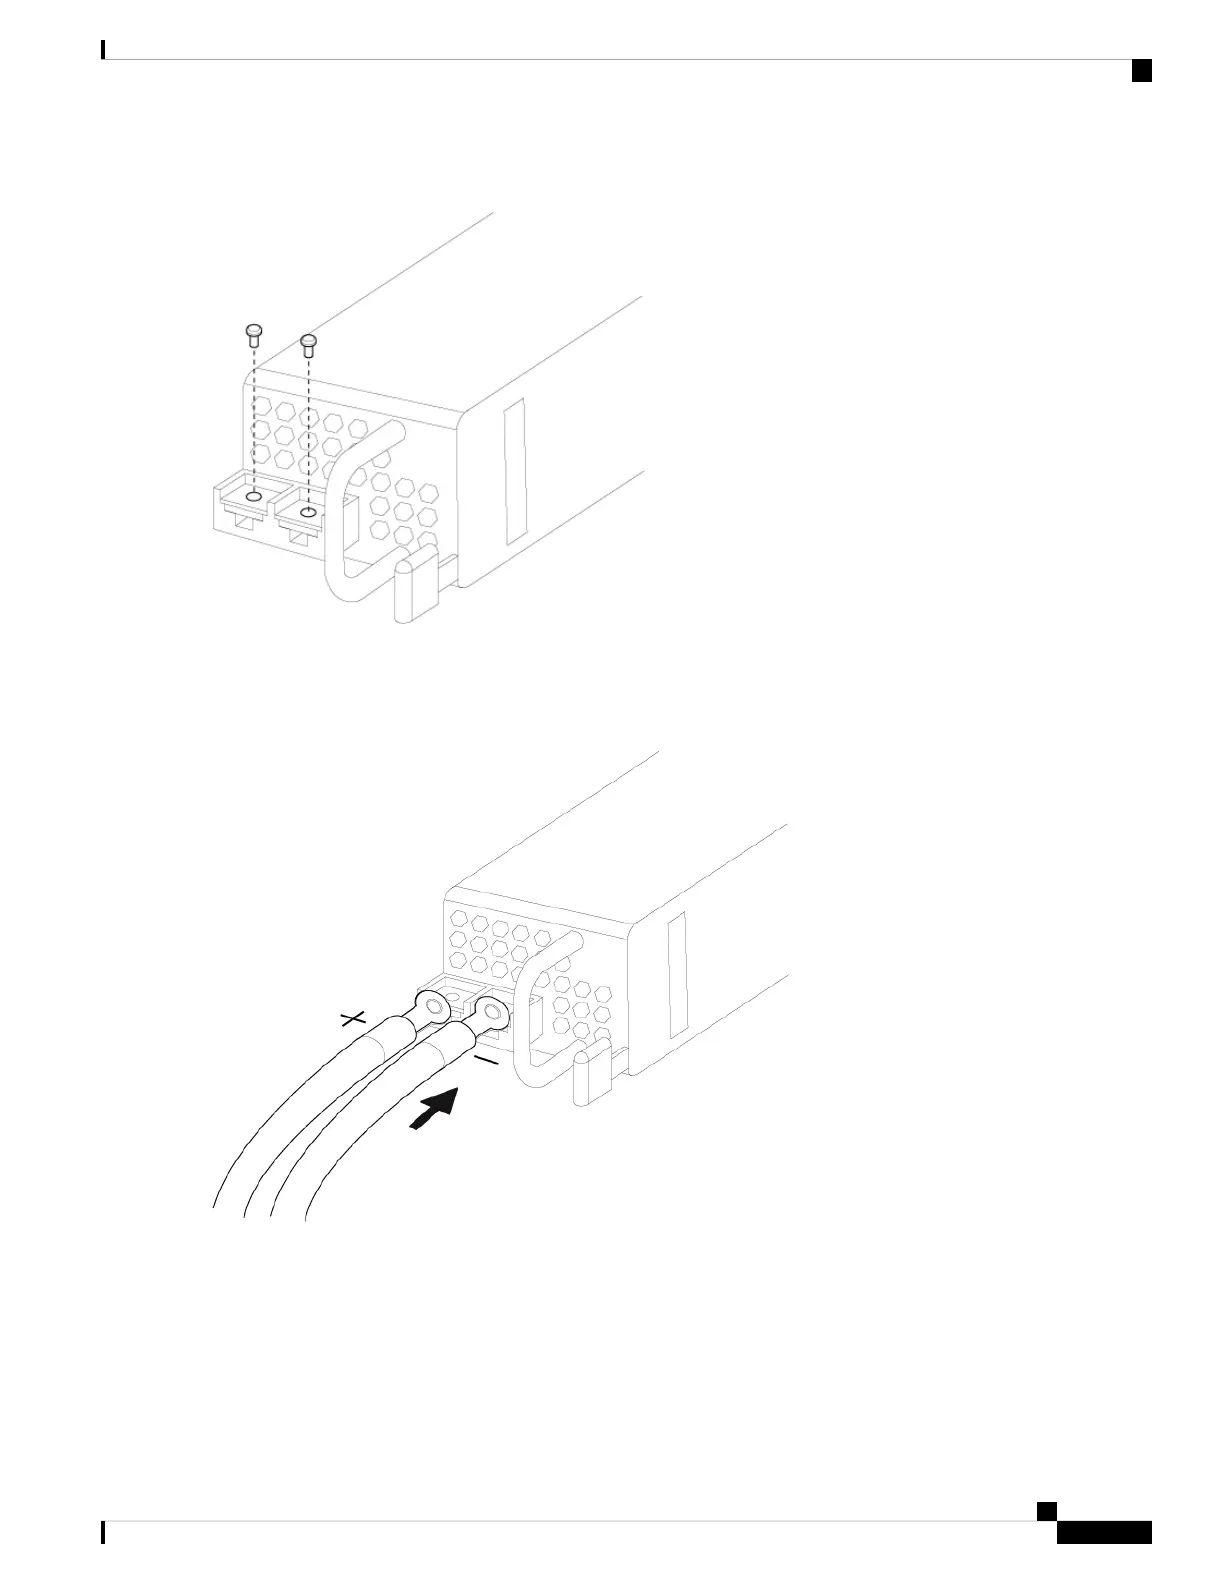
Figure 47: Remove the M5 Screws
Step 7 For easier cable management, insert the negative lead cable first. Replace the grounding lug with the cable in the
following order—wire terminal, then the screw with the captive washer.
Figure 48: Insert the Cables
Step 8 Tighten the M5 screw with the captive washer to the recommended torque of 5 in-lbs for the positive stud and wire.
Secure the wires coming in from the terminal block so that they cannot be disturbed by casual contact.
Cisco Firepower 4112, 4115, 4125, and 4145 Hardware Installation Guide
71
Installation, Maintenance, and Upgrade
Connect the DC Power Supply Module