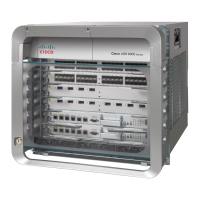
Installing an Interface Module
Before inserting an interface module, make sure that the chassis is grounded.
Caution
Procedure
Step 1 To insert the interface module, carefully align the edges of the interface module between the upper and lower edges of
the router slot.
Step 2 Carefully slide the interface module into the router slot until the interface module makes contact with the backplane.
Step 3 Tighten the locking thumbscrews on both sides of the interface module. The recommended maximum torque is 5.5 in.-lb
(.62 N-m).
Step 4 Connect all the cables to each interface module.
Installing the DC Power Supply Module
This equipment is suitable for installation in Network Telecommunications Facilities and locations where the NEC applies.
This equipment is suitable for installations utilizing the Common Bonding Network (CBN).
The grounding architecture of this product is DC-Isolated (DC-I) for DC-powered products. DC-powered products have a nominal
operating DC voltage of 48 VDC.
Perform the following procedure to install the power supply module:
Procedure
Step 1 Ensure that the system (earth) ground connection has been made. See the following figure.
Step 2 If necessary, remove the blank power supply filler plate from the chassis power supply bay opening by loosening the
captive installation screws.
Step 3 Verify that power to the DC circuit connected to the power supply you are installing is off. To ensure that power has been
removed from the DC circuits, locate the circuit breakers for the DC circuits, switch the circuit breakers to the OFF
position, and tape the circuit-breaker switches in the OFF position.
Step 4 Grasp the power supply handle with one hand. Place your other hand underneath the power supply. Slide the power
supply into the power supply bay. Make sure that the power supply is fully seated in the bay.
Step 5 Tighten the captive installation screws of the power supply. The recommended maximum torque is 5.5 in.-lb (0.62 N-m).
16
 Loading...

