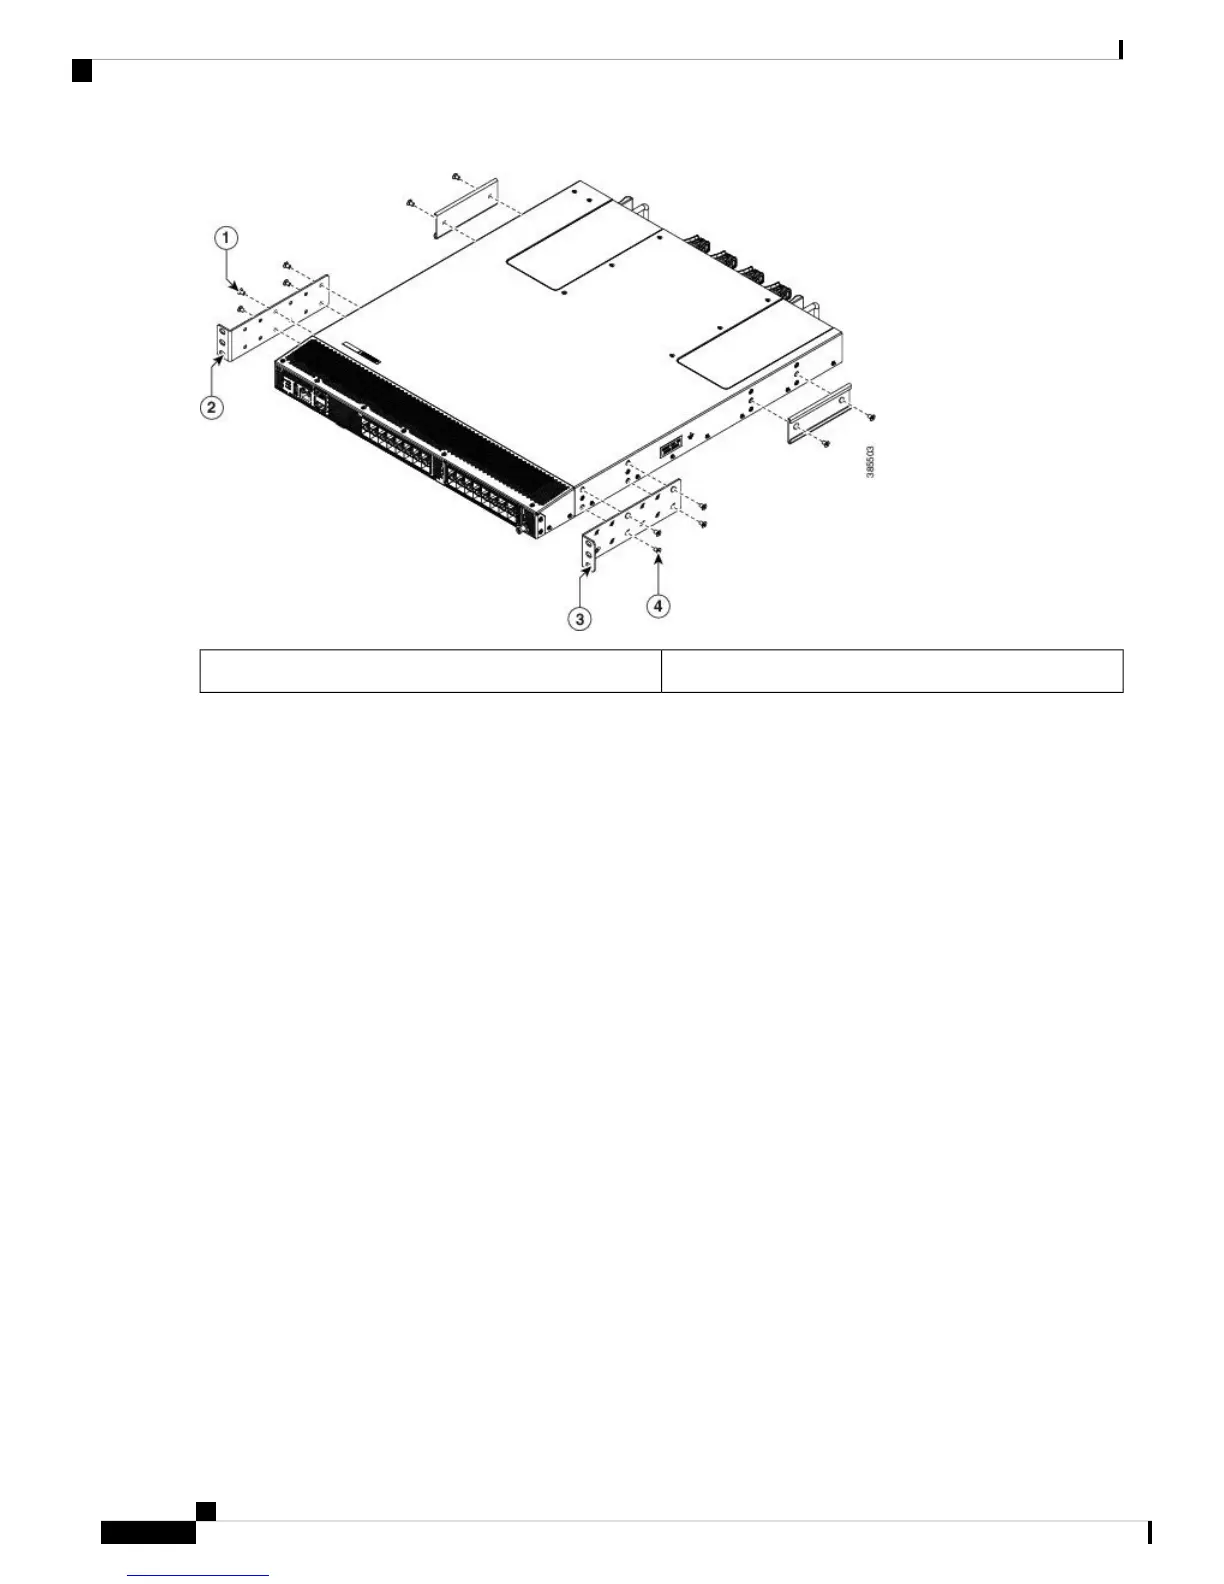
2 & 3. Front rack-mount bracket1 & 4. Four M4 screws
c. Secure the front-mount bracket to the chassis using the four M4 screws and tighten each screw to 12 in-lb (1.36 N·m)
of torque.
d. Repeat Step 1 for the other front rack-mount bracket on the other side of the switch, and be sure to position that
bracket the same distance from the front of the switch.
Step 2 Install the two rear rack-mount brackets on the chassis, as follows:
a. Align the two screw holes on a rear rack-mount bracket to the middle two screw holes in the remaining six screw
holes on a side of the chassis if you are aligning the guide to holes that are near the port connections end of the chassis.
b. Attach the guide to the chassis using two M4 screws. Tighten the screws to 12 in-lb (1.36 N·m) of torque.
c. Repeat Step 2 for the other rear rack-mount bracket on the other side of the switch.
Step 3 If you are not installing the chassis into a grounded rack, you must attach a customer-supplied grounding wire to the
chassis, as explained in Grounding the Switch. However, if you are installing the chassis into a grounded rack, you can
skip this step.
Step 4 Install the slider rails into the rack or cabinet, as follows:
a. Determine which two posts of the rack or cabinet you should use for the slider rails. Of the four vertical posts in the
rack or cabinet, two will be used for the front-mount brackets attached to the easiest-accessed end of the chassis, and
the other two posts will have the slider rails.
b. Position a slider rail at the desired level on the back side of the rack and use two 12-24 screws or two 10-32 screws,
depending on the rack thread type, to attach the posts to the rack. Tighten the 12-24 screws to 30 in-lb (3.39 N·m)
of torque, and tighten the 10-32 screws to 20 in-lb (2.26 N·m) of torque.
c. Repeat Step 3 to attach the other slider rail to the other side of the rack.
To make sure that the slider rails are at the same level, you should use a level tool or tape measure, or carefully count
the screw holes in the vertical mounting posts.
Installing a Cisco MDS 9132T Switch
10
Installing a Cisco MDS 9132T Switch
Installing the Switch in a 4-Post Rack

 Loading...