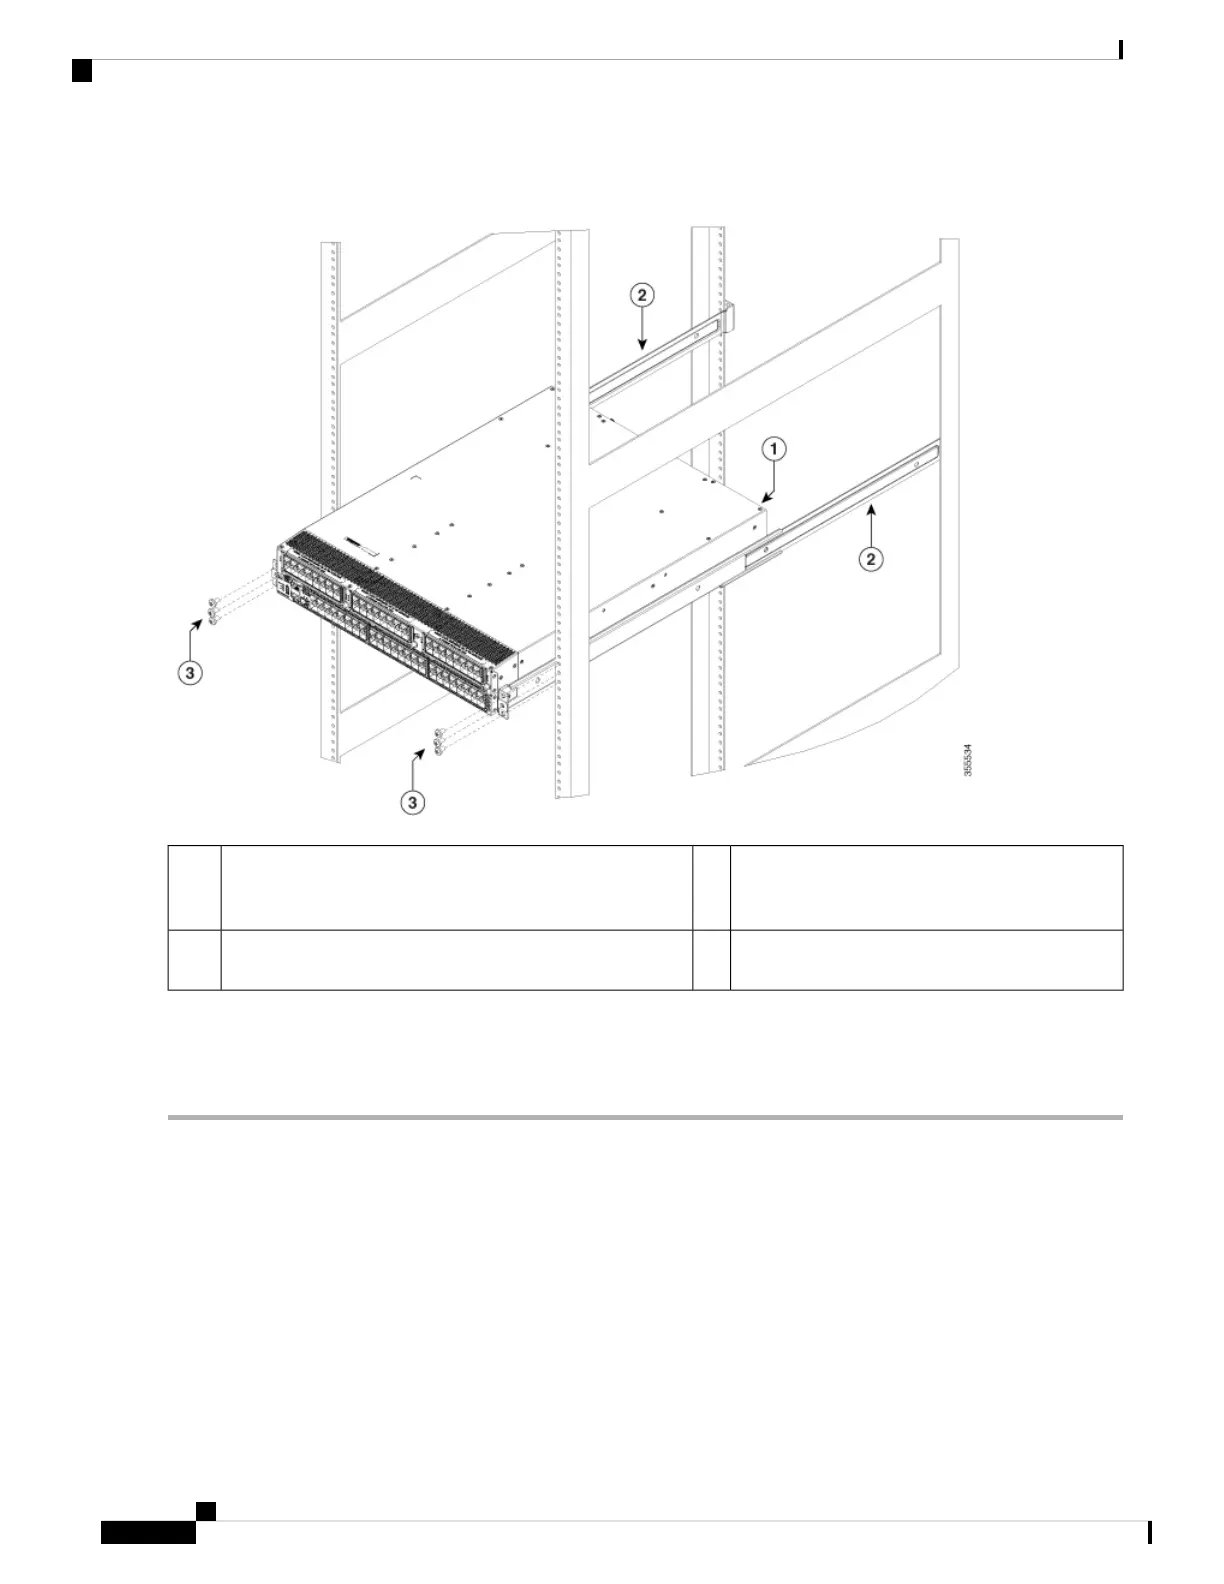
Figure 5: Sliding the Chassis onto the Bottom-Support Rails
Customer-supplied rack-mount screw (M6 x 10
mm screw or other appropriate screw) used to
secure each side of the chassis to the rack.
3Slide the fan-tray end of the chassis onto the
bottom-support rails so that the chassis locks onto the
chassis stops at the end of the rails.
1
Chassis stops for holding the chassis (installed by the hot
aisle)
2
Step 2 Use a customer-supplied rack-mount screw (an M6 x 10 mm screw or other appropriate screw for the rack) to attach each
of the two mounting brackets on the chassis to the rack and tighten each screw to the appropriate torque setting for the
screw (for M6 x 10 mm screws, use 40 in-lb [4.5 N·m] of torque).
Grounding the Switch
The switch is grounded when you connect the chassis and the power supplies to the earth ground in the
following ways:
• You connect the chassis (at its grounding pad) to either the data center ground or to a fully bonded and
grounded rack.
Installing the Cisco MDS 9396T Switch
14
Installing the Cisco MDS 9396T Switch
Grounding the Switch
 Loading...