Installing and Remvoing Components
Hazardous voltage or energy is present on the backplane when the system is operating. Use caution
when servicing. Statement 1034
Warning
During this procedure, wear grounding wrist straps to avoid ESD damage to the switch.
Caution
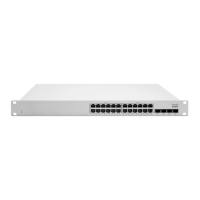
Installing and Removing AC Power Supplies
This section provides instructions for installing and removing the AC power supplies for the Cisco MDS
9396T switch.
Installing Power Supplies
To install a power supply, follow these steps:
Before you begin
• HVAC/HVDC power supplies automatically use the same airflow direction as the installed fan modules.
If the power supply that you are replacing has a different color handle than the replacement power supply,
verify that it has or will have the same airflow direction as the other modules in the switch.
• To implement n+n redundancy, each PSU must be connected to a separate power source. Otherwise,
only one power source is required.
• There must be an earth ground connection to the chassis to which you are installing the replacement
module. Typically, the chassis is grounded by its metal-to-metal connection with a grounded rack. If you
need to ground the chassis, see Grounding the Switch, on page 14.
Step 1 Holding the power supply unit with one hand underneath it and the other hand holding the handle, turn the power supply
so that its release latch is on the right side, and align the back end of the power supply (the end with the electrical
connections) to the open power supply slot. Carefully slide the power supply unit all the way into the slot until it clicks
into place.
If the power supply unit does not fit into the slot opening, turn the unit over and try again.
Note
Step 2 Test the installation by trying to pull the power supply out of the slot without using the release latch.
If the power supply does not move out of place, it is secured in the slot. If the power supply moves, carefully press it all
the way into the slot until it clicks in place.
Step 3 Attach the power cable to the electrical outlet on the front of the power supply.
Step 4 Make sure that the other end of the power cable is attached to the appropriate power source for the power supply. If the
power source has a switch, slide it to the On position.
Installing the Cisco MDS 9396T Switch
16
Installing the Cisco MDS 9396T Switch
Installing and Remvoing Components
 Loading...