Do you have a question about the Cisco Nexus 9348GC-FX3 and is the answer not in the manual?
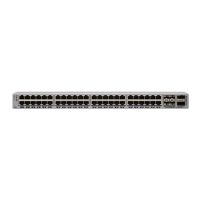
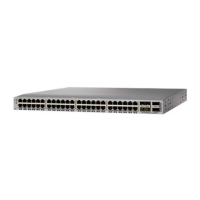
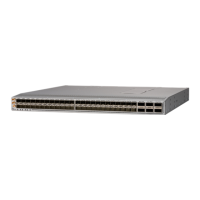
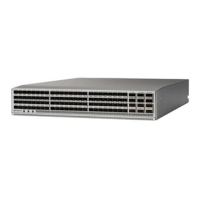
Provides a general overview of the Cisco Nexus 9348GC-FX3 switch, its features, and components.
Specifies the acceptable operating and non-operating temperature ranges for the switch.
Details acceptable relative humidity levels to prevent moisture damage to the switch.
Outlines the maximum altitude rating for the switch's operation.
Advises on maintaining a clean environment to prevent dust contamination and overheating.
Provides guidelines to reduce EMI/RFI effects on the switch and other devices.
States that the switch has undergone shock and vibration testing for operational standards.
Explains the importance of proper grounding for electrical safety and preventing voltage variations.
Defines the types of racks and cabinets suitable for installing the switch.
Details essential safety precautions and warnings for installing the switch equipment.
Describes different rack-mount kit options for installing the switch in various rack depths.
Explains how fan and power supply airflow directions impact cooling and placement.
Provides general guidelines for safe and efficient switch installation.
Guides on how to unpack and inspect the switch for damage or missing components.
Step-by-step instructions for installing the switch using the NXK-ACC-KIT-1RU rack-mount kit.
Detailed procedure for grounding the switch chassis to ensure electrical safety.
Instructions on how to power up and start the switch after installation.
Introduces different types of network connections for the switch.
Details how to establish a local management connection using a console terminal.
Guides on assigning an IP address and performing initial switch configuration.
Instructions for configuring the switch's management port for network access.
Explains how to connect switch interface ports to other network devices.
Procedure for replacing a fan module in the switch while it is operating.
Instructions for replacing a power supply module for redundancy or maintenance.
Describes the types of cabinets and racks suitable for switch installation.
Outlines general requirements for cabinets and racks, including EIA standards.
Specifies requirements for mounting the switch in standard open racks.
Details requirements for perforated cabinets, including perforation percentages.
Provides tips for managing cables to ease routing and access.
Lists environmental specifications including temperature, humidity, and altitude.
Provides the physical dimensions of the switch with different power supply configurations.
Details the weight and quantity of the switch chassis and its modules.
References where to find specifications for transceivers and cables.
Lists typical and maximum power consumption for the switch.
Details specifications for different types of power supply modules.
Specifies available power cables for AC power supplies.
Describes the status, environmental, and port LEDs on the switch chassis.
Explains the status LED on the fan modules.
Details the status indicators for the power supply modules.
Lists and illustrates the contents of the 1-RU rack-mount kit.
| Model | Nexus 9348GC-FX3 |
|---|---|
| Product Series | Nexus 9000 |
| Form Factor | 1RU |
| Operating Temperature | 32°F to 104°F (0°C to 40°C) |
| MAC Address Table Size | 288000 entries |
| Jumbo Frame Support | Up to 9216 bytes |
| Operating System | Cisco NX-OS |
| VLANs | Up to 4096 |
| Jumbo Frames | 9216 bytes |
| Memory | 16 GB |
| Power Supply | Dual AC or DC power supplies |
| Dimensions | 1.72 in x 17.3 in x 22.5 in |
| Weight | 4.5 kg |
| Management | CLI, SNMP |
| Storage | 16 GB |
| Fans | Redundant fans |
| Ports | 48x 1/10/25G SFP28, 6x 40/100G QSFP28 |
| Features | VXLAN, EVPN, QoS, vPC |