If you cannot safely view and access the component, remove the server from the rack.
Caution
c) Remove the top cover from the server as described in Removing the Server Top Cover, on page 28.
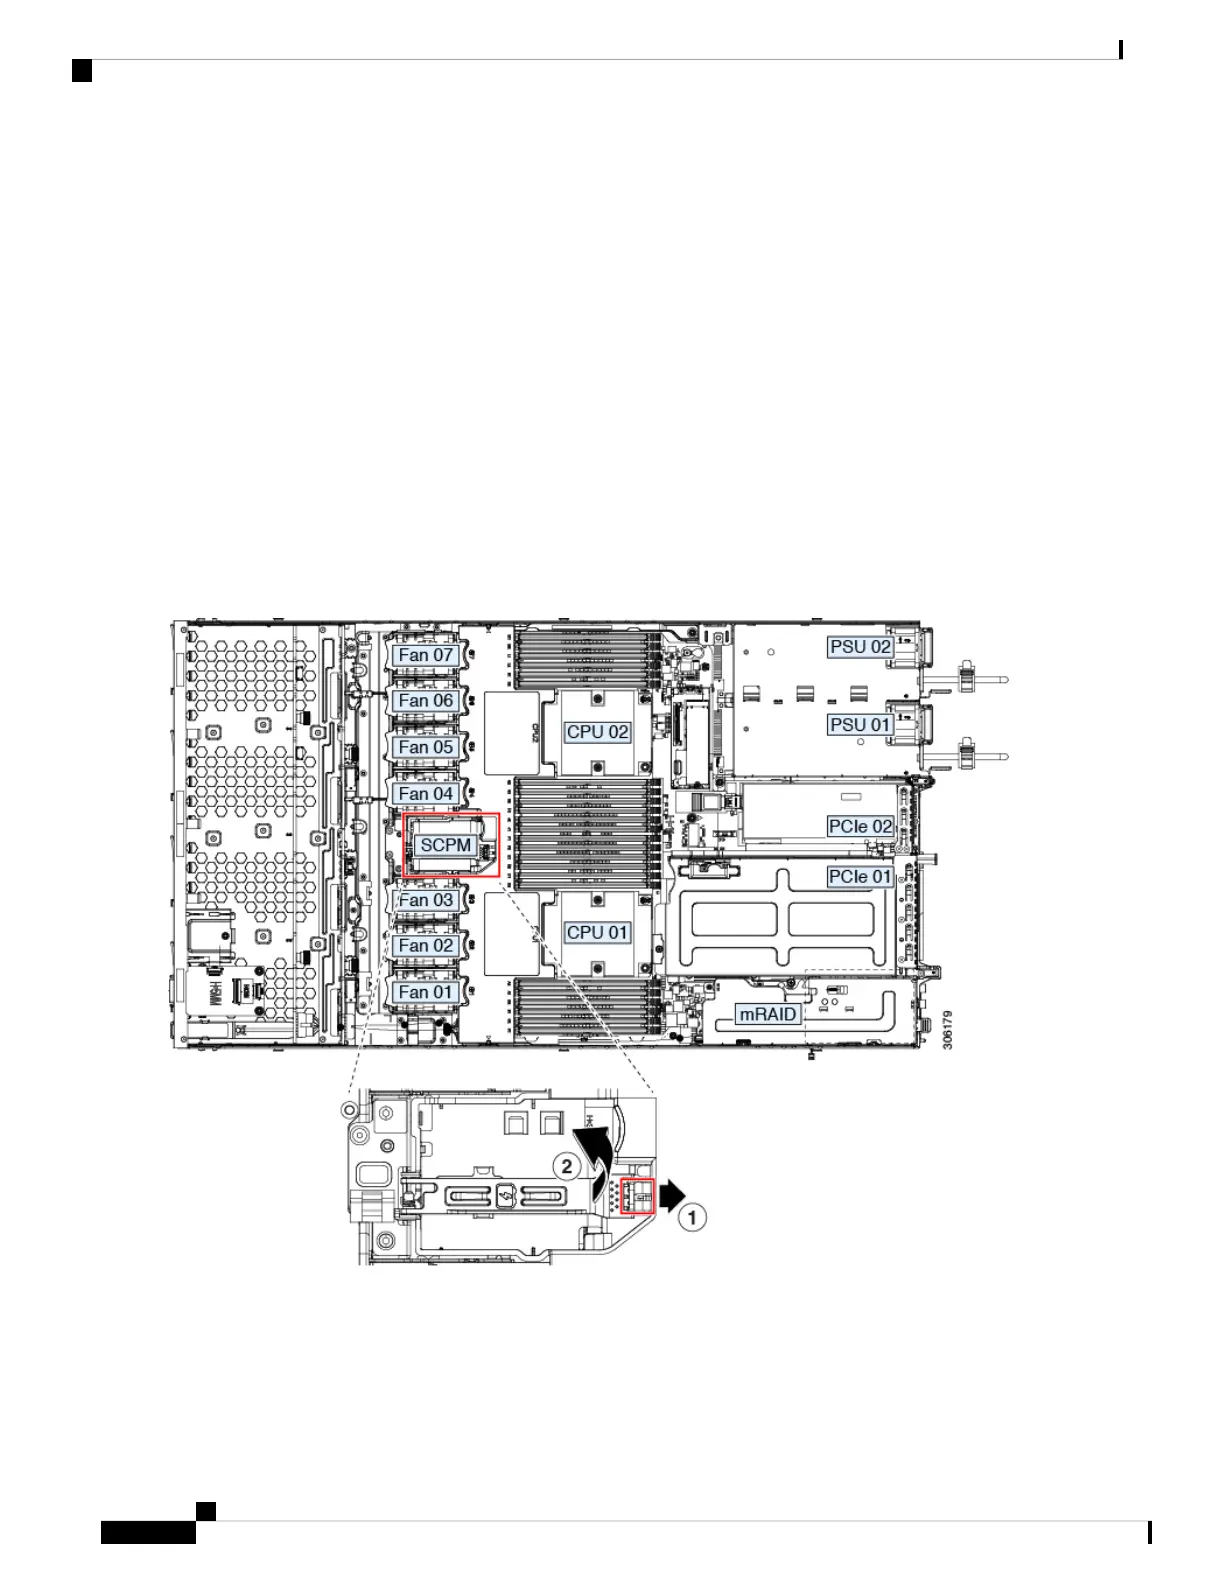
Step 2 Remove an existing supercap:
a) Disconnect the supercap cable from the existing supercap.
b) Push aside the securing tab to open the hinged latch that secures the supercap to its bracket on the removable air
baffle.
c) Lift the supercap free of the bracket and set it aside.
Step 3 Install a new supercap:
a) Set the new supercap into the mounting bracket.
b) Close the hinged plastic clip over the supercap. Push down until the securing tab clicks.
c) Connect the supercap cable from the RAID controller card to the connector on the new supercap cable.
Step 4 Replace the top cover to the server.
Step 5 Replace the server in the rack, replace cables, and then fully power on the server by pressing the Power button.
Figure 42: Replacing Supercap
Cisco Application Services Engine Hardware Installation Guide
74
Maintaining the Server
Replacing the Supercap (RAID Backup)