EasyManuals Logo

Cisco SG220-26 User Manual

Cisco SG220-26
16 pages
To Next Page IconTo Next Page
To Previous Page IconTo Previous Page
Page #7 background imageLoading...
Page #7 background image
Cisco 220 Series Smart Plus Switches Quick Start Guide 7
To mount the non-PoE switch to the wall:
STEP 1 Determine where you want to mount the switch. Verify that the
surface is smooth, flat, dry, and sturdy.
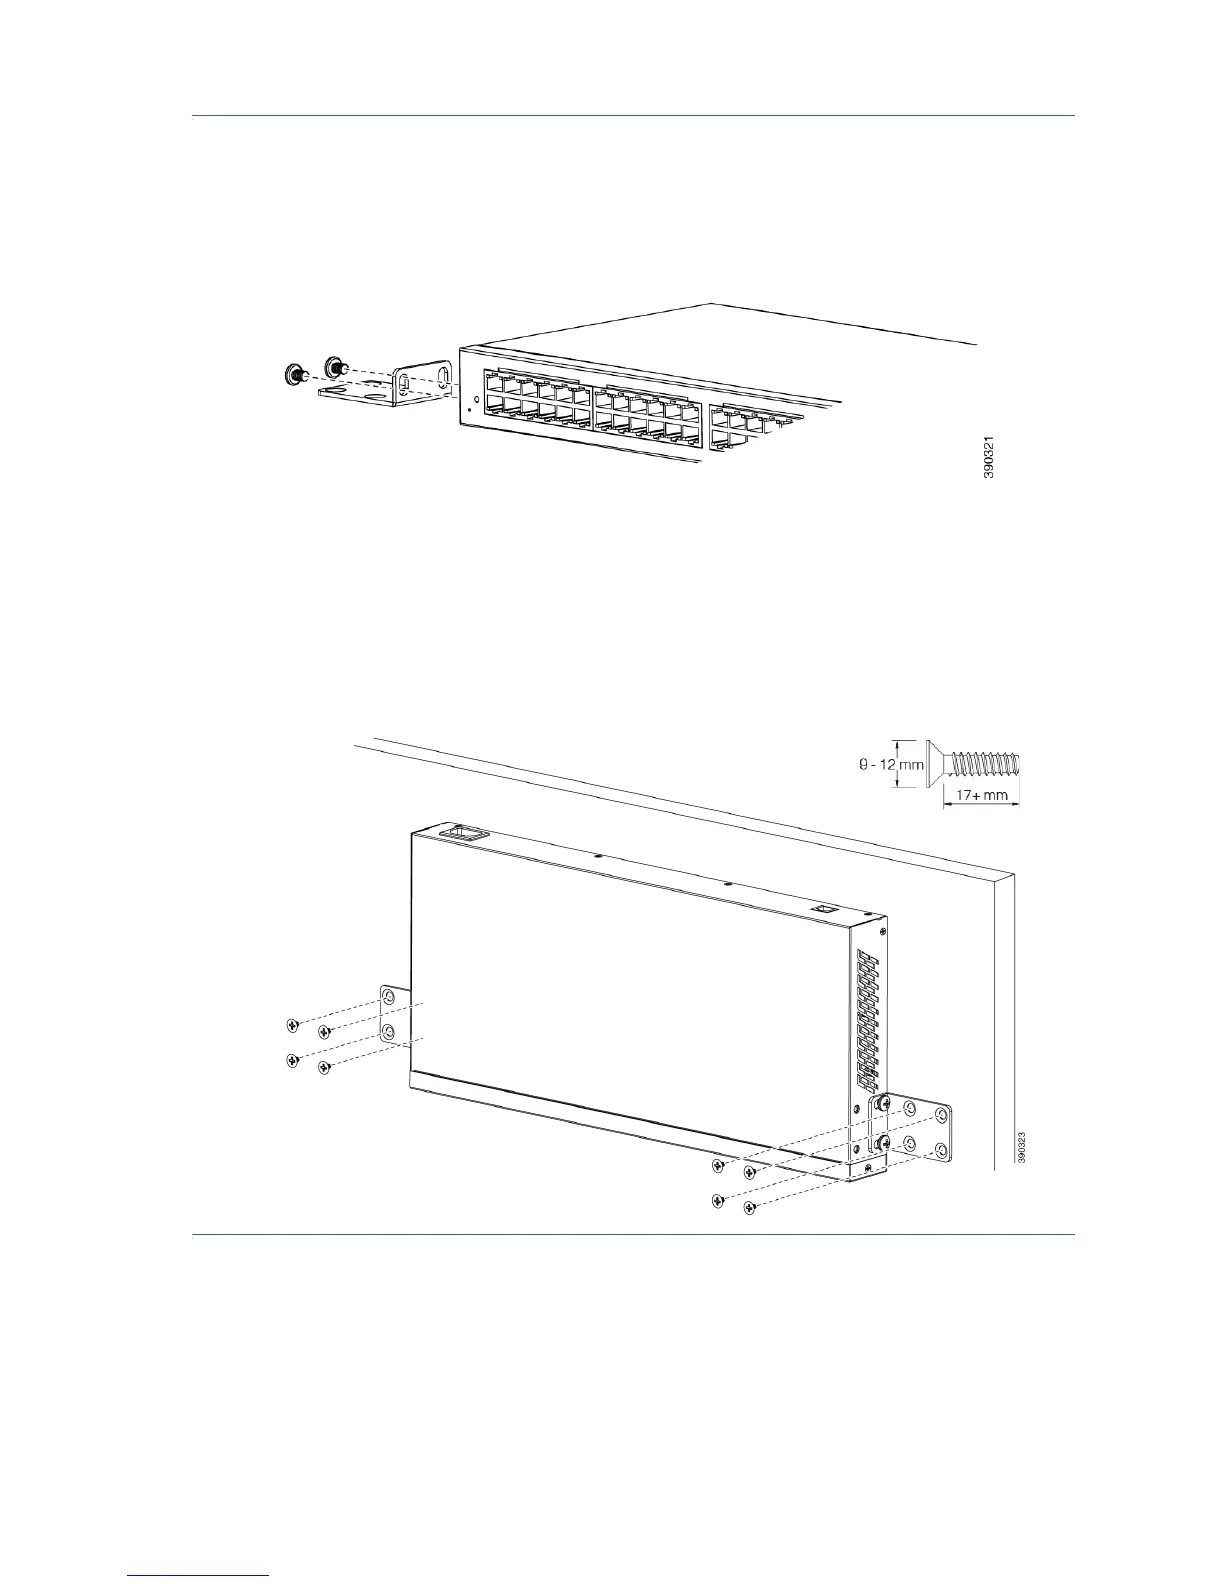
STEP 2 Attach one of the supplied brackets to one side of the switch and
use two pan head M5 screws to secure it.
STEP 3 Repeat the previous step to attach the other bracket to the opposite
side of the switch.
STEP 4 For the best support of the switch and cables, make sure that the
switch is attached securely to wall studs or to a firmly attached
plywood mounting backboard. Mount the switch with the front
panel facing down as shown here.

Other manuals for Cisco SG220-26

Questions and Answers:

Question and Answer IconNeed help?

Do you have a question about the Cisco SG220-26 and is the answer not in the manual?

Cisco SG220-26 Specifications

General IconGeneral
ModelSG220-26
CategorySwitch
Ports24 x 10/100/1000 + 2 x Gigabit SFP
Switching Capacity52 Gbps
Forwarding Rate38.69 Mpps
LayerLayer 2
PoENo
MountingRack-mountable
MAC Address Table Size8K entries
Power SupplyInternal
ManagementWeb-based
Jumbo Frame Support9216 bytes
Operating Temperature0°C to 40°C (32° to 104°F)
Storage Temperature-20°C to 70°C (-4° to 158°F)
Humidity10% to 90%, non-condensing
Standards ComplianceIEEE 802.3, IEEE 802.3u, IEEE 802.3ab, IEEE 802.3z, IEEE 802.3x, IEEE 802.1D, IEEE 802.1Q, IEEE 802.1p

Related product manuals