4 Cisco 550X Series Stackable Managed Switches Quick Start Guide
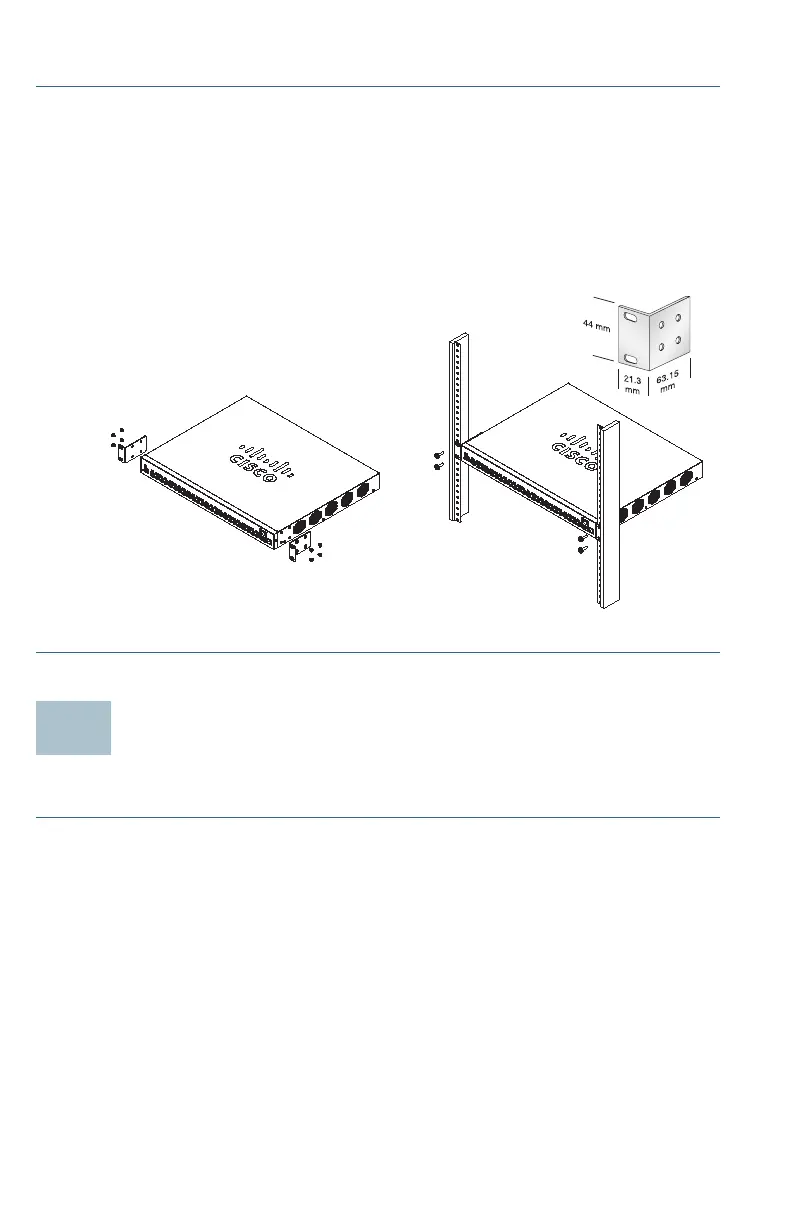
To install the switch into a 19-inch standard chassis:
STEP 1 Place one of the supplied brackets on the side of the switch so the
four holes of the brackets align to the screw holes, and then use the
four supplied M4 screws to secure it.
STEP 2 Repeat the previous step to attach the other bracket to the opposite
side of the switch.
STEP 3 After the brackets are securely attached, the switch is now ready to
be installed into a standard 19-inch rack as shown here.
Connecting Network Devices
To connect the switch to the network:
STEP 1 Connect an Ethernet cable to the Ethernet port of a computer,
printer, network storage, or other network devices.
STEP 2 Connect the other end of the Ethernet cable to one of the
numbered Ethernet ports of the switch. The LED of the port lights if
the device connected is active.
The Ethernet port light turns green when the connection is active.
Refer to Cisco 550X Series Stackable Managed Switches
Features for details about the different ports and LEDs on each
switch.
STEP 3 Repeat Step 1 and Step 2 for each device that you want to
connect to the switch.

 Loading...