3-11
Cisco UCS C22 Server Installation and Service Guide
OL-26646-01
Chapter 3 Maintaining the Server
Installing or Replacing Server Components
Replacing Hard Drives or Solid State Drives
This section includes the following information:
• Drive Population Guidelines, page 3-11
• Drive Replacement Procedure, page 3-11
Drive Population Guidelines
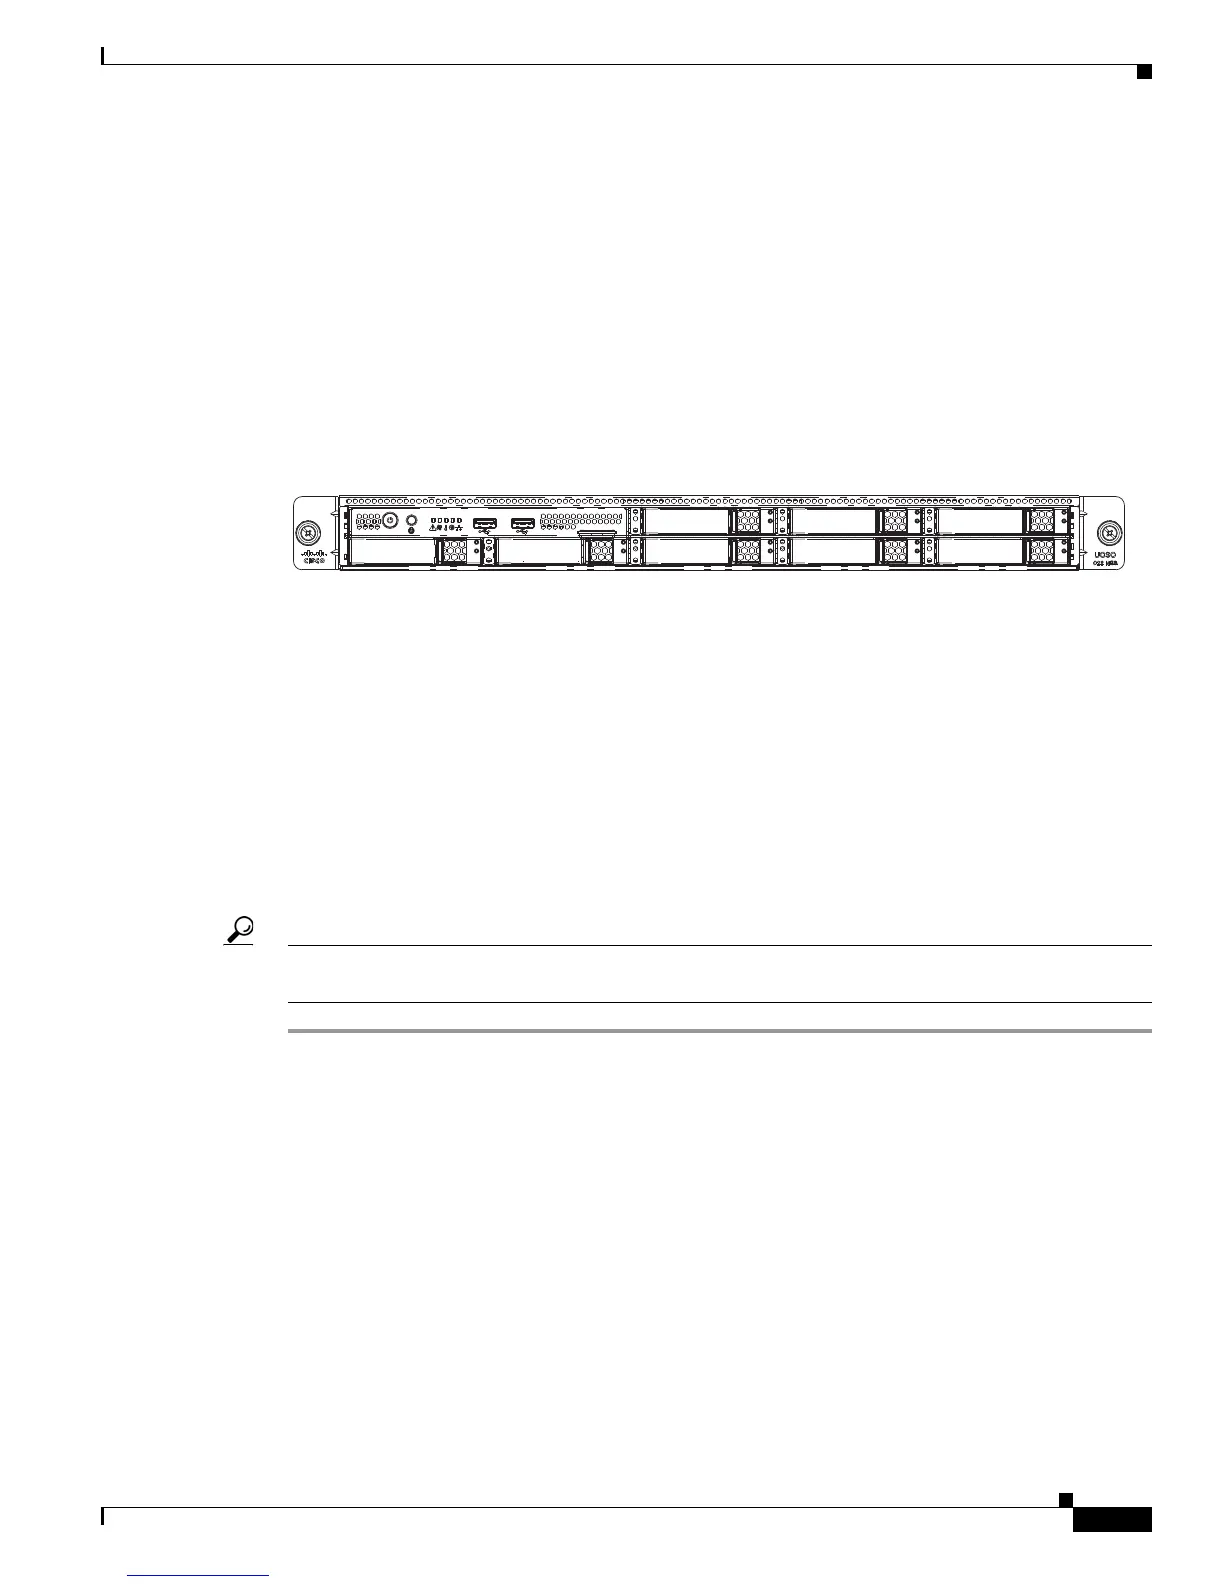
The drive-bay numbering is shown in Figure 3-5.
Figure 3-5 Drive Numbering, Small Form Factor
Observe these drive population guidelines for optimum performance:
• When populating drives, add drives to the lowest-numbered bays first.
• Keep an empty drive blanking tray in any unused bays to ensure proper air flow.
• You can mix hard drives and SSDs in the same server. However, You cannot configure a logical
volume (virtual drive) that contains a mix of hard drives and SSDs. That is, when you create a
logical volume, it must contain all hard drives or all SSDs.
Drive Replacement Procedure
To replace or install a hot-pluggable hard drive, follow these steps:
Tip You do not have to shut down or power off the server to replace hard drives or solid state drives (SSDs)
because they are hot-pluggable.
Step 1 Remove the drive that you are replacing or remove a blank drive tray from the bay:
a. Press the release button on the face of the drive tray. See Figure 3-6.
b. Grasp and open the ejector lever and then pull the drive tray out of the slot.
c. If you are replacing an existing drive, remove the four drive-tray screws that secure the drive to the
tray and then lift the drive out of the tray.
Step 2 Install a new drive:
a. Place a new drive in the empty drive tray and install the four drive-tray screws.
b. With the ejector lever on the drive tray open, insert the drive tray into the empty drive bay.
c. Push the tray into the slot until it touches the backplane, then close the ejector lever to lock the drive
in place.
285203
HDD06
HDD01
HDD07
HDD02
HDD08
HDD03
HDD04
HDD04
HDD05
HDD05