Figure 4: Attaching the Brackets for Wall Mounting
Step 2 Attach the second bracket to the opposite side of the chassis.
Step 3 Orient the chassis to ensure that the back panel with connectors faces sideways.
Vertical orientation of the chassis with the back panel connectors facing up or down is not
recommended.
Note
Step 4 Secure the long legs of the brackets to the wall with fasteners that are appropriate for the material that wall
is made of:
a) To hold the unit in place for easy installation, install a starter screw in the wall, and hook the bracket
keyhole over the screw.
b) Secure both brackets to the wall using the fasteners (not supplied).
To attach the brackets to a wall stud, each bracket requires two #10 wood screws (round-head or
pan-head) with #10 washers, or two #10 washer-head screws. The screws must be long enough to
penetrate at least 3/4 inch (20 mm) into the supporting wood or metal wall stud.
Note
For hollow-wall mounting, each bracket requires two wall anchors with washers. Wall anchors and
washers must be #10.
Note
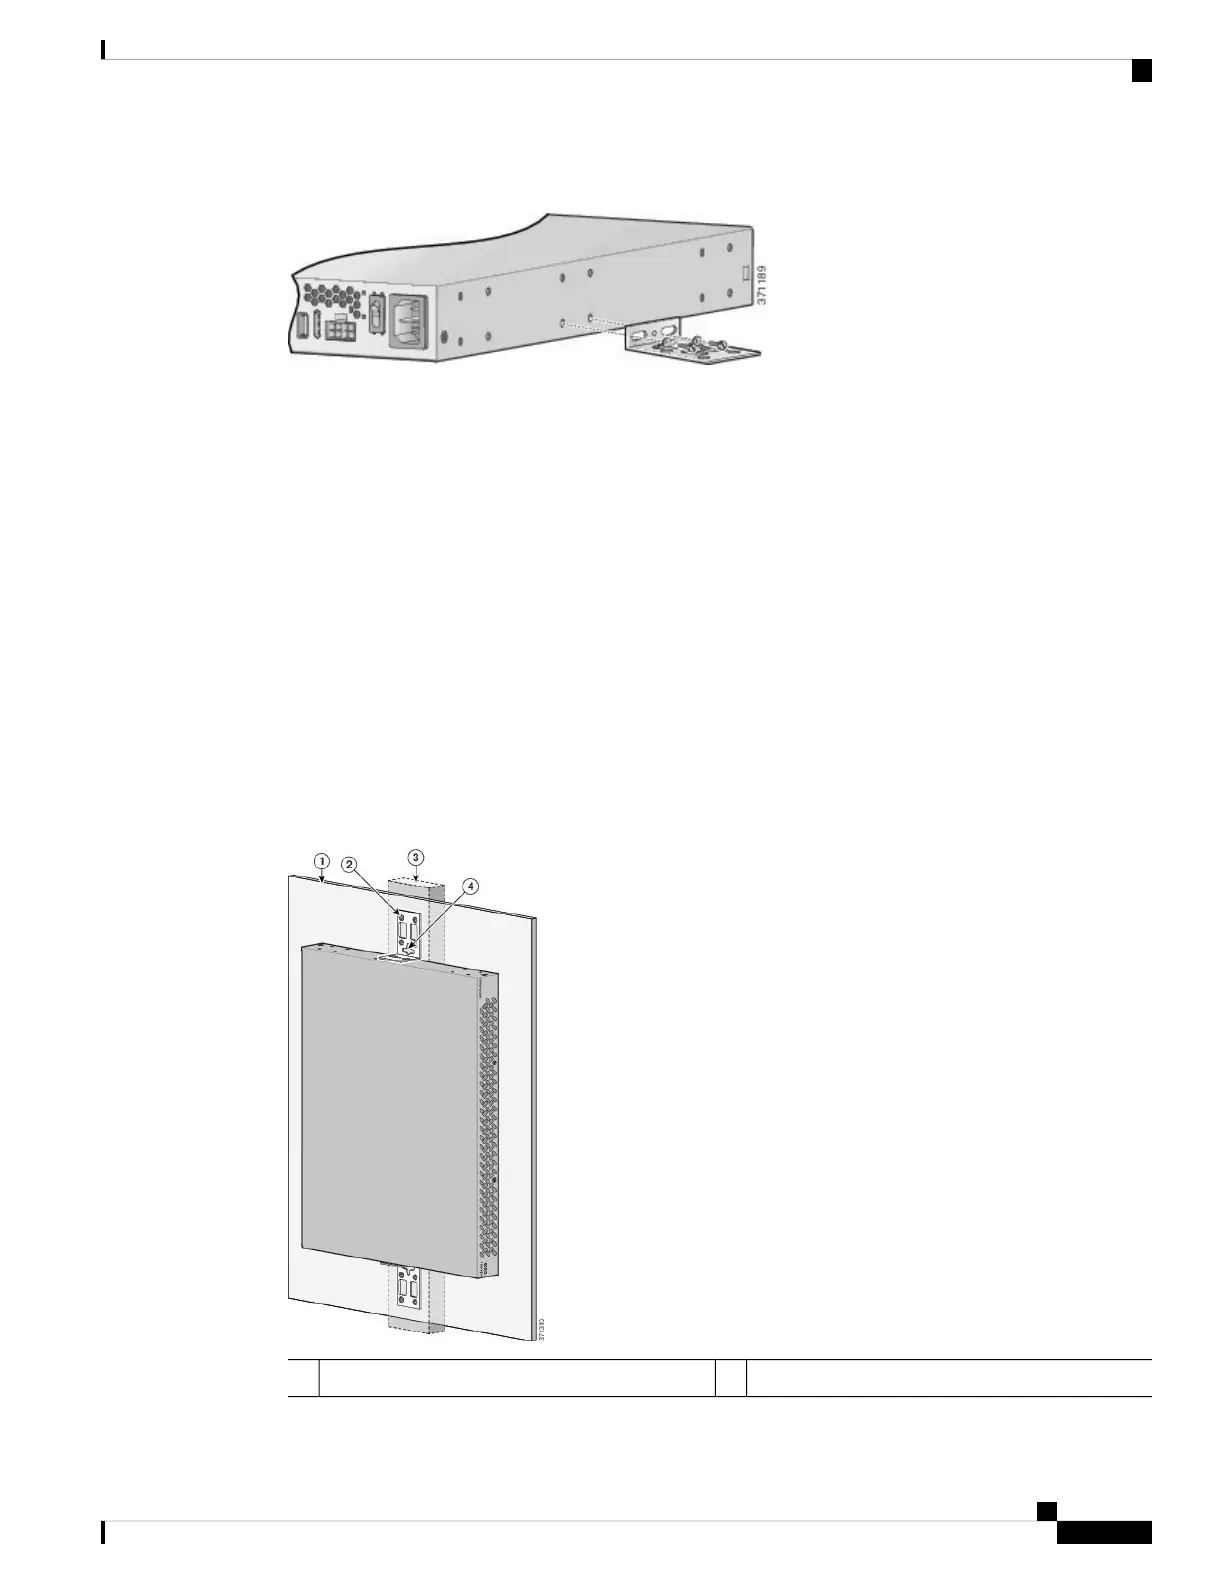
Figure 5: Mounting the Chassis on a Wall
Wall stud3Wall1
Installing the Cisco VG310 and Cisco VG320 Voice Gateways
9
Installing the Cisco VG310 and Cisco VG320 Voice Gateways
Mounting the Chassis on a Wall
 Loading...