You can mount the voice gateway in the following ways:
• Center-front mounting: Brackets attached in the center front of the chassis with only the front panel
facing forward.
• Center-back mounting: Brackets attached in the center back of the chassis with only the back panel facing
forward.
• Front mounting: Brackets attached at the front of the chassis with the front panel facing forward.
• Back mounting: Brackets attached at the back of the chassis with the back panel facing forward.
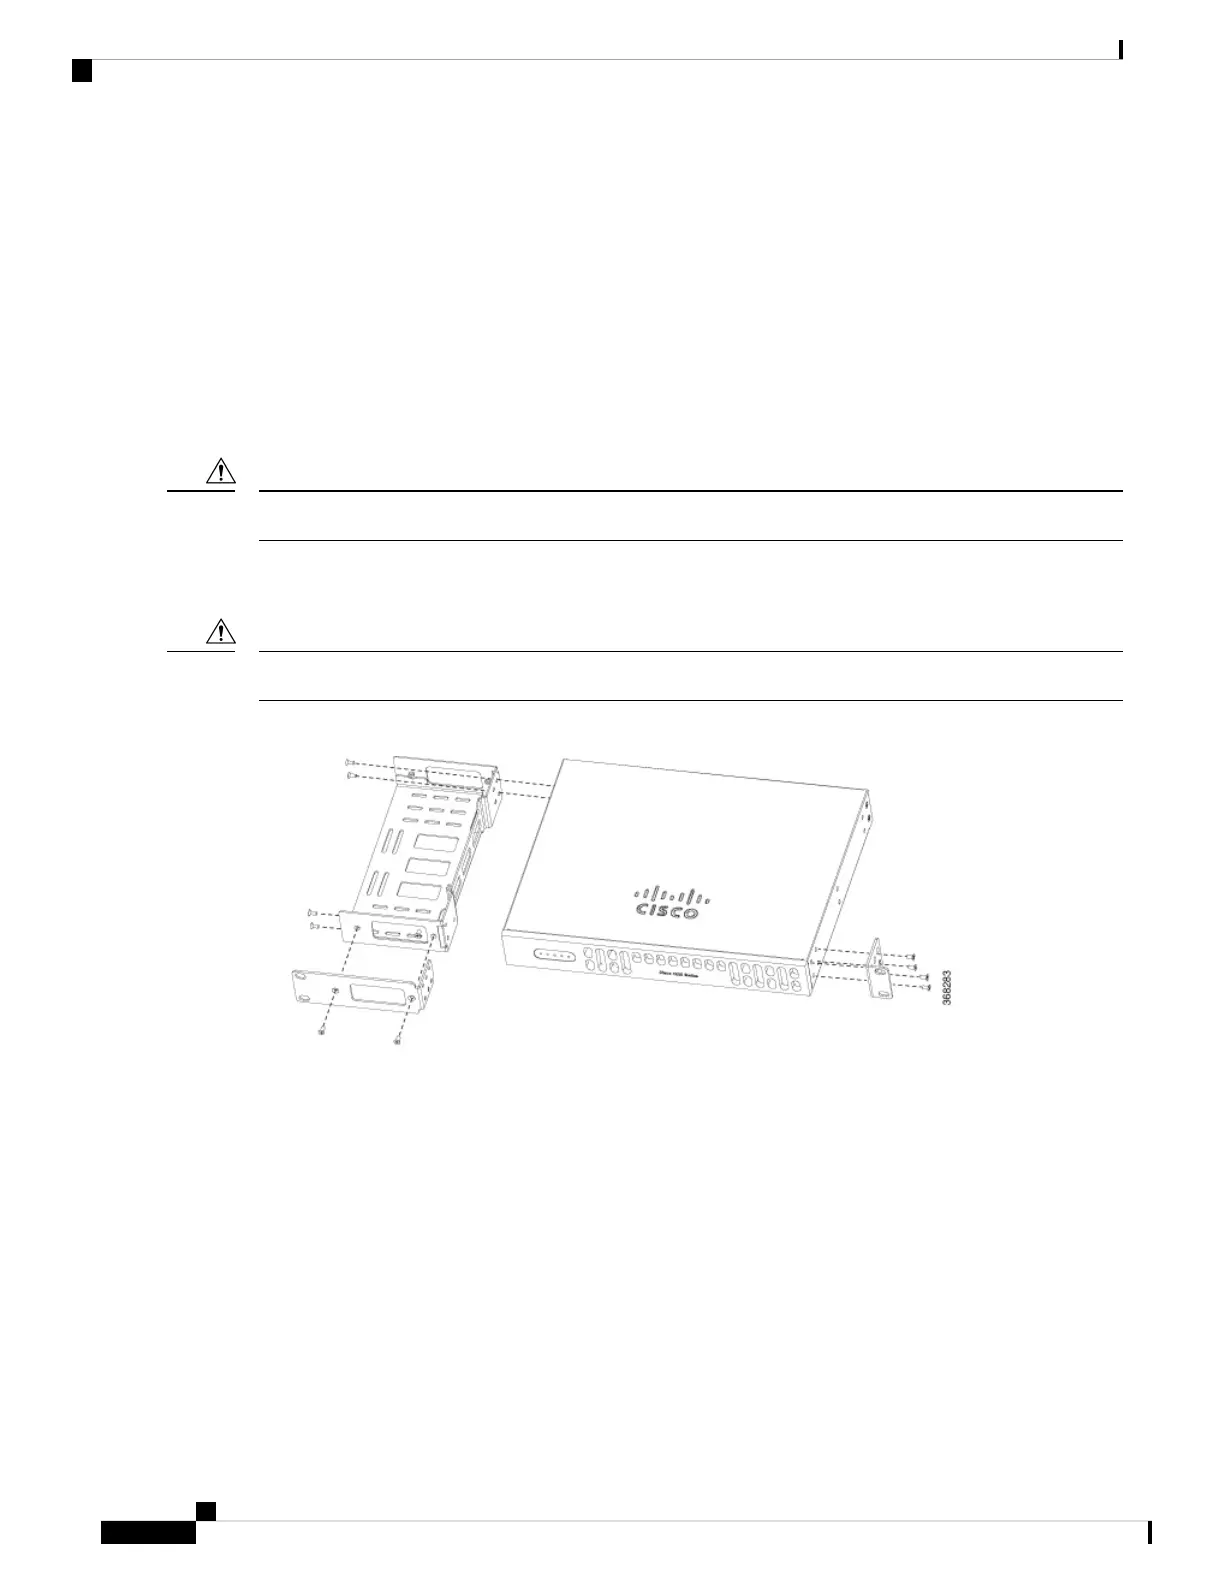
1. Attach the mounting brackets to the chassis as shown in the following images, using the screws provided.
Do not over-torque the screws. The recommended torque is 15 to 18 inch-lb (1.7 to 2.0 N-m).
Caution
2. Attach the second bracket to the opposite side of the chassis. Use a number-2 Phillips screwdriver to
install the number-8 bracket screws.
Your chassis installation must allow unrestricted airflow for chassis cooling.
Caution
Figure 1: Bracket Installation for Front Mounting
Installing the Cisco VG400 Voice Gateway
6
Installing the Cisco VG400 Voice Gateway
Mount Cisco VG400 Voice Gateway Chassis in Rack
 Loading...