EasyManuals Logo

Citizen CLP-521 Technical Manual

Citizen CLP-521
20 pages
To Next Page IconTo Next Page
To Previous Page IconTo Previous Page
Page #13 background imageLoading...
Page #13 background image
Chapter 2 Installation Procedure
CLP-521, CLP-621 & CLP-631 2-4
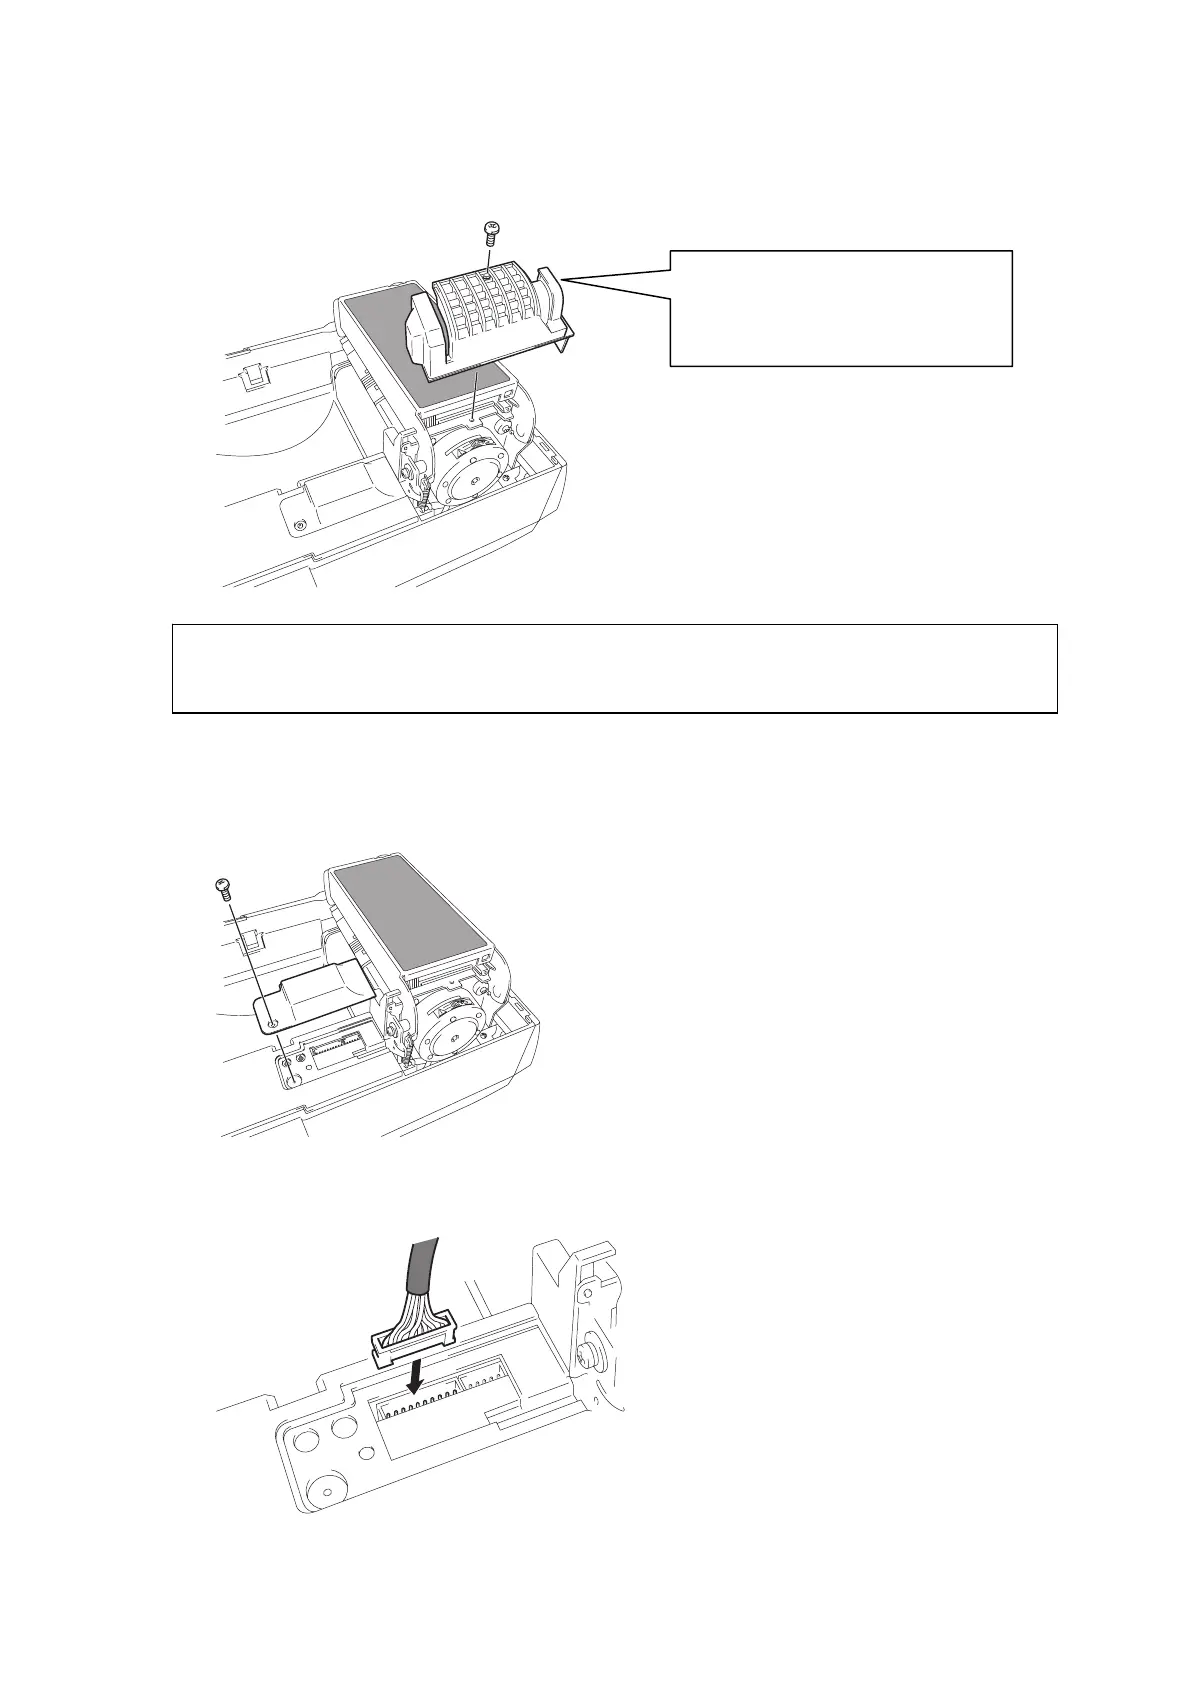
4. Remove the one screw (PH, M3x3) that fastens the Motor Cover, and detach the Motor
Cover.
In this case, pay attention not to drop the screw inside the printer.
Note:
Do not touch the motor as it can get hot.
5. Remove the one screw (PHT(BH2T), M3x14) that fastens the Connector Cover, and detach
the Connector Cover.
6. Connect the cable of Cutter Stand Unit to the connector (CN15) on the Main PCB Unit of
the printer.
In CLP-621 and CLP-631, the
screw is fastened in the
horizontal direction.

Other manuals for Citizen CLP-521

Questions and Answers:

Question and Answer IconNeed help?

Do you have a question about the Citizen CLP-521 and is the answer not in the manual?

Citizen CLP-521 Specifications

General IconGeneral
Print technologyDirect thermal
USB portNo
RS-232 interfaceYes
Optional connectivityEthernet
USB 1.1 ports quantity1
USB 2.0 ports quantity0
Connectivity technologyWired
Power requirements100 - 240V, 50 / 60Hz
Compatible operating systemsWindows 2000/XP
Flash memory2 MB
CertificationUL, C-UL, FCC: class A, CCC, CE Marking
Internal memory8 MB
Number of fonts2
Built-in barcodesPDF417, UPC-A, UPC-E
Built-in processor32 Bit RISC
Mean cycles between failures (MCBF)1000
Core diameter25.4 mm
Media thickness0.0635 - 0.254 mm
Maximum label width104 mm
Maximum label length812 m
Maximum roll diameter127 mm
Supported paper width19.5 - 118 mm
Weight and Dimensions IconWeight and Dimensions
Depth289 mm
Width231 mm
Height186 mm

Related product manuals