19
2.
EXPLANATION OF PRINTER PARTS
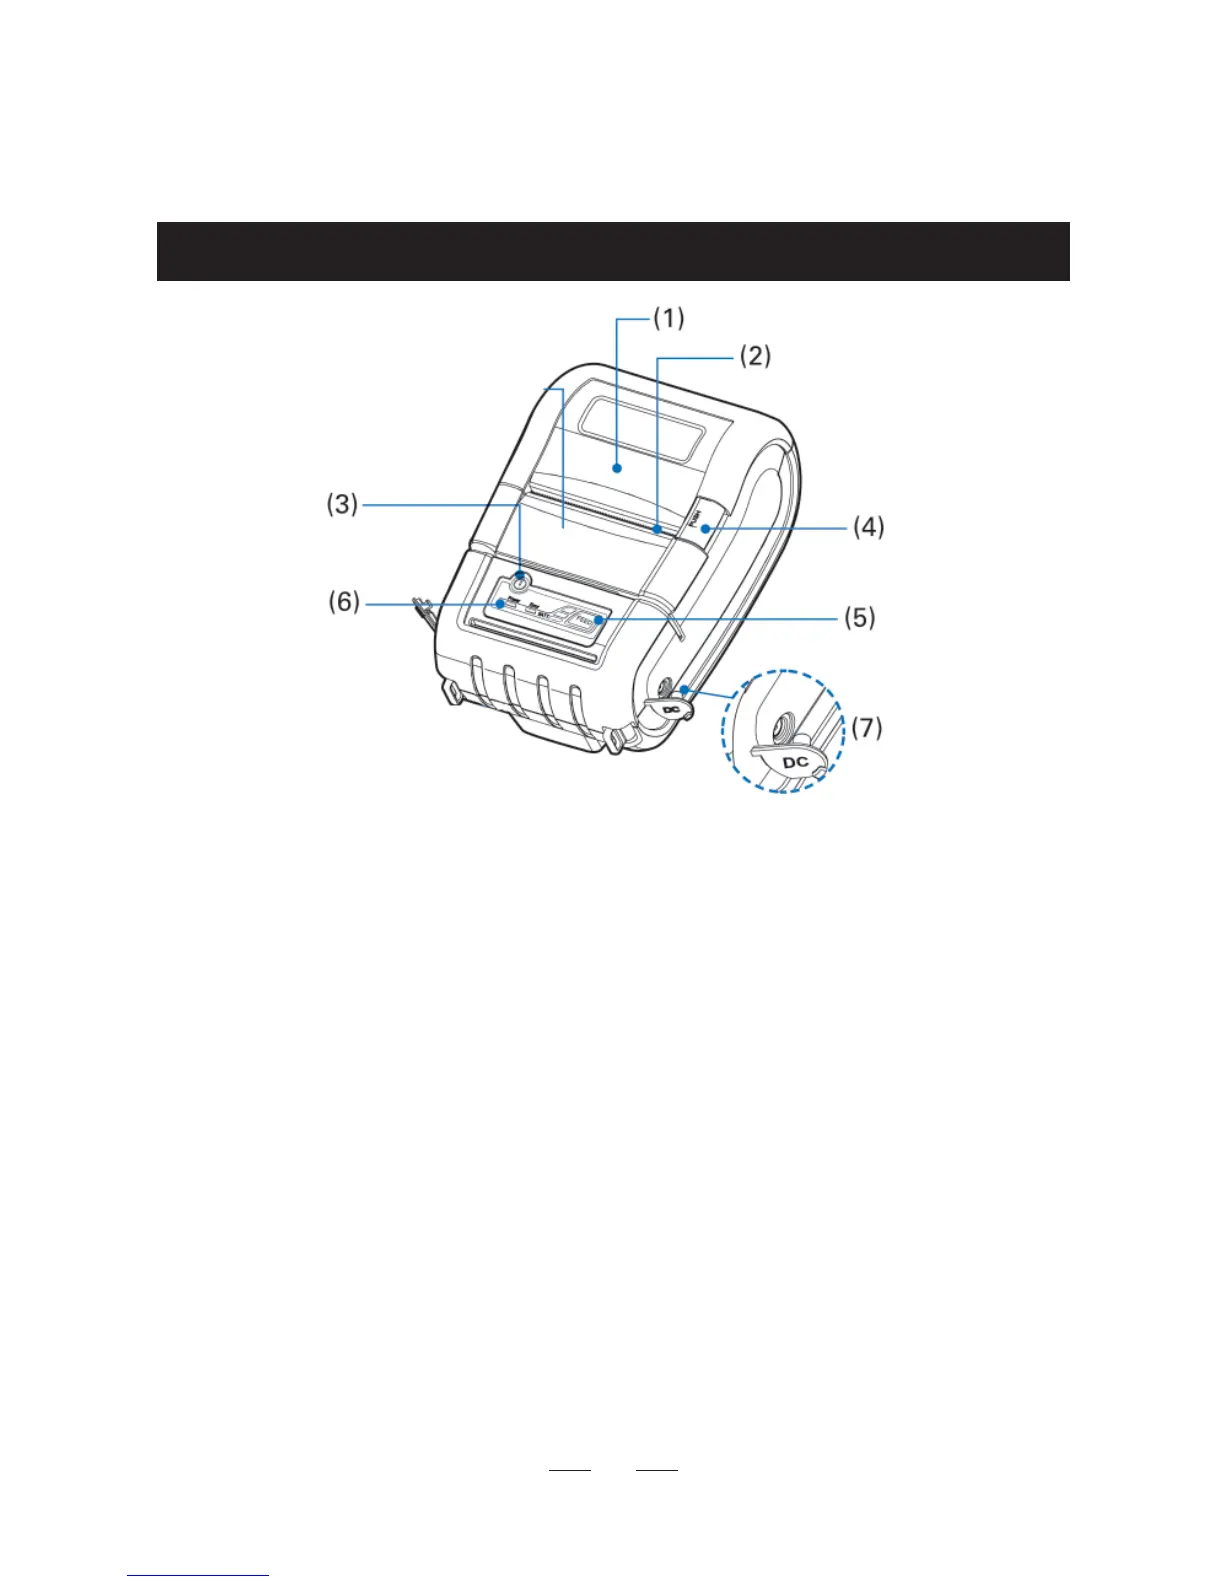
2.1 Printer Appearance
(1) Paper Cover
Set paper roll inside this cover.
(2) Manual Cutter (Tear Bar)
To cut the printed paper, gently pull the paper from the edge of the
paper at the angle so that paper fi rmly contacts the serrated cutter.
(3) Power Button
Press and hold the Power button for approximately 3 seconds to turn
the printer power ON.
To turn OFF the printer, press and hold the Power button until the
Power LED gets off.
(4) Paper Cover Open Button (blue colour)
Press down to open the paper cover for replacing the paper roll.
(5) Paper Feed Button
Press once for 1 line paper feed.
Press down and hold for continuous paper feed to any required length.
(6) Control Panel