23
Practical information
7
The charge level increases slowly as charging
progresses.
When the charge is completed, the instrument
panel switches o.
Disconnection
► Disconnect the charging cable from the
power socket.
► Open the passenger door.
► Store all of the charging cable inside its
housing.
► Close the passenger door.
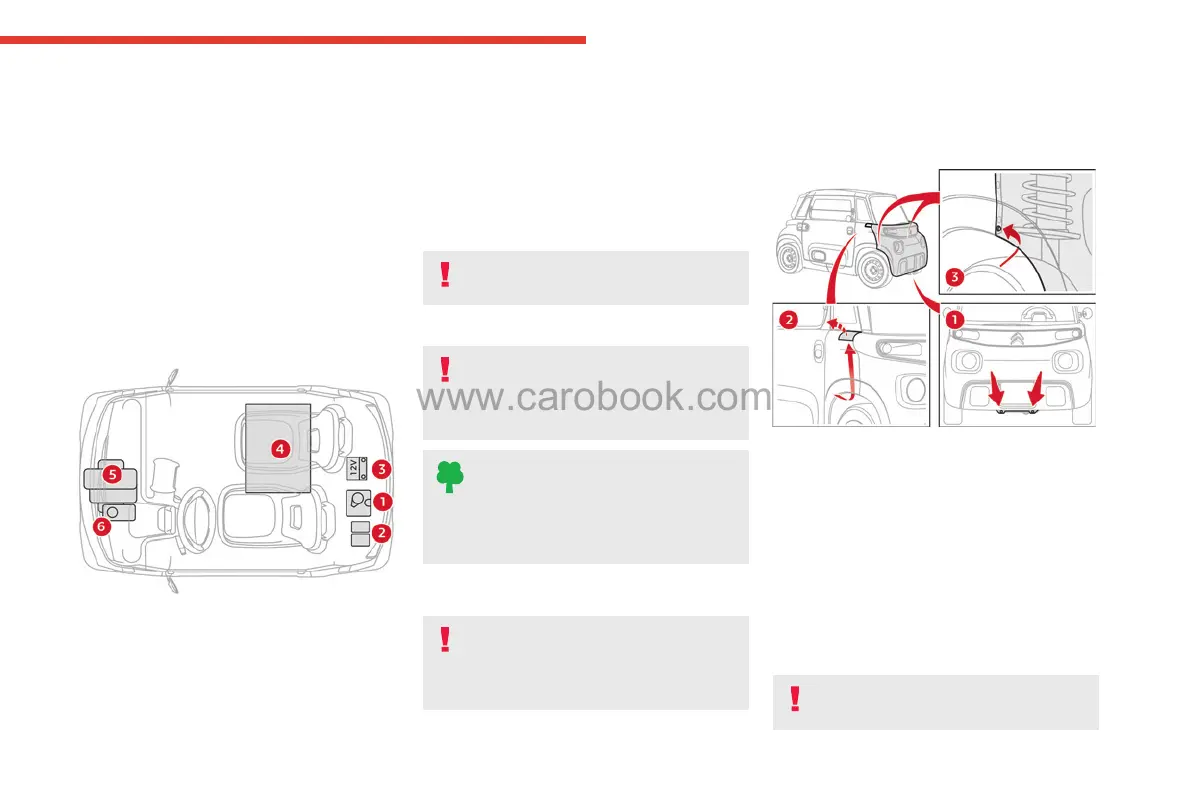
Electric motor
1. Screenwash uid reservoir
2. Fuse box
3. 12 V battery
4. Traction battery/48 V electrical circuit
5. Electric motor
6. Brake uid reservoir
Checking levels
Check all of the following levels regularly in
accordance with the Manufacturer's service
schedule. Top them up if required, unless
otherwise indicated.
If a particular level has dropped signicantly,
have the corresponding circuit checked by a
dealer or qualied workshop.
Fluids must comply with the
Manufacturer's recommendations.
Used products
Avoid prolonged contact of used uids
with the skin.
Most of these uids are harmful to health and
very corrosive.
Do not discard used uids into sewers
or onto the ground.
Drain used uids into the dedicated
containers provided by dealers or qualied
workshops.
Brake uid
Before doing any work
Switch o the ignition, apply the parking
brake, check that the instrument panel is o
and that the charging cable is not connected.
To nd out how often the brake uid should be
replaced, refer to the Manufacturer's servicing
schedule.
Removing front bumper
► Remove the 2 lower xing screws from the
frame.
► Remove the 2 upper access aps from the
wings, pass an arm under the wing and lift it up.
► Remove the 2 upper side xing screws from
the aps.
► Remove the 2 lower side xing screws from
the wheel arches.
► Pull the bumper horizontally for about ten
centimetres until the attachment points come
away.
► Disconnect the indicator wiring looms.
Before topping up, it is necessary to
protect the motor and its connectors in