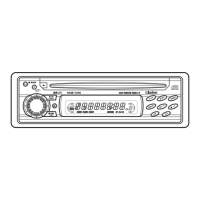
Basic Operations
Audio
Mode Adjustments
1. Press the [A-M] button to select the
adjustment mode. The mode switches as
follows each time the
[A-M] button is pressed:
BASS
~
TREB
~
SAL
~
FAD'"
Previous
mode
*The display returns to the previous mode 7
seconds after the adjustment.
*When the adjustment
is
complete, press the
[A-M] button several times until the function
mode
is
reached.
Note:
• When the Z-Enhancer function is turned
on,
BASS (bass)
and
TREB (treble) cannot be
selected.
•
Adjusting
the
bass (BASS)
2. Turning the [ROTARY] knob clockwise
emphasizes the bass; turning it
counterclockwise attenuates the bass.
*The factory default setting
is
"0".
(Adjustment
range:
-7
to +7)
•
Adjusting
the
treble (TREB)
2. Turning the [ROTARY] knob clockwise
emphasizes the treble; turning it
counterclockwise attenuates the treble.
*The factory default setting is
"0".
(Adjustment
range:
-7
to +7)
•
Adjusting
the
balance (BAL)
2. Turning the [ROTARY] knob clockwise
emphasizes the sound from the right
speaker; turning it counterclockwise
emphasizes the sound from the left speaker.
*The factory default setting
is
"0".
(Adjustment
range: L13 to
R13)
•
Adjusting
the
fader (FAD)
2. Turning the [ROTARY] knob clockwise
emphasizes the sound from the front
speakers; turning it counterclockwise
emphasizes the sound from the rear speakers.
*The factory default setting
is
"0".
(Adjustment
range: F12 to R12)
• When
the
adjustment
is complete
3.
Press the [A-M] button several times until the
function
mode
is reached.
Illumination dimmer function
When the illumination line of this unit is connected
with the car-side illumination signal line, the
display illumination of this unit dims
in
connection
with turning on the car-side illumination.
12
DB455MC
Radio Operations
Listening to the radio
1.
Press the [SRC] button and select the radio
mode.
The
frequency appears in the display.
2. Press the
[BND] button and select the radio
band. Each time the button is pressed, the
radio reception band changes in the
following order:
FM1
~
FM2
~
FM3
~
AM
~
FM1
...
3.
Press the
[<~]
or
[~>]
button to tune in the
desired station.
Tuning
There are 3 types of tuning mode available, seek
tuning, manual tuning and preset tuning.
Seek
tuning
1.
Press the [BND] button and select the
desired band (FM
or
AM).
*
If
"MANU"
is
lit
in
the display, press and hold
the [BND] button for 1 second or longer.
"MANU"
in
the display goes off and seek
tuning
is
now available.
2.
Press the
[<~]
or
[~>]
button to
automatically seek a station.
When the
[~>]
button is pressed, the station is
sought
in
the direction of higher frequencies; if
the
[<~]
button is pressed, the station
is
sought
in
the direction of lower frequencies.
Manual
tuning
There are 2 ways available: Quick tuning and
step tuning.
When you are in the step tuning mode, the
frequency changes one step at a time. In the
quick tuning mode, you can quickly
tun~
the
desired frequency.
1.
Press the [BND] button and select the
desired band (FM
or
AM).
* If "MANU"
is
not lit
in
the display, press and
hold the [BND] button for 1 second or longer.
"MANU" is lit
in
the display and manual tuning
is
now available.
2. Tune into a station.
.Quick
tuning:
Press and hold the
[<~]
or
[~>]
button for 1
second
or
longer to tune in a station.
.Step
tuning:
Press the
[<~]
or
[~>]
button to manually
tune in a station.