17
IMPORTANT!
If you are changing the size of wire, you must also select the appropriate
groove on the feed roller. See p. 19
Pull out the end of the wire
from the rim of the spool,
taking care NOT to release it.
The spool is wound firmly and
should remain this way.
Ensuring the wire is straight
and not kinked in any way,
clip off the end cleanly,
ensuring there are no burrs or
sharp edges.
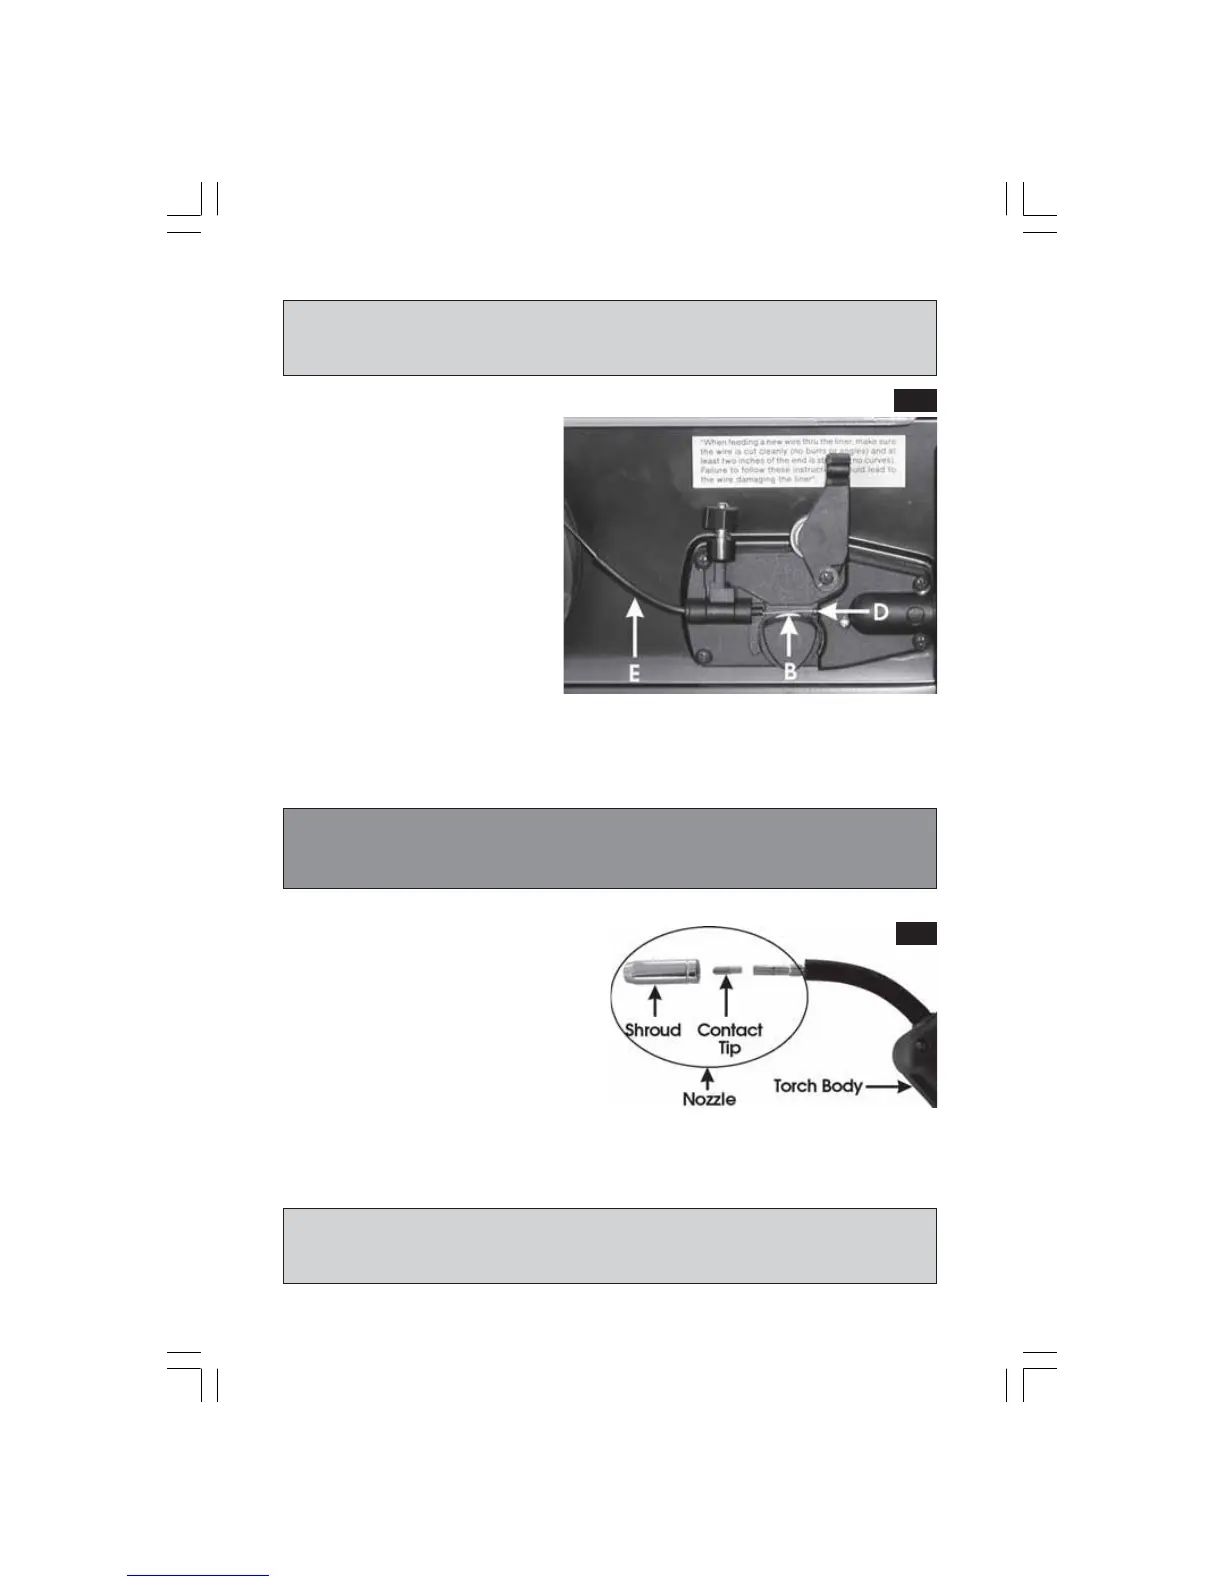
Proceed to feed it through
the guide tube (E), over the
groove on the roller (B), and
into the wire liner (D), by
about 10 - 15 cm.
Fig.5
3. Re: Fig.5
5. (Ref. Fig 6)
Unscrew and pull off the torch
shroud by twisting it anti clockwise,
then unscrew the contact tip.
6. Close the side panel of the machine,
plug into a 230V, 50HZ outlet (or
switch on isolator), switch on the
machine and press the trigger.
The wire will feed through the hose and when it appears at the torch end,
release the trigger, switch off the machine and disconnect the machine from
the mains supply. Replace the contact tip and the torch shroud.
IMPORTANT:
Ensure the hose is kept straight during this operation, to assist the wire as it
is fed through to the wire liner and contact tip.
Fig6
4. Reposition the pressure roller bracket (C, FIG.4) and plastic knob (A, Fig.4) and
tighten slightly.
CAUTION:
Tightening the knob (A) too tightly will crush the wire and damage the
wire feed