A-12 / ENGLISH
A-12 - FORM NO. 56041660 - Clean Track
®
16, 18
EN
AUTHORIZED PERSONNEL MAINTENANCE
SOLUTION PUMP REMOVAL
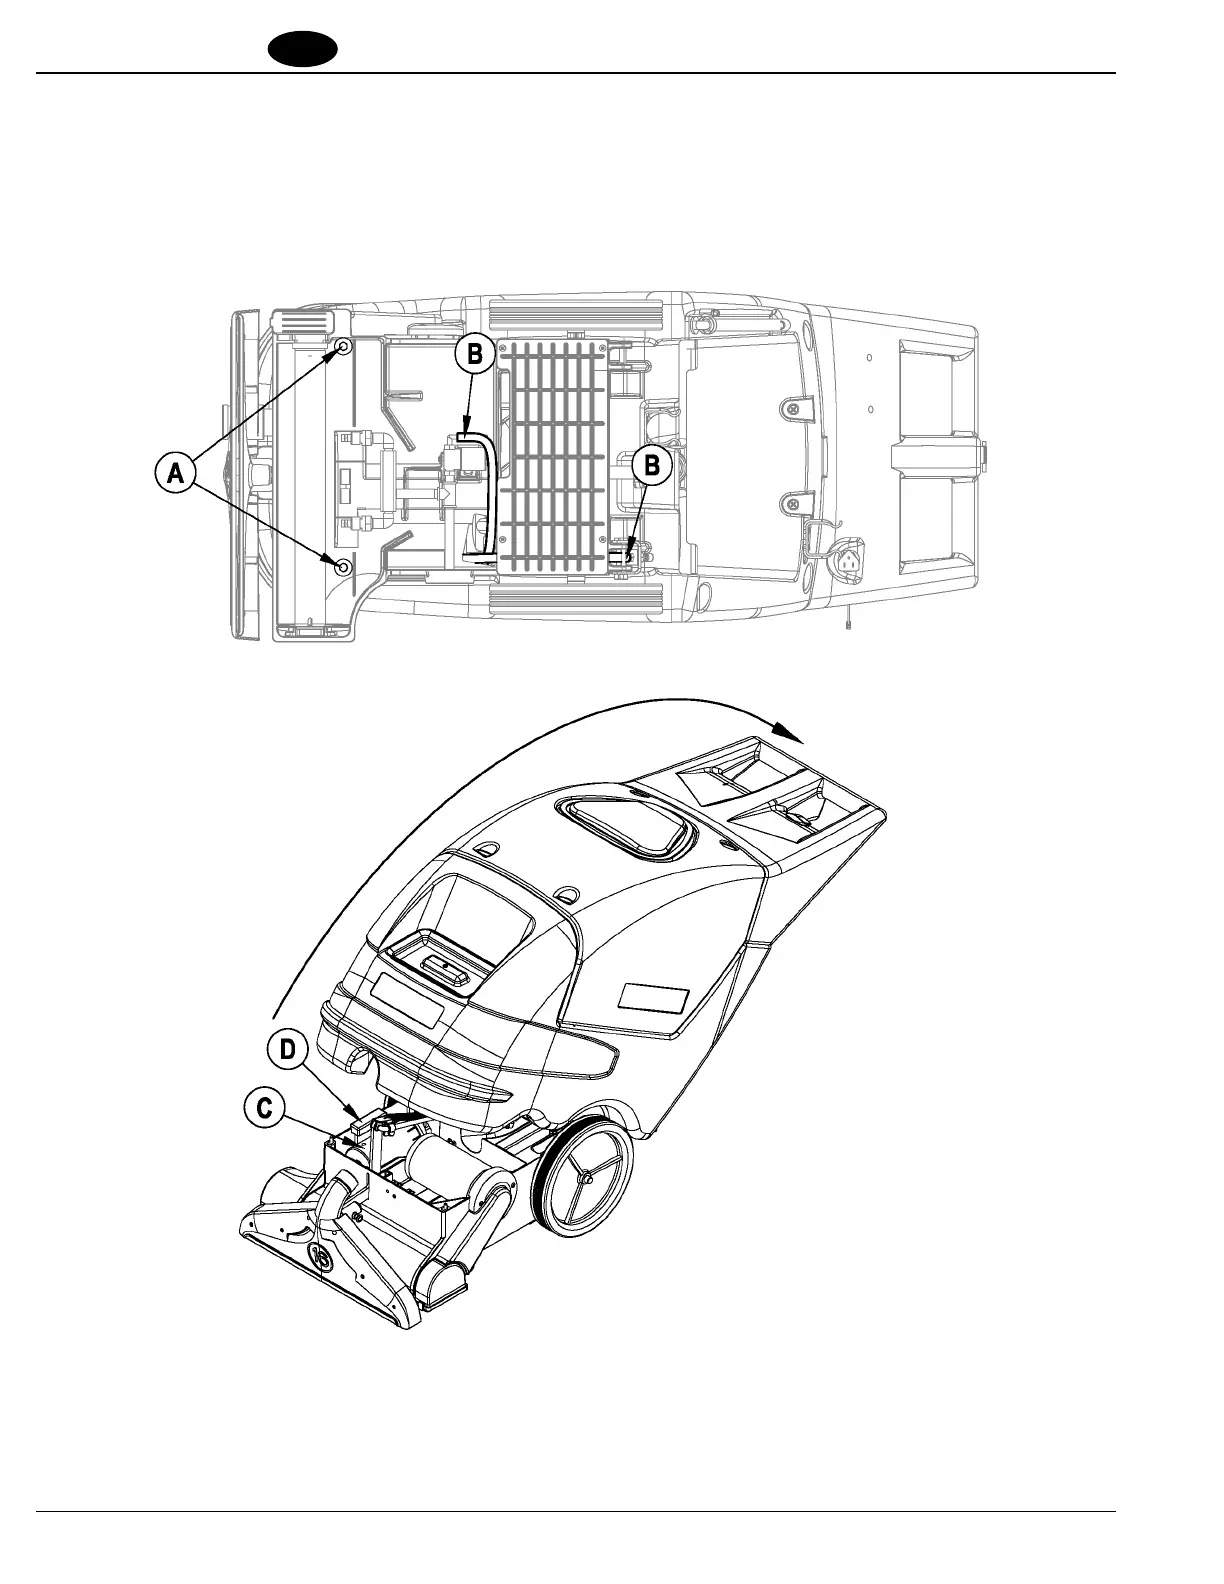
1 Drain the recovery and solution tanks and tip the machine over onto its side.
2 See Figure 8. Remove the (2) (A) Screws and disconnect both bottom solution hoses (B) from the Solution Pump.
3 Tip the machine back upright, grab hold of the Operator’s Handle (1) and push down to tilt the entire recovery / solution tank assembly back.
BOTTOM VIEW OF MACHINE
4 Disconnect the top solution hose and the pump wiring connectors. The Pump (C) can now be lifted straight up and out of the base assembly.
NOTE: Make note of the orientation of the pump mounts (D) for reassembly. Make note of the connection locations of the wiring for
reassembly.
5 Follow the above steps in reverse order to install the pump.
FIGURE 8
revised 10/07
 Loading...