18
2. Mount the Cutting Tool
Select a cutting tool that will produce the desired cut and mount it in the Tool
Rest, with as little overhang as possible, securing it using three hex socket head
screws. (Ideally, the overhang should be approx. 10 mm but not more than
15mm for a straight tool).
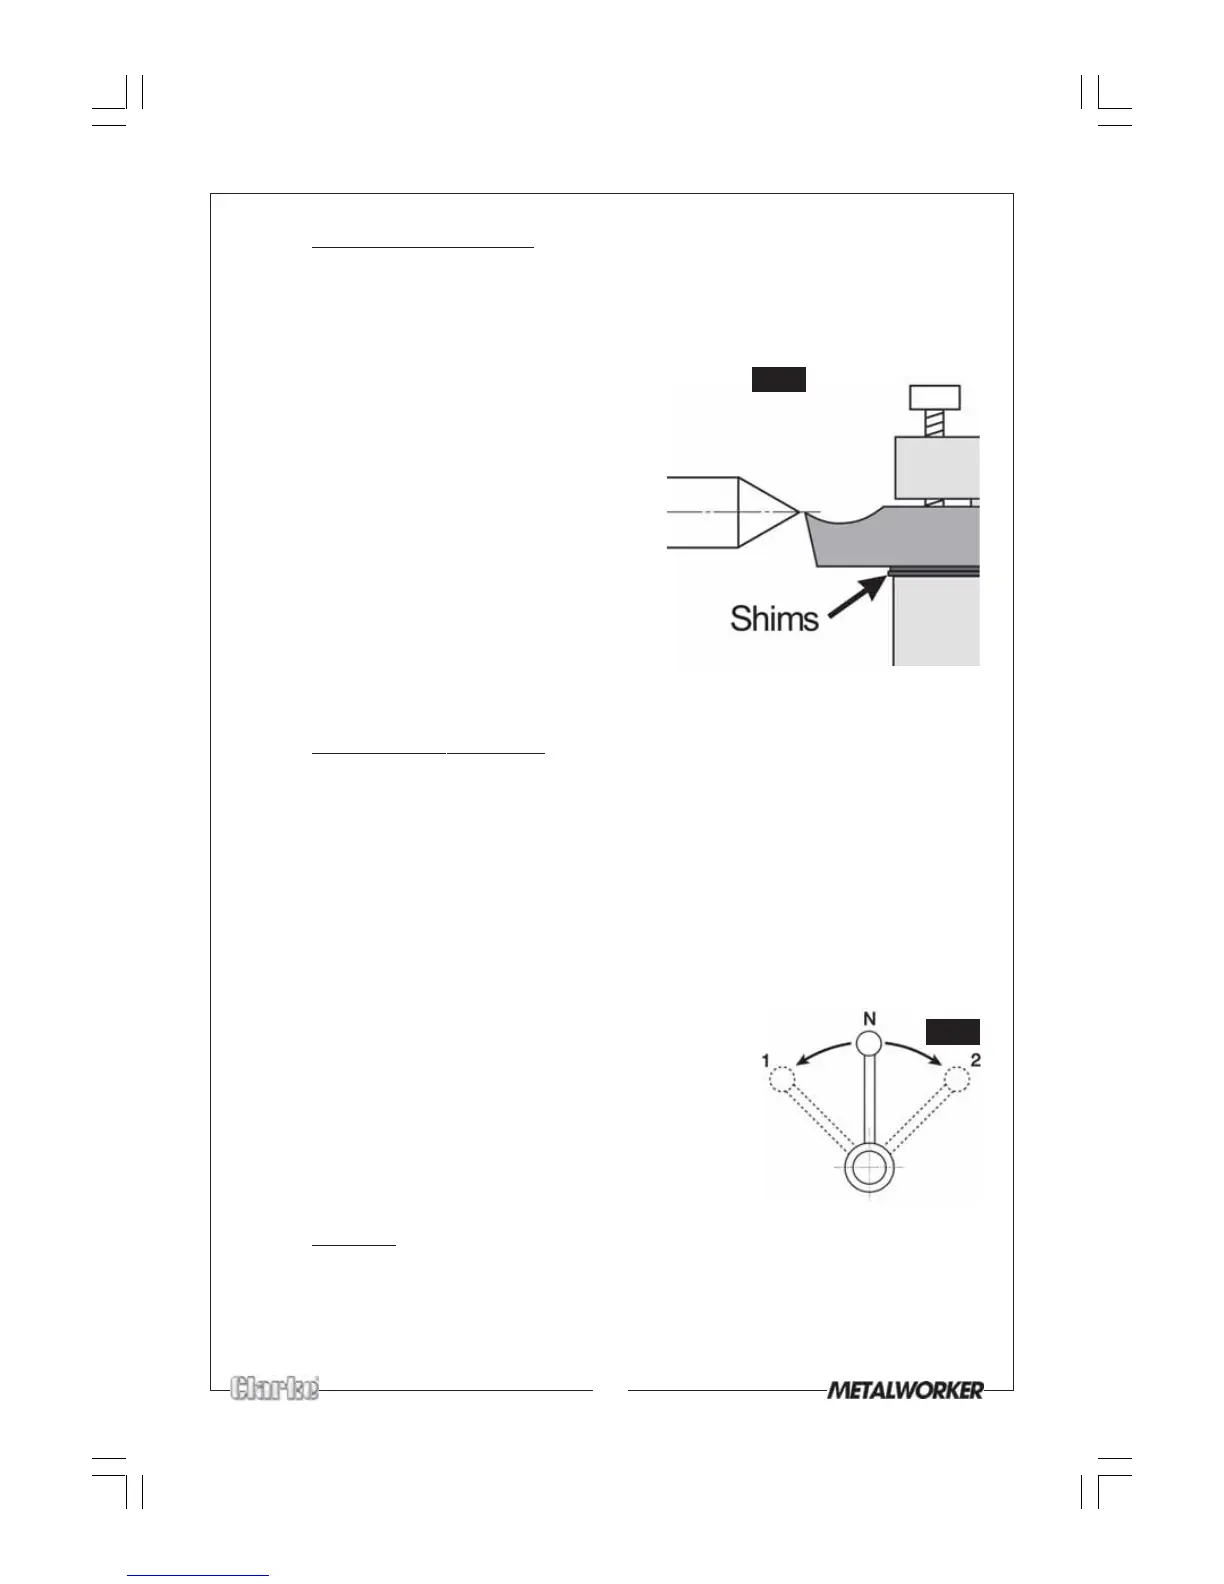
It is IMPORTANT to ensure that the tip of the
cutting tool is on the centre line of the work,
or very slightly below it. On no account
should it be above the centre line. Where
necessary shims should be used beneath the
tool in order to achieve the correct height,
or, if the tip is too high, the only recourse is to
select another tool or grind down the tip.
To check to ensure the tip is at the correct
height, position the tool so that the tip is
almost touching the point of the tailstock
centre, see Fig.15. They should coincide. If
necessary make adjustments using shims,
grind down the cutting tool tip or select
another tool.
3. Mount the Workpiece
Mount the work either in the chuck or on a faceplate, and if necessary, use the
tailstock centre for additional support (If the work cannot be adequately
secured by the chuck, or if it is a long piece, or of small diameter).
Additionally, ‘Steadies’ may be used which are shown in ‘Accessories’.
If the Tailstock is not to be used, you may remove it completely by turning the
locking lever at its base, and sliding it free of the bed. Take care to retain the
Jib Strip which will fall away when the Tailstock is lifted free.
The setup is now complete to begin your cutting operation, but before starting,
check the position of:
Fig.17
a. Saddle Auto Feed lever (29 Fig.13). Ensure it is
in the 3 o’clock position for manual feed.
b. The 2-Speed lever (30 Fig.13) is in the upright -
neutral position, unless auto feed is to be used.
If this is the case, select the appropriate
speed/feed rate.
2-Speed Lever
4. Starting
Plug the machine into the mains ensuring nothing can possibly interfere with
the workpiece or chuck, and that the Forward/Reverse button, beneath the
Yellow cover on the Switch Box, is switched to Forward
Switch the machine ON by pressing the GREEN button Marked ‘I’.
Fig.18