19
PREPARATION FOR USE
A.Electrical Connections
1. NO-GAS WELDING (EN Models ONLY)
IMPORTANT: ENSURE THE ELECTRICAL CONNECTIONS WITHIN THE WELDERS SIDE
COMPARTMENT ARE CORRECTLY CONNECTED...as follows:
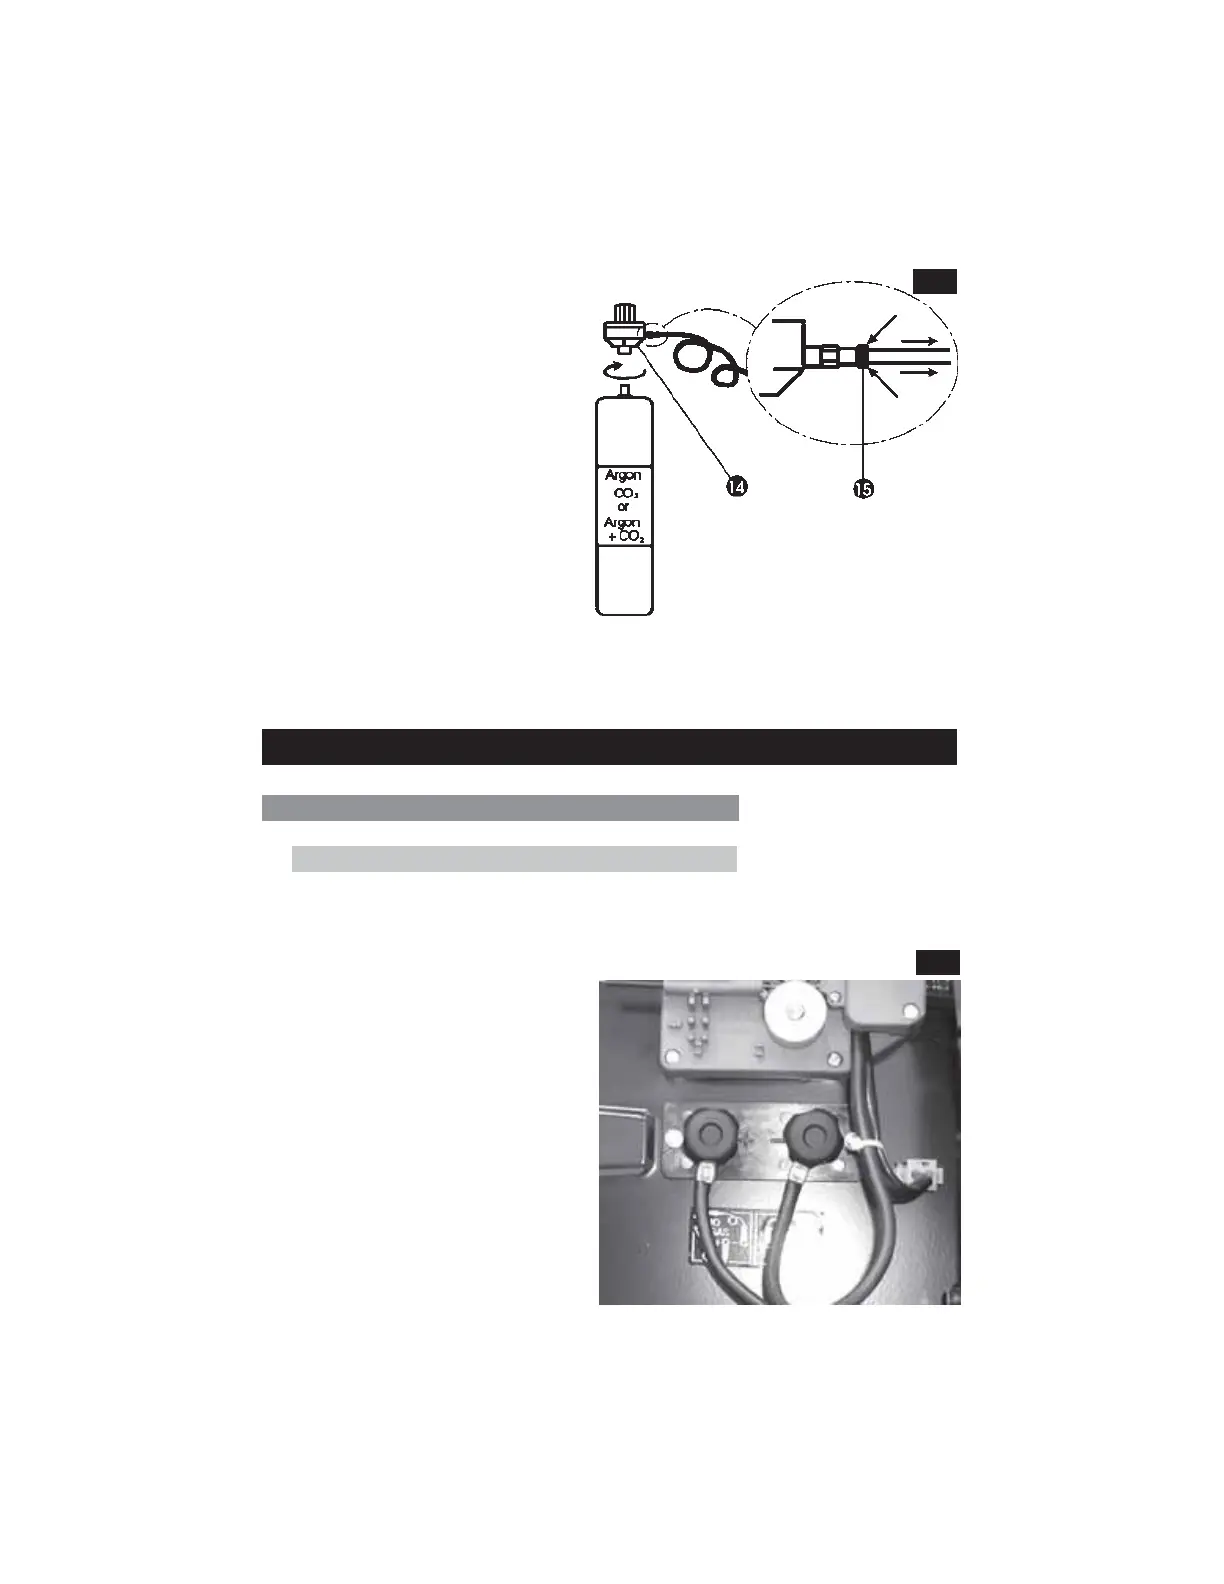
Attach the mini gas bottle to the
machine as described in ‘Assembly’
on page 15, then connect up as
follows: (Ref. Fig. 5)
1. Remove the protective cap
from the cylinder outlet and
screw on the regulator (14),
fully, BUT DO NOT OVERTIGHTEN.
2. Simply push the gas hose, at the
rear of the machine, into the
gas regulator outlet, as far as
possible and release. This is a self
sealing coupling.
To remove the hose, hold back the
ring (15) then pull the hose out.
All components are now correctly
Fig.5
attached, and the welder may now be prepared for operation, as follows:
TORCH to the NEGATIVE (-ve) terminal,
EARTH cable to the POSITIVE (+ve)
terminal.
The terminals within the side
compartment are shown in Fig. 6
Fig.6