BRUSH CLEANING
NOTE
It is advisable to wear protective gloves when cleaning the brush because there may be sharp debris.
Remove the brush, as shown in Brush/pad holder installation/removal procedure.1.
Clean the brush with water and detergent.2.
Check the brush bristles for integrity and wear; if necessary, replace the brush.3.
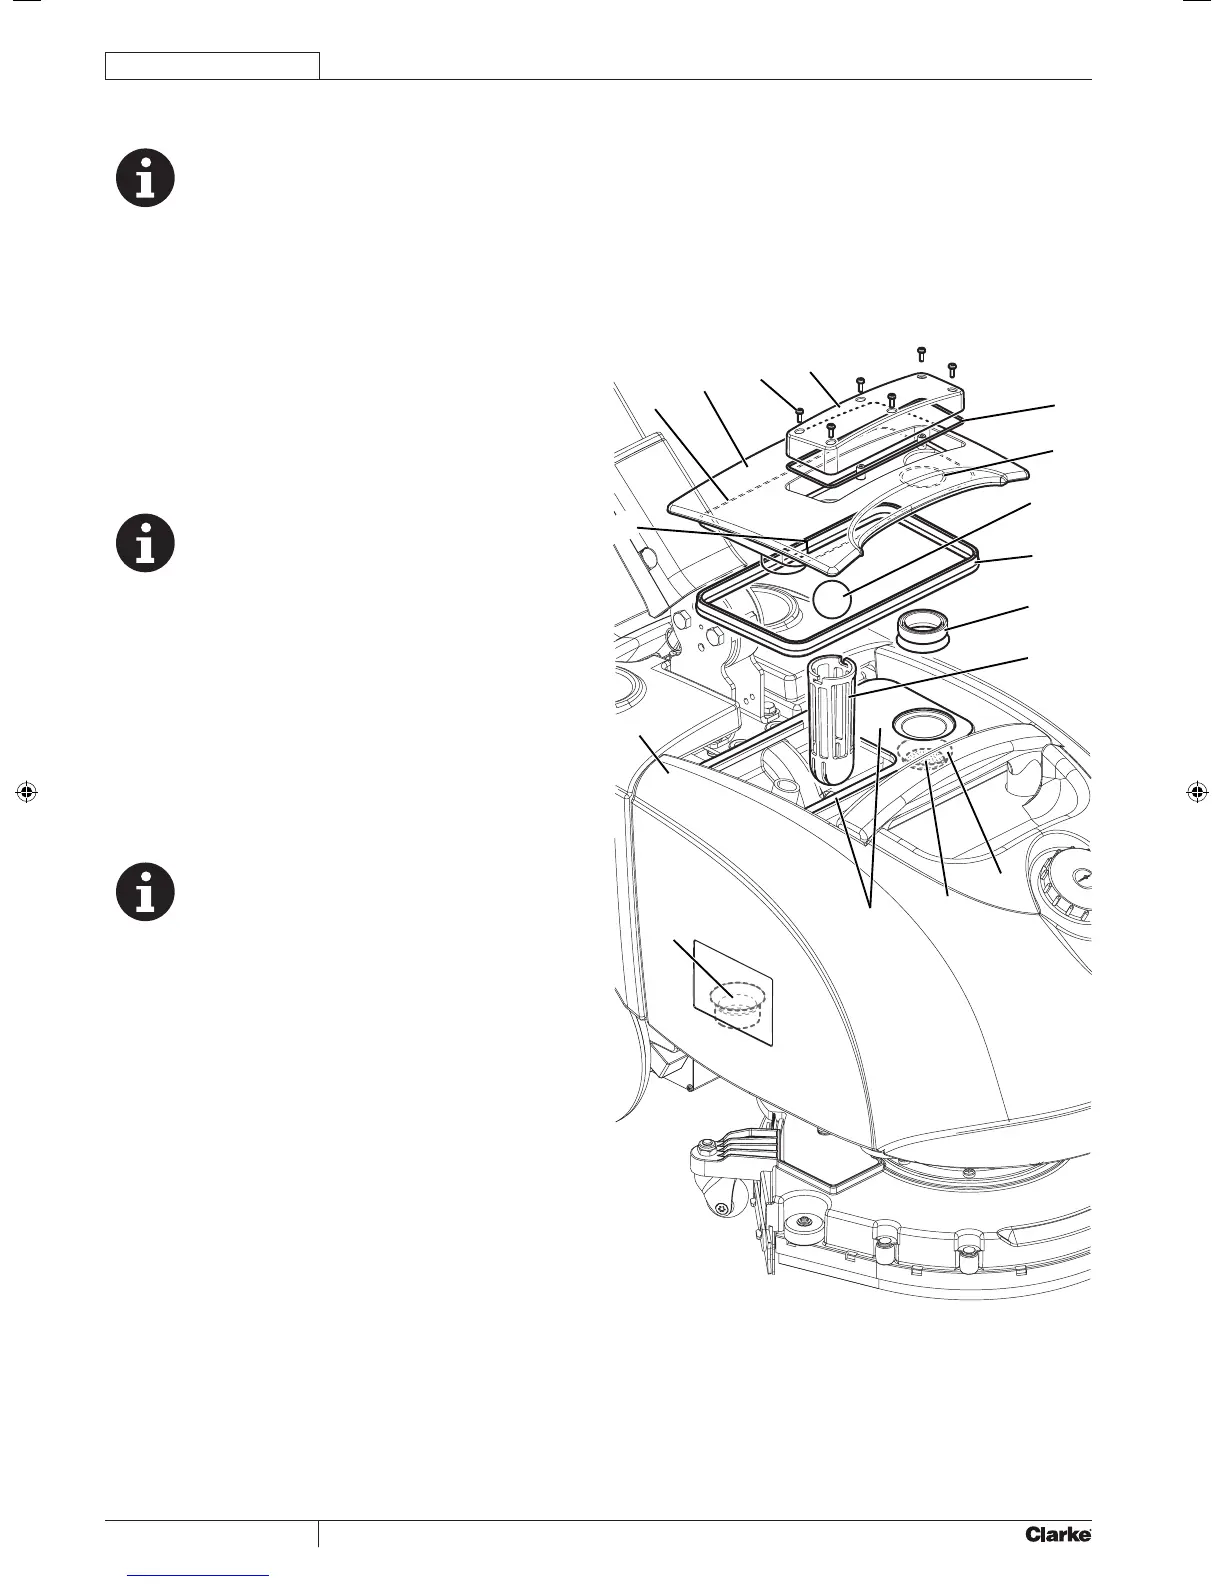
TANK, COVER AND VACUUM GRID CLEANING
Drive the machine to the appointed disposal area.1.
Turn the knob (32) to “0” and disconnect the battery (7).2.
Lift the cover (A, Fig. 5), then clean and wash the cover 3.
and the vacuum grid (B) with clean water. Drain the water
from the tanks (C) and clean them.
If necessary, disengage the grid (B) by turning it and 4.
remove the oat (D), than clean with care and reinstall.
Check the gaskets (E) and (F) for integrity.5.
NOTE
The gaskets (E) and (F) create vacuum in the tank
that is necessary for vacuuming the recovery water.
If necessary replace the gaskets by removing them from
their housings (G) on the cover (A). When assembling the
new gasket (E), install the joint (H) in the area shown in the
gure.
Check that the seating surface (I) of the gaskets (E) and 6.
(F) is clean and adequate for the gasket themselves.
If necessary, remove the screws (J), open the cover (K) and
check the gasket (L) for integrity, then clean with care and
reinstall.
Close the recovery tank cover (A).7.
VACUUM SYSTEM MOTOR FILTER AND
GASKET CLEANING
NOTE
The gaskets (M) and (O) create vacuum in the
system that is necessary for vacuuming the recovery
water.
Drive the machine on a level oor.1.
Turn the knob (32) to “0” and disconnect the battery (7).2.
Lift the tank assembly (C) and check the vacuum system 3.
motor gasket (M) for integrity.
If necessary replace the gasket by removing it from its
housing.
Check that the pre-lter (N) is clean. If necessary clean it 4.
with water and compressed air, then use reinstall it.
Check the gasket (O) for integrity. If necessary replace the 5.
gasket by removing it from its housing.
Clean with care and reinstall.6.
 Loading...