40
Section 3 - Routine Maintenance
NOTE: If there is a leak in the system or if the
outdoor furnace loses water from boiling
frequently, the problem should be identied and
repaired immediately. Under normal operation,
little or no water needs to be added. Adding
water to the furnace may cause corrosion if not
immediately treated with Corrosion Inhibitor
Plus™ to the proper pH and nitrite levels. In
addition, the amount of dissolved solids in the
system (due to adding additional water) can
cause problems.
After the initial three months of operation and every
six months thereafter, the pH and nitrite levels of the
system water should be tested. These levels should be
maintained as previously stated.
POST HEATING SEASON MAINTENANCE
The water should be left in the outdoor furnace if the
outdoor furnace is not being used for an extended period
of time. Check pH and nitrite levels as described in the
Water Quality and Maintenance section.
1. At the end of the heating season, clean all the ashes
out of the outdoor furnace. Scrape the walls and
oor of the rebox taking special care to clean at the
ash line and below, especially in the corners.
2. Check behind the bafe and in the chimney ue.
Clean out any excessive buildup. Any large or dry
crusty deposits on the walls, bafe or heat exchanger
area should be removed. A thin, tar-like coating
of creosote above the ash line does not need to be
scraped clean as it works like a protective coating
on the metal. When cleaning the rebox, be sure to
wear the appropriate personal protective gear.
3. When the furnace is clean, carefully inspect the
rebox for any signs of excessive corrosion or
deterioration. If any corrosion or deterioration is
found, call your dealer. It is always better to do
maintenance during the non-heating season.
4. After the inspection is completed, apply a thin coat
of new motor oil to the rebox being sure to work oil
into all corners.
5. Place a cover over the chimney to keep rain from
entering the outdoor furnace. Clean and oil the
chimney ue (and on 4030 models only, the chimney
restrictor) to the rebox.
Flushing the System
If the system water is brown or orange, it is an indication
the Corrosion Inhibitor Plus™ level has not been
maintained and corrosion is present in the water jacket.
The water jacket should be thoroughly ushed and the
system relled with the proper amount of Corrosion
Inhibitor Plus added. Be sure to test the system water to
veriy the proper amount of Corrosion Inhibitor Plus.
1. De-energize the pumps and close the supply and
return valves on the outdoor furnace. Remove the
inspection panel and insulation covering the drain
to gain access to the drain. Remove the cap and
connect a hose to the drain.
NOTE: Refer to General Installation Information
for information on draining treated system water.
2. Open the drain to drain the system; then ush the top
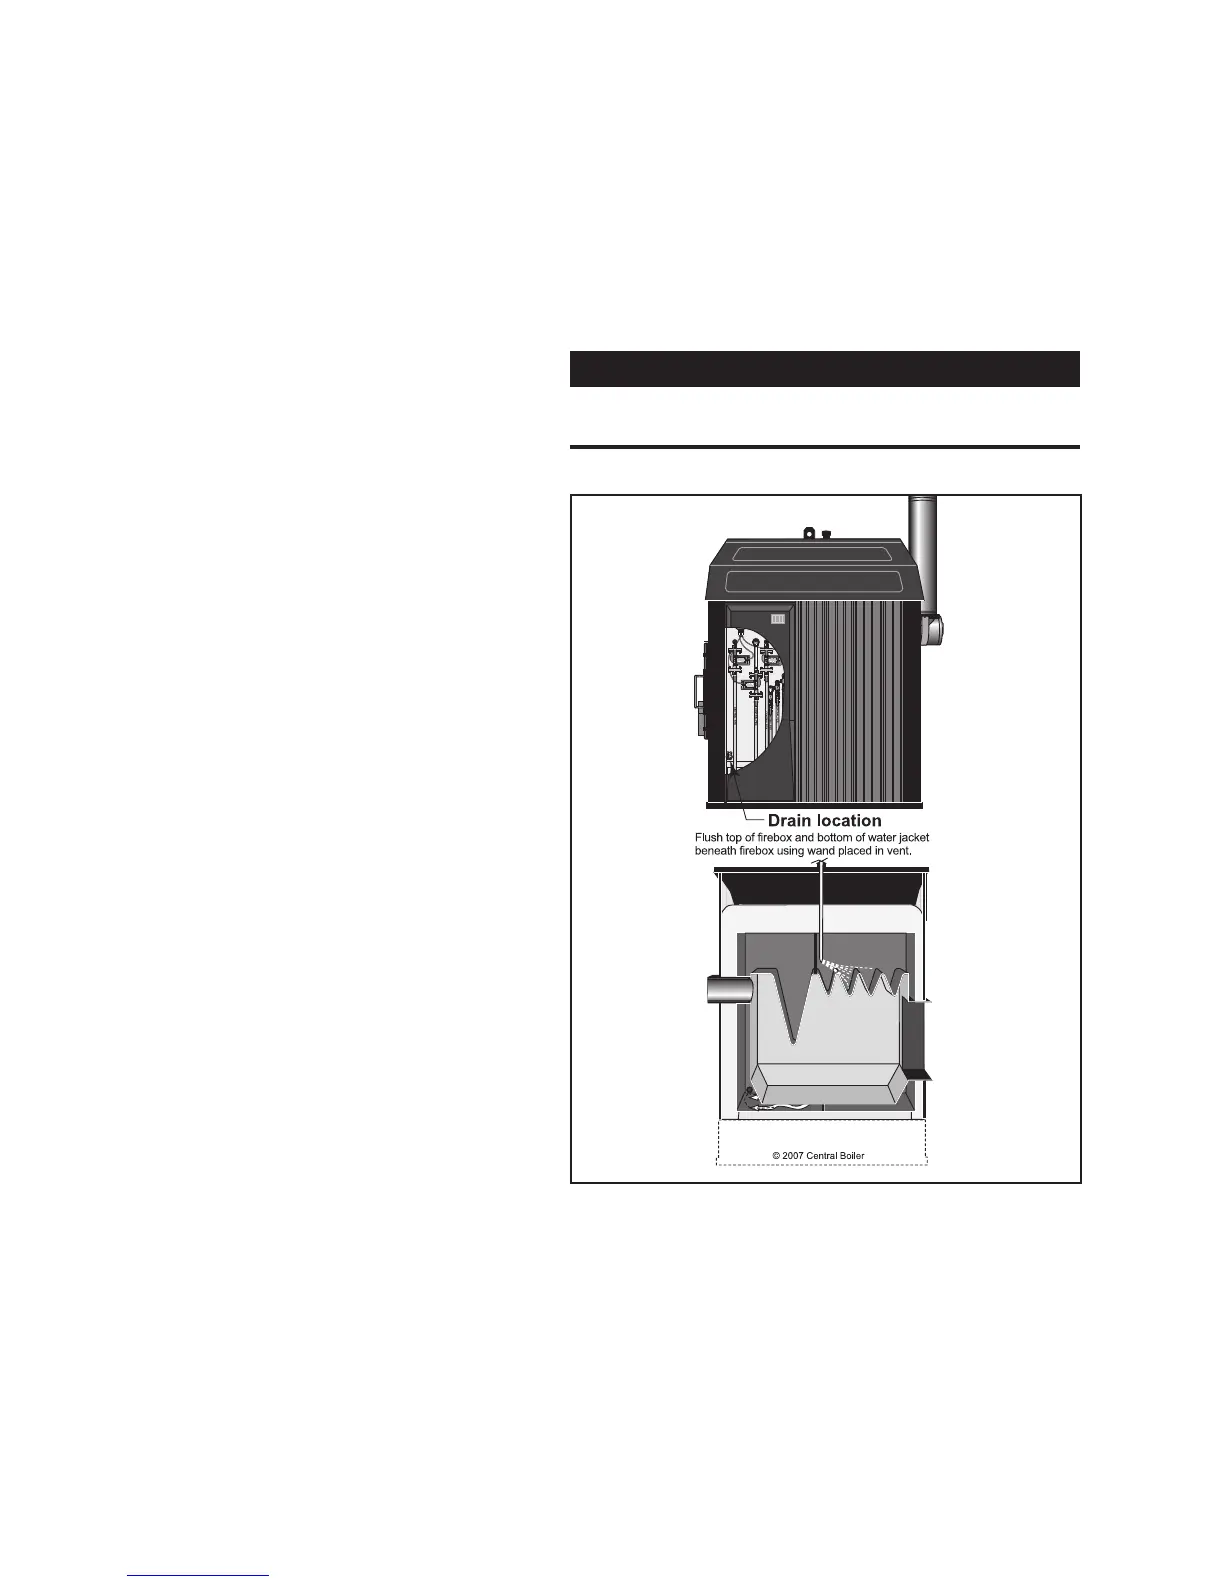
of the rebox and bottom of the water jacket beneath
the rebox using a wand placed in the vent (Fig. 45).
CAUTION
Completely clean out the rebox before draining
water from the outdoor furnace.
Fig. 45
3. Close the drain valve securely and replace the cap
on the drain after ushing the outdoor furnace.
4. Fill the furnace following the procedure in Water
Quality and Maintenance making sure to operate the
pump(s) to thoroughly mix the Corrosion Inhibitor
Plus™.
5. Insulate the area using either canned urethane foam
insulation or a mat of berglass insulation.
6. Install the inspection panel and secure with self-
tapping screws.