CleanSpace Respirators USER INSTRUCTIONS
22
3. Place the Power Unit in Standby Mode. Press and release the Flow Test button.
4. The CleanSpace Respirator runs the Flow Test automatically. The Power Unit will operate and air will be discharged from
the Flow Test Cap.
5. After completion of the Flow Rate Test, the Battery Indicator Lights illuminate to display the result.
Refer to the table below.
PASS - Excellent (Flow >180 l/min)
FAIL - (Flow <120 l/min)
Do not use the CleanSpace Respirator until a new filter has been fitted and / or battery charged and
the Flow Test has been repeated with a PASS result.
Reset the CleanSpace respirator by pressing the Power Button. Fully charge the battery and / or replace
the filter. Repeat the flow test. If the CleanSpace respirator continues to FAIL the Flow Test, with a new
filter fitted and battery, do not use until it has been evaluated. Contact CleanSpace Technology.
6. Remove the yellow Flow Test Cap and store for later use.
STEP 4 - DON THE CLEANSPACE RESPIRATOR WITH FULL FACE MASK
NOTE: Please this step in its entirety prior to donning the CleanSpace Respirator.
Collect the Power Unit and mask. Ensure the mask is the correct size.
(A neck support is optional with the Full Face Mask and does not affect operation or function of the CleanSpace Respirator)
Familiarise yourself with the Adjust Buttons and the Mask
Release Buttons.
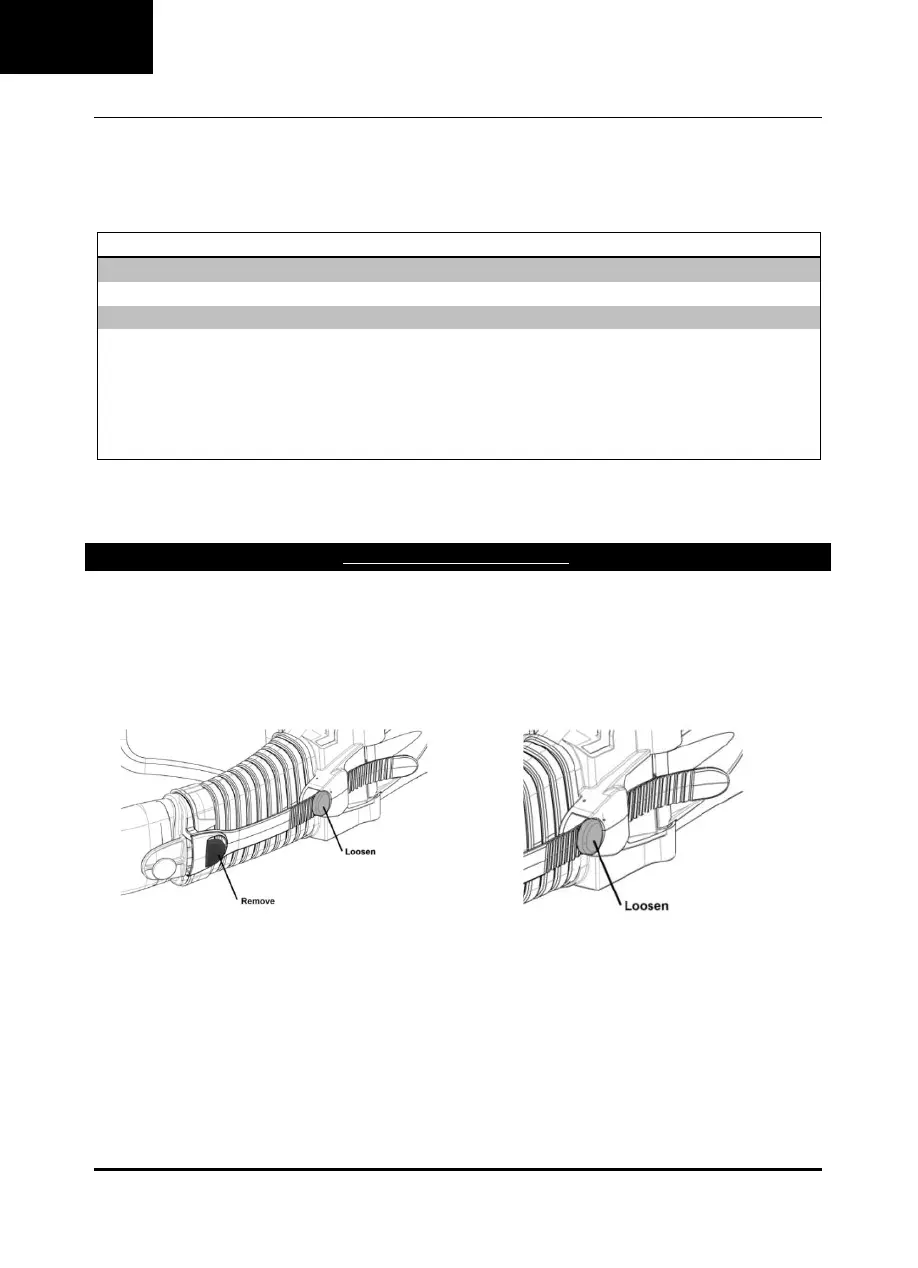
Extend both bellows to their longest setting.
Mask Release Button and Adjust Button
Press the Adjust Button on the Power Unit and pull on the
bellows to extend them
It is recommended that long hair be tied back to ensure it does not interfere with the seal between mask and face.
Don the Full Face Mask