Clear-Com Intercom Systems
5
Audible Call Signal-Function #6
Enables an audible call signal (alternating pitch for 2 seconds) to sound in the headset. The tone’s level is preset.
(Volume may vary slightly, depending on headset.) Useful for unspoken cues where visual call signal is not practical
or effective.
Electret Mic-Function #7
Selects Hi or Lo Gain for headset mic. Lo gain in useful in high noise environments.
Function Lockout #L
Once selected, all onboard function selections are no longer editable. You can access the functions, but cannot
switch them. To gain access to the functions again, you must restore the factory default settings or access them
through a PC with the software. Modes are still selectable.
Factory Default Setting Restore
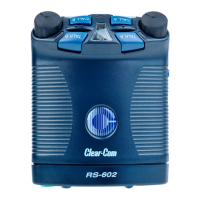
To restore the factory default setting for the beltpack, enter the Setup mode as before. Once the LED displays “P”,
press the CALL button. The display will change from “1’ to “2”. While still pressing the Call button, press the Program
button again. The LED will then display “F” . The LED will then turn off and normal operation is resumed.
6. General Usage Notes
Cabling choices can have a large impact on the performance of your intercom system (for more details, consult the
Party Line System Installation Manual). Length, gauge, shield quality and routing choices must all be considered. For
two pair cable, crosstalk performance is affected both by length and DC resistance of the shield (the lower the better).
Crosstalk can also be affected by the quality of the headset cable, particularly in large systems.
The headphone amp can accommodate impedances from 50 to 2000 Ohms. The mic preamp can accommodate
impedances from 50 to 1000 Ohms. The output level is more critical to optimal performance than the impedance.
Higher impedances may require more mic gain, thereby raising the noise floor.
6.1. Maintenance
Beltclip
In some applications it may be desirable to mount or wear the beltpack “upside down” or “sideways”. This can be
accomplished by rotating the beltclip:
Remove the help menu label and then 2 retaining screws and rotate the beltclip 90
o
or 180
o
as desired. Replace the
screws (the label will not be reusable and must be replaced). Replacement help menu labels can be ordered from
your distributor or the factory.
Use the same procedure for replacing a broken or damaged beltclip.
Cleaning
To clean the surface of your beltpack, use a damp cloth and mild soap. Remove all soap residue and excess moisture
before returning to service.
7. Trouble Shooting
Problem: Low Audio Level
Cause: Multiple terminations on the line
Solution: If connected to more than one main station or power supplies check to insure that there is only on
termination per channel.
Cause: Excessive capacitance and/or resistance due to cable length and/or gauge.
Problem: Call Light stays on
Cause: DC current present on the audio line
Solution: Check cabling for shorts or crossed wired; make sure there is a termination on the channel.

 Loading...

