EasyManua.ls Logo

Clevo W370ST - Removing and Installing the Processor

Clevo W370ST
108 pages
To Next Page IconTo Next Page
To Previous Page IconTo Previous Page
Loading...
Disassembly
Removing and Installing the Processor 2 - 11
2.Disassembly
Removing and Installing the Processor
Processor Removal Procedure
1. Turn off the computer, and turn it over, remove the battery (page 2 - 5), and component bay cover (page 2 - 10).
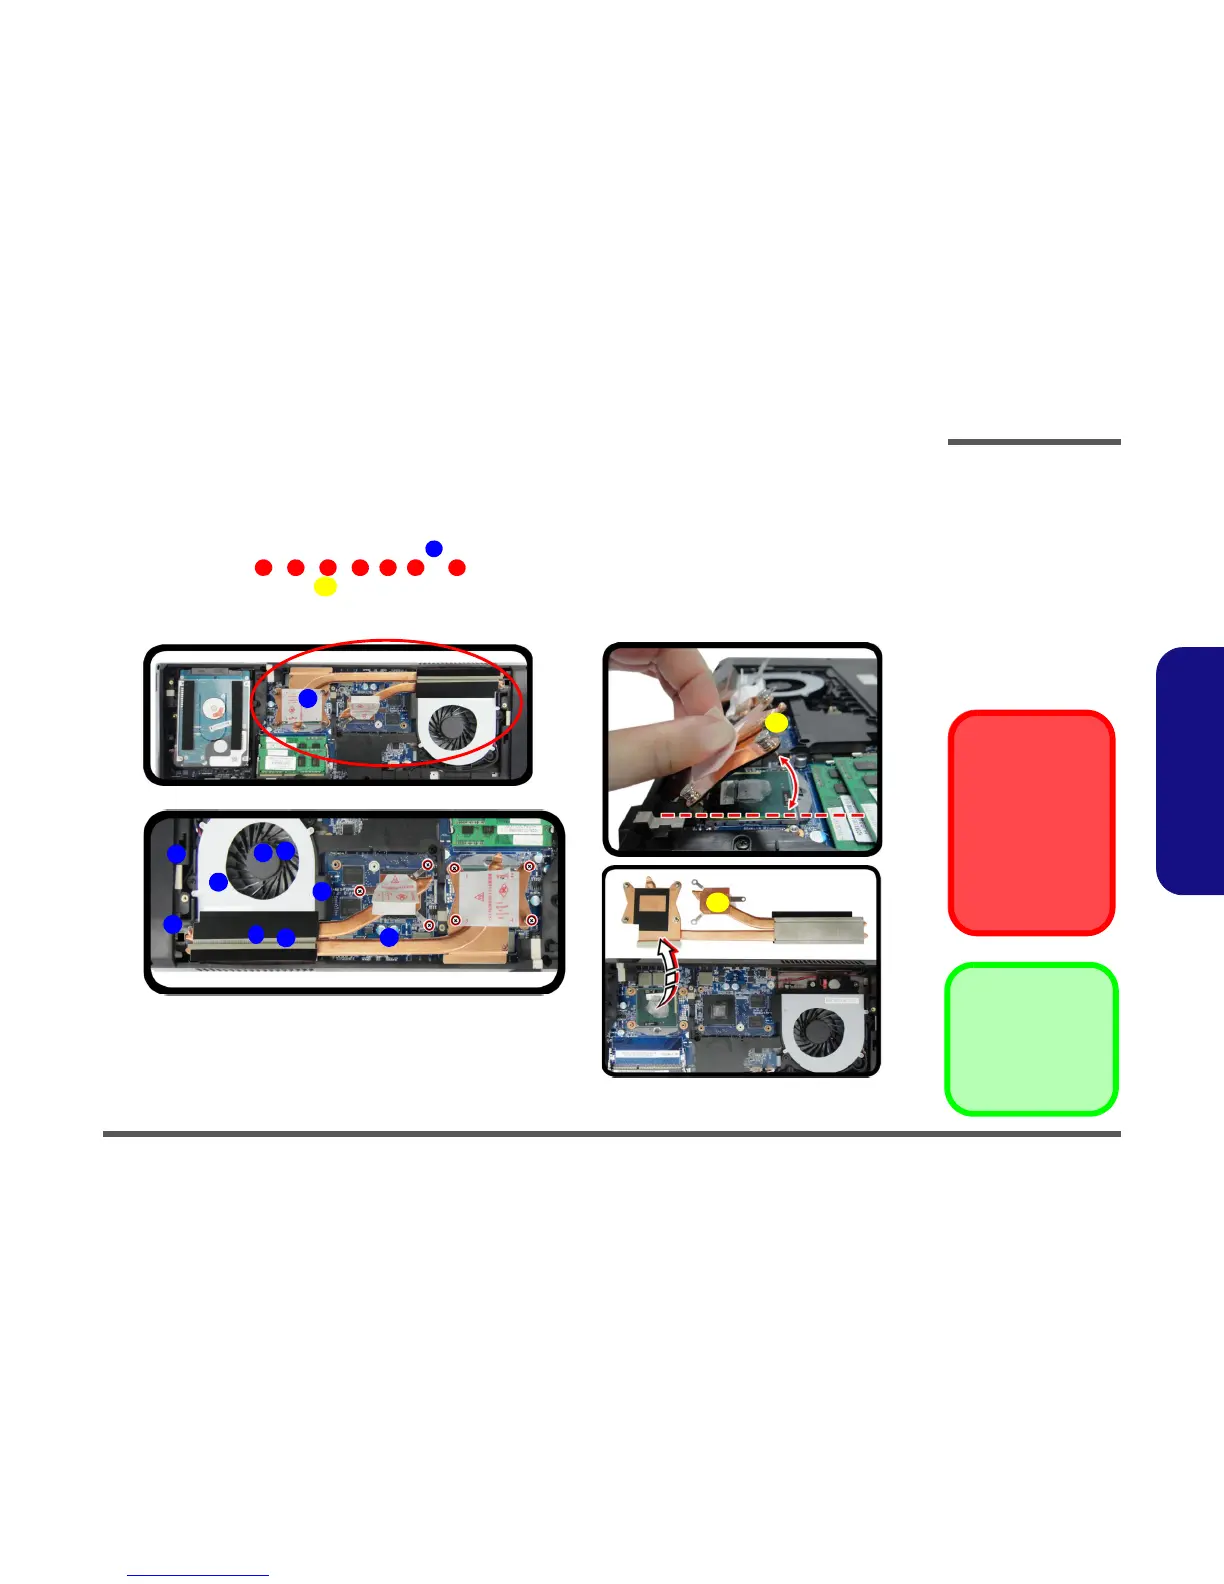
2. The CPU heat sink will be visible at point on the mainboard
(Figure 7a).
3. Remove screws
, , , , , & , the reverse order indicated on the label (Figure 7b).
4. Carefully lift the heat sink
up straight (do not angle it as you lift it) about a centimeter in order to clear the fan
unit, and then angle it around 45° to remove it from the computer
(Figure 7c).
Caution
The heat sink, and
CPU area in general,
contains parts which
are subject to high
temperatures. Allow
the area time to cool
before removing these
parts.
Figure 7
Processor Removal
a. Locate the heat sink.
b. Remove the screws.
c. Grip the heat sink tab and
carefully lift the heat sink
up and off the computer.
A
7
6
5
4
3
2
1
9
9. CPU Heat Sink
•7 Screws
c.
a.
A
8
45°
b.
2
1
3
4
6
5
7
8
9
9

Table of Contents

Related product manuals