"Zero z", and finally click "Send".
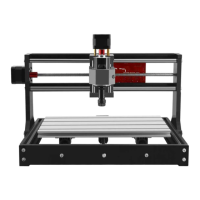
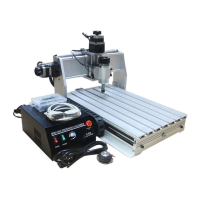
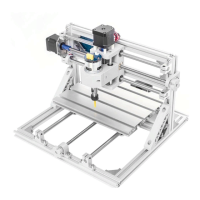
Getting Started
After the machine is assembled, you can perform basic machine tests. The following is the recommended
start up sequence for the system:
1.Confirm that the USB cable of the control board is plugged into your computer, and then start the computer.
2.Start the Candle software and verify in the status window that no errors are displayed. Under normal
circumstances, when the control board is connected to the software, it will display "Idle". If a red error
"alarm" appears, you need to click the "reset" of Candle with the mouse, and then click "unlock" to reach the
"idle" state.
3.Make sure that the 24V power supply is connected to the control board first, and then the other end is
connected to 110V-220V. Press the white "on/off" button on the control panel.
4.Next, click the "Spindle" button to turn on the spindle motor. Move the slider left and right to verify
whether the motor speed changes.
5.Adjust the value of "Feed" to the range of 200 to 500. Use the mouse to click the direction button on the
left to confirm whether the X axis and Y axis are moving. In a similar manner, click the up and down buttons
on the far right to verify that the Z axis moves normally. If there is no problem with all these tests, it means
that your engraving machine can work normally. Shut down the machine using the reverse start process.
6.Close the control panel.
7.Unplug the 24V DC power supply from the power supply.
8.Close the Candle program and turn off the computer. Remember, if you run the machine offline, the USB
cable must be disconnected from the control board.