13
ENGLISH
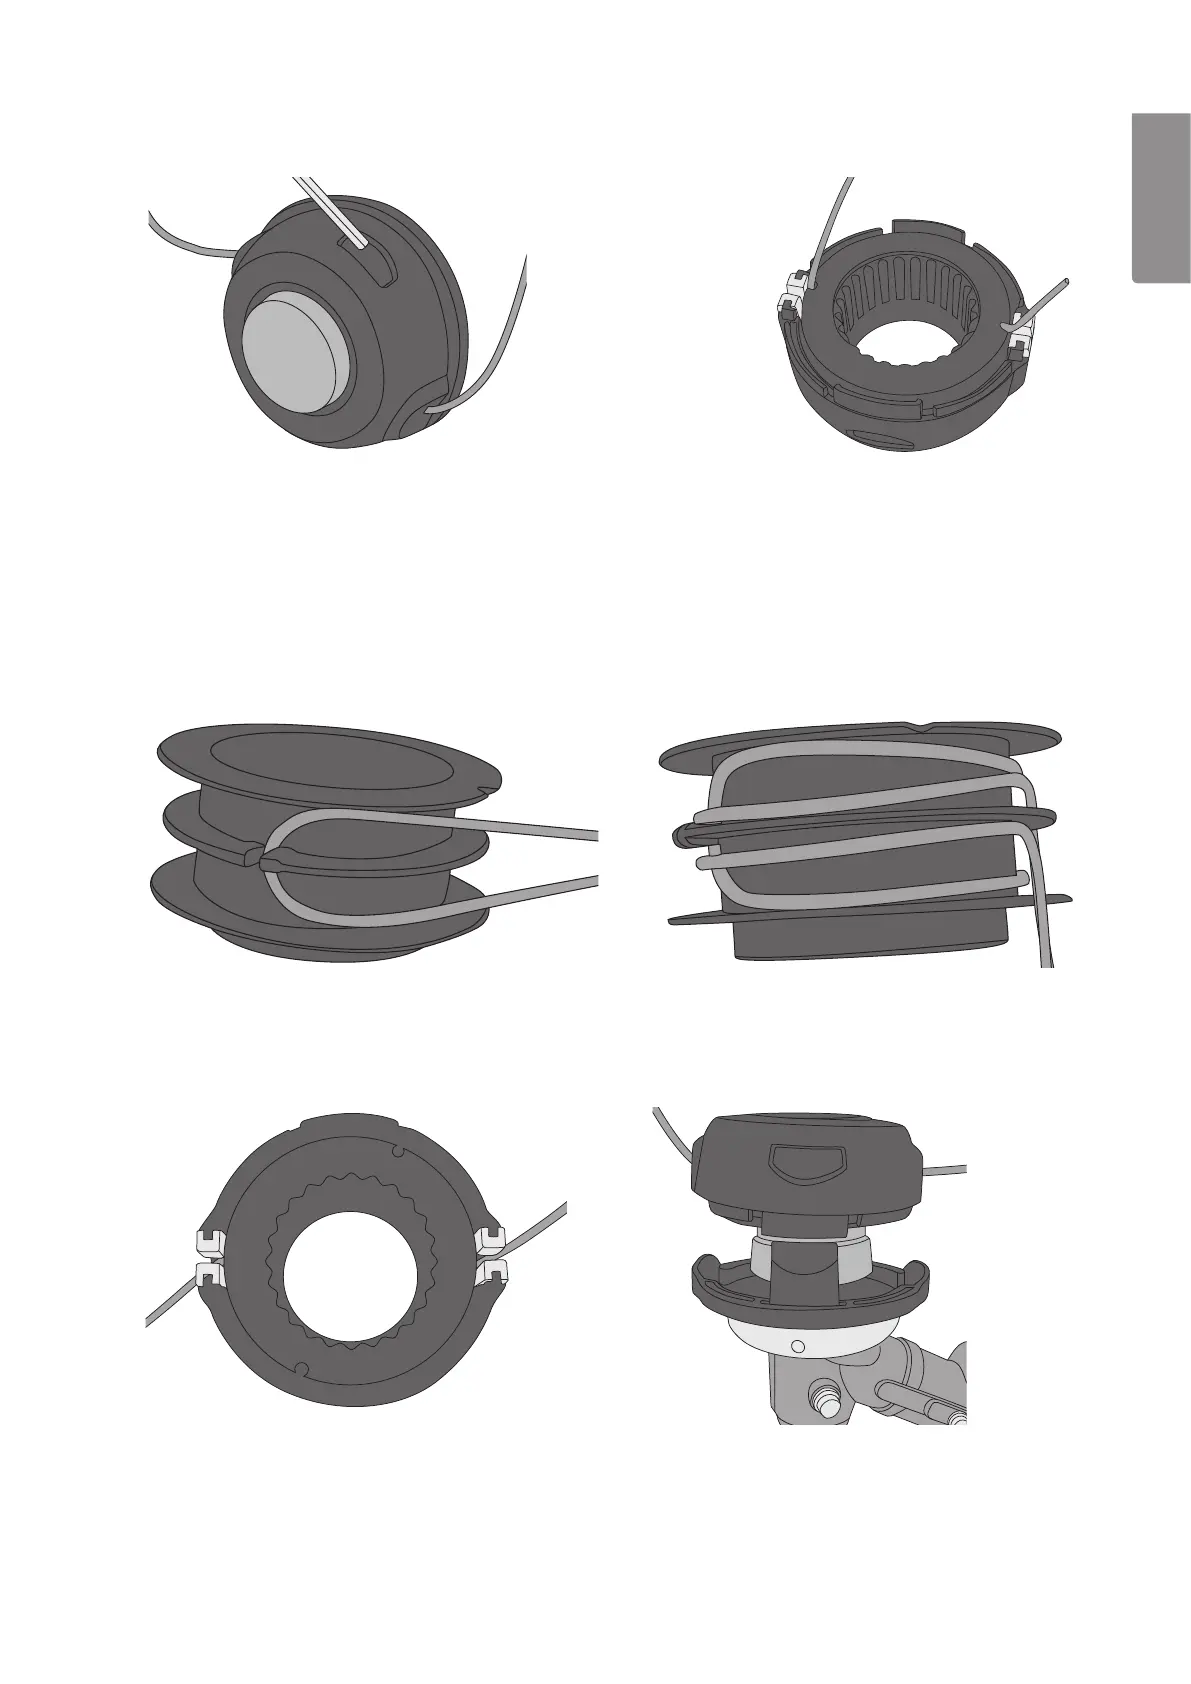
Changing the trimmer line
1. Press in one of the snap-locks holding the trimmer head together
with a suitable implement and pull one side of thecover out of
the trimmer head. Pull the cover far enough out that it will not slip
back in and lock onto the trimmer head again. Press in the snap-
lock on the other side of the trimmer head and remove the cover.
2. Lift up theends of any remaining
line and guide them into
thenotches on thespool.
3. Pull thespool out of thecover.
4. Remove any remaining line from thespool.
5. Begin by hooking themiddle of thenew line into
thenotch in thecentre of thespool. Makesure
that themiddle of thenew line is notched in.
7. Fit thespool back into thecover and guide
theends of theline through theslots in theside
of thecover.
6. Wind the trimmer line around the spool and slot
it into the notches when you are finished.
8. Press in the snap-lock tabs a little and fit the
spool back onto the trimmer head. Ensure that
the two snap-locks hold the cover on securely.